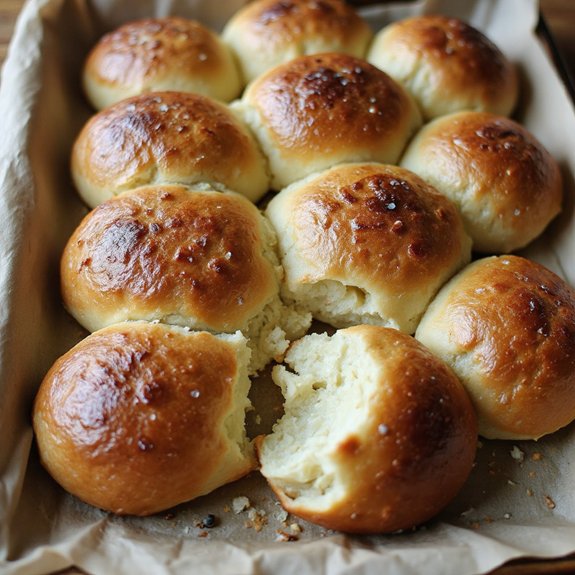
There’s something about tearing into a warm, golden sourdough bun that makes the whole table go quiet for a moment.
Picture a basket of soft dinner rolls, their crusts just kissed with brown, steam curling up as you pull one apart and reveal a tender, airy crumb with that gentle tang only sourdough can give.
These rolls are perfect alongside a hearty stew, a Sunday roast, or even a simple salad-and-soup dinner—and they’re surprisingly low-effort once your dough is mixed, thanks to slow rising and flexible timing.
They’re ideal for families, sourdough beginners, and anyone who loves easy entertaining.
I still remember a chilly Sunday when unexpected guests dropped by; a pot of soup was already on, and these buns turned an ordinary meal into a cozy, lingering supper.
They also shine for holiday spreads, potlucks, or make-ahead lunches. Ready to bring this basket of comfort to life?
Why You’ll Love It
- Delivers rich, buttery flavor with a subtle, tangy sourdough finish
- Produces ultra-soft, fluffy rolls with a tender, pull-apart crumb
- Relies on simple pantry ingredients and a mature sourdough starter
- Adapts easily to your schedule with room-temperature and cold-proof options
- Freezes beautifully for make-ahead holiday dinners and busy weeknights
Ingredients
- 150 g active sourdough starter — 100% hydration, recently peaked
- 260 g water — room temperature for easier mixing
- 40 g unsalted butter, melted and cooled — adds richness and softness
- 1 large egg — room temperature for better incorporation
- 30 g granulated sugar — balances tang and aids browning
- 9 g fine sea salt — enhances flavor and gluten strength
- 450 g bread flour — higher protein for better structure
- 15 g olive oil — for lightly greasing bowl and hands
- 1 large egg — for egg wash, beaten just before use
- 15 g milk — for egg wash, helps deep golden color
Step-by-Step Method
Mix the Starter and Liquids
Whisk the active sourdough starter and room-temperature water in a large mixing bowl. Dissolve the starter as much as possible.
Add the cooled melted butter, egg, and sugar. Whisk until the mixture looks smooth and uniform. Make certain no streaks of egg remain. This even mixture helps the dough ferment and rise consistently later.
Combine Dry Ingredients and Form Dough
Add the bread flour and fine sea salt directly to the wet mixture. Stir with a dough scraper or silicone spatula until a rough, shaggy dough forms.
Scrape down the sides of the bowl as you mix. Don’t worry about smoothness yet. Stop once no obvious dry patches of flour remain throughout the dough.
Rest the Dough (Autolyse)
Cover the bowl with a clean kitchen towel or plastic wrap. Let the dough rest for 20 to 30 minutes at room temperature.
Allow the flour to hydrate fully. This rest makes the dough easier to handle and strengthens gluten naturally. Avoid disturbing the dough during this time; just let it relax.
Strengthen with Stretch-and-Folds
Lightly oil your hands to prevent sticking. Perform several stretch-and-folds directly in the bowl.
Lift one side of the dough, stretch it up, and fold it over itself. Rotate the bowl and repeat all around, for about 2 to 3 minutes. Continue until the dough feels smoother, more elastic, and slightly tighter.
Bulk Ferment the Dough
Cover the bowl again and let the dough bulk ferment at room temperature for 4 to 6 hours.
During the first 2 hours, perform 2 to 3 sets of stretch-and-folds, spaced about 30 minutes apart. Watch for signs of growth and bubbles. By the end, the dough should increase by roughly 60 to 75 percent in volume.
Turn Out and Portion the Dough
Lightly oil a clean work surface so the dough doesn’t stick. Gently turn the airy dough out of the bowl, trying not to deflate it completely.
Pat it softly into a rough rectangle. Use a bench scraper or sharp knife to divide it into 12 equal pieces. Weigh pieces for accuracy if you prefer perfectly even rolls.
Shape into Tight Rolls
Cup one piece of dough under your palm on the oiled surface. Circle your hand while gently tucking the dough underneath to create surface tension.
Form a smooth, tight ball without tearing the surface. Repeat with the remaining pieces. Aim for evenly shaped rolls so they bake consistently and look uniform on the tray.
Arrange and Proof the Rolls
Line a baking sheet with parchment paper. Place the shaped dough balls on the sheet, spacing them evenly to leave room for expansion.
Lightly cover them with a clean kitchen towel or plastic wrap, making sure it doesn’t stick. Let the rolls proof at room temperature for 1 to 2 hours, until noticeably puffy and lighter.
Chill for Flavor (Optional)
Transfer the covered baking sheet of proofed rolls to the refrigerator. Refrigerate for 4 to 6 hours, or leave them overnight for deeper, more complex sourdough flavor.
Keep them covered so they don’t dry out. This cold proof slows fermentation, develops the crumb, and adds flexibility if you need to bake later.
Preheat the Oven and Prepare Egg Wash
Remove the rolls from the refrigerator if chilled. Let them sit at room temperature while you preheat the oven to 400°F (200°C).
In a small bowl, whisk together the egg and milk until completely smooth. Make certain no streaks remain. Use this egg wash to give the rolls a shiny, deeply golden brown crust.
Brush and Bake the Rolls
Gently brush the tops of the risen rolls with a thin, even layer of egg wash. Avoid letting it drip heavily down the sides.
Place the baking sheet in the preheated oven. Bake for 15 to 20 minutes, until the rolls are deep golden brown and the internal temperature reaches about 200°F (93°C) when checked.
Cool and Finish the Rolls
Remove the baking sheet from the oven and promptly transfer the hot rolls to a wire cooling rack. Allow them to cool for at least 20 minutes so the crumb can finish setting.
For softer tops, brush immediately with melted butter. Serve warm or at room temperature, or cool fully before freezing for later use.
Ingredient Swaps
- Flour: You can swap bread flour for all-purpose; rolls will be slightly less chewy and may spread a bit more—reduce water by 10–20 g if the dough feels too loose.
- Butter: Use an equal amount of neutral oil or dairy-free butter for a lactose-free/vegan-friendly fat (if also swapping the egg).
- Egg in dough: Omit the egg and add 30–40 g extra water or milk for egg-free rolls; texture will be a bit less rich but still soft.
- Sugar: Substitute granulated sugar with honey or maple syrup (use 25 g and reduce water by about 5 g) or with light brown sugar for deeper flavor.
- Milk/egg wash: For a shiny but egg-free top, brush with milk or cream; for vegan, use plant milk with a teaspoon of oil.
You Must Know
– Flavor Boost – For more tang and complexity without making the rolls too sour, keep bulk on the shorter side (around 4 hours) and extend the cold proof closer to 18 hours; cool fermentation slows yeast but lets acids and flavor compounds build.
Serving Tips
- Serve warm with softened butter, honey, or herb compound butter on the side.
- Split and use as slider buns for pulled pork, meatballs, or mini veggie burgers.
- Pair with soups or stews; dunk directly for a cozy, rustic presentation.
- Slice, toast lightly, and top with jam, cheese, or avocado for breakfast.
- Arrange in a bread basket lined with a towel to keep them warm at table.
Storage & Make-Ahead
These sourdough buns keep in the fridge for up to 4 days, well wrapped or in an airtight container.
For make-ahead, you can fully bake, cool, and freeze them for 2–3 months.
Rewarm from thawed or frozen in a 300°F (150°C) oven until soft and heated through.
Reheating
Reheat rolls gently: wrap in foil and warm in a 300°F oven 8–10 minutes.
Microwave briefly under a damp towel.
Or reheat covered in a skillet over low heat until soft.
Sourdough at Holiday Tables
Once the rolls are warm and fragrant again, they’re ready to slip into the heart of a holiday table.
I love setting them in a wide basket, tucked into a clean, soft towel so the steam curls up like breath on a cold window. Their golden tops catch the candlelight, and that sourdough aroma weaves between roasted vegetables and gravy.
As everyone reaches in, the basket becomes a quiet pause in the bustle. Tear one open and you’ll feel the thin crust give way, the tender crumb releasing butter-soft warmth.
I pass them around often, letting hands brush, plates clink, and conversation stretch—these rolls turn the simple act of “would you like one?” into a shared tradition.
Final Thoughts
Give these sourdough buns a try and see how they fit into your regular dinner rotation—then tweak the sweetness, tang, or topping to make them truly your own.
However you customize them, you’ll end up with soft, flavorful rolls that are hard to stop eating.
Frequently Asked Questions
Can I Make These Sourdough Buns Without a Kitchen Scale?
Yes, you can, though I’d treat measurements more gently. I’d use cups and spoons, feel for a soft, slightly tacky dough, watch for airy rise, and let your kitchen’s warmth whisper when it’s ready.
How Do I Adapt This Recipe for a Stand Mixer?
You can, and I’d let the mixer knead on low 6–8 minutes after mixing wet and dry. Listen for a soft thump, watch for a silky, windowpane stretch—dough smooth as warm, buttered linen.
Can I Add Herbs, Cheese, or Garlic Without Affecting Fermentation?
Yes, you can, but add them after the first rest. I’d fold in soft herbs, grated cheese, or roasted garlic gently, feeling the dough stay airy, so fermentation hums along like a warm, yeasty evening.
How Should I Adjust Fermentation Times in a Very Cold Kitchen?
I’d simply double or even triple bulk time, watching for a billowy, jiggly dough, not the clock. If it’s still sluggish, I’d tuck the bowl into a slightly warm, draft-free spot, like a gently lit oven.
Are These Rolls Suitable for Vegan or Dairy-Free Adaptations?
Yes, you can adapt them. I’d swap butter and milk for oat or almond versions, skip the egg, and brush risen dough with plant milk; you’ll still get tender, fragrant rolls, warm and softly steaming.

Sourdough Buns Dinner Rolls
Equipment
- 1 Kitchen scale
- 1 large mixing bowl
- 1 Medium bowl
- 1 dough scraper or silicone spatula
- 1 bench scraper or sharp knife
- 1 clean kitchen towel or plastic wrap
- 1 Baking sheet
- 1 sheet parchment paper
- 1 wire cooling rack
- 1 pastry brush
Ingredients
- 150 gram active sourdough starter 100% hydration
- 260 gram water room temperature
- 40 gram unsalted butter melted and cooled
- 1 large egg room temperature
- 30 gram granulated sugar
- 9 gram fine sea salt
- 450 gram bread flour plus extra for dusting
- 15 gram olive oil for greasing bowl and hands
- 1 large egg beaten; for egg wash
- 15 gram milk for egg wash
Instructions
- In a large mixing bowl whisk together the active sourdough starter and water until the starter is mostly dissolved.
- Add the melted butter, egg, and sugar to the bowl and whisk until well combined.
- Add the bread flour and salt to the wet mixture and stir with a dough scraper or spatula until a rough, shaggy dough forms.
- Cover the bowl and let the dough rest for 20 to 30 minutes to allow the flour to hydrate.
- With lightly oiled hands, perform several stretch-and-folds in the bowl until the dough becomes smoother and more elastic, about 2 to 3 minutes.
- Cover the bowl and let the dough bulk ferment at room temperature for 4 to 6 hours, performing 2 to 3 sets of stretch-and-folds during the first 2 hours, spaced 30 minutes apart.
- When the dough has increased by about 60–75% in volume and looks airy with bubbles, lightly oil a clean surface and turn the dough out.
- Gently pat the dough into a rectangle and divide it into 12 equal pieces using a bench scraper or sharp knife.
- Shape each piece into a tight ball by cupping your hand around the dough and circling it on the counter to create surface tension.
- Line a baking sheet with parchment paper and arrange the dough balls evenly spaced, allowing room for expansion.
- Lightly cover the rolls with a clean kitchen towel or plastic wrap, making sure it does not stick to the dough.
- Let the rolls proof at room temperature for 1 to 2 hours, or until puffy, then optionally refrigerate for 4 to 6 hours or overnight for deeper flavor.
- When ready to bake, remove the rolls from the refrigerator (if chilled) and let them sit at room temperature while you preheat the oven to 400°F (200°C).
- In a small bowl whisk together the egg and milk for the egg wash until fully combined.
- Gently brush the tops of the risen rolls with a thin, even layer of egg wash.
- Bake the rolls for 15 to 20 minutes, or until deep golden brown and the internal temperature reaches about 200°F (93°C).
- Remove the baking sheet from the oven and transfer the rolls to a wire cooling rack.
- Allow the sourdough buns to cool for at least 20 minutes before serving to finish setting the crumb.
Notes

Cynthia Weatherford is a seasoned chef and culinary enthusiast who serves as the Recipe creator of Somonday. With decades of experience in the kitchen and a passion for exploring diverse cuisines, Cynthia brings a blend of creativity and technique to every dish. Known for transforming simple ingredients into show-stopping meals, Cynthia believes that cooking is an art form anyone can master. Dedicated to inspiring home cooks, Cynthia shares approachable recipes, pro tips, and culinary wisdom to make every meal memorable.


