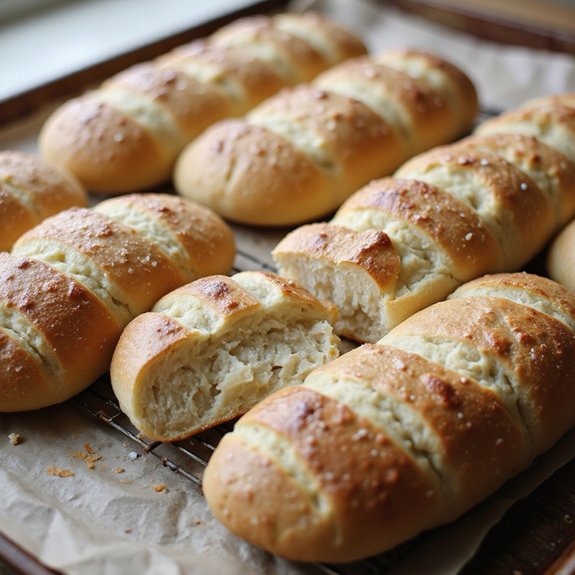
There’s something about a tray of freshly baked sourdough hoagie buns that instantly makes the kitchen feel like a bakery.
Golden crusts crackle as you tear one open, releasing a warm, tangy aroma and revealing a tender, chewy crumb inside.
These buns are your blank canvas—perfect for hearty sandwiches, toasted garlic subs, or packed hoagies for busy days.
They’re ideal for meal-preppers, sandwich lovers, and anyone who wants bakery-quality bread at home, with most of the work done ahead so they’re ready when you are.
I still remember a chaotic Sunday before a big game day gathering. I’d the fillings prepped but no good bread in sight.
Pulling these sourdough hoagie buns from the oven at the last minute turned simple cold cuts into something everyone raved about.
They shine for make-ahead lunches, casual entertaining, and comforting weekend suppers. Ready to bring this recipe to life?
Why You’ll Love It
- Delivers bold sourdough tang with a soft, tender hoagie crumb
- Holds hearty sandwich fillings without becoming dense or overly chewy
- Uses simple pantry ingredients and natural fermentation for better flavor
- Adapts easily to overnight refrigeration for flexible baking schedules
- Freezes beautifully, so you can batch-bake future sandwich rolls
Ingredients
- 240 g active sourdough starter — 100% hydration, at peak rise for best flavor
- 360 g water — room temperature, non-chlorinated if possible
- 30 g olive oil — a mild, good-quality variety for tender crumb
- 30 g granulated sugar — helps with browning and fermentation
- 600 g bread flour — high-protein for better structure and chew
- 11 g fine sea salt — evenly seasons and strengthens the dough
- 1 large egg — beaten, for a glossy egg wash finish
- 15 ml water — thins the egg wash for easier brushing
Step-by-Step Method
Mix the Wet Ingredients
Whisk the active sourdough starter, room-temperature water, olive oil, and sugar in a large mixing bowl. Combine until the mixture looks smooth and uniform, with no streaks of oil or starter.
Proper mixing here helps distribute the yeast and sugars evenly, supporting strong fermentation and balanced flavor later in the dough.
Form the Shaggy Dough
Add the bread flour and fine sea salt to the wet mixture. Stir with a sturdy spoon or dough whisk until a rough, shaggy dough forms.
Make certain no dry pockets of flour remain. The dough should look uneven and scrappy at this stage, which is normal.
This step fully hydrates the flour and begins gluten development.
Knead Until Smooth
Knead the dough by hand for 8–10 minutes on a lightly floured surface, or use a stand mixer with a dough hook on medium-low for 5–6 minutes.
Aim for a smooth, elastic, and slightly tacky dough. Avoid adding excessive flour.
The dough should stretch without tearing easily, indicating sufficient gluten development.
Start the Bulk Fermentation
Shape the dough into a smooth ball and place it in a lightly oiled bowl, turning once to coat all sides. Cover the bowl with plastic wrap or a damp kitchen towel.
Keep the bowl at room temperature, away from drafts. The oil prevents sticking and helps maintain moisture during fermentation.
Let the Dough Rise
Allow the dough to bulk ferment at room temperature for 4–6 hours. Watch for the dough to roughly double in size and look puffy with a domed surface.
Timing can vary by temperature and starter strength. If your kitchen is cool, expect the longer end of the range or even slightly more time.
Divide the Dough Evenly
Gently turn the risen dough onto a lightly floured surface. Flatten it into a loose rectangle without pressing out all the air.
Use a bench scraper or sharp knife to divide the dough into 8 equal pieces by weight. Weighing each portion guarantees uniform bun size for even baking and a consistent appearance.
Pre-Shape into Loose Balls
Take each piece and gently tuck the edges under to form a loose ball. Avoid over-tightening at this stage.
Arrange the balls on the work surface, cover them with a clean kitchen towel, and let them rest for 15 minutes. This rest relaxes the gluten, making final shaping easier and preventing the dough from springing back.
Shape the Hoagie Buns
Work with one piece at a time. Gently flatten it into a small rectangle about 4×6 inches.
Roll the rectangle tightly from the long side into a log. Pinch the seam closed along the length.
Roll the log back and forth to reach 6–7 inches, tapering the ends slightly if you prefer a classic hoagie shape.
Arrange and Proof the Buns
Place each shaped bun seam-side down on a parchment-lined baking sheet. Space the buns at least 2 inches apart to allow room for expansion.
Cover them lightly with plastic wrap or a towel. Let them proof at room temperature for 1–2 hours, until noticeably puffy and airy when gently pressed.
Preheat and Prepare Egg Wash
Near the end of the proofing time, preheat your oven to 400°F (200°C).
In a small bowl, whisk the beaten egg with 15 ml of water to create an egg wash. Mix until smooth and uniform.
This wash will give the buns a glossy, golden crust and help them brown evenly during baking.
Brush and Score the Buns
Gently brush the tops of the proofed buns with the egg wash using a pastry brush. Avoid pressing down and deflating the dough.
Optionally, use a sharp knife or razor to score a shallow lengthwise slash down the center of each bun. This score controls expansion and adds a traditional hoagie look.
Bake Until Golden
Place the baking sheet in the preheated oven. Bake for 15–20 minutes, rotating the pan halfway through for even coloring.
Watch for a deep golden brown crust. Check that the internal temperature reaches about 200°F (93°C).
Fully baked buns will feel light and sound slightly hollow when tapped on the bottom.
Cool Before Slicing
Remove the baking sheet from the oven and transfer the buns to a cooling rack. Let them cool for at least 30 minutes before slicing.
Cooling allows the crumb to set, preventing gummy interiors. Once cooled, slice lengthwise and fill with your favorite sandwich ingredients, or freeze leftovers well-wrapped for later use.
Ingredient Swaps
- Use neutral oil (like canola or vegetable) or melted butter instead of olive oil if preferred or more affordable.
- Replace granulated sugar with honey, maple syrup, or brown sugar in equal weight; reduce water by 5–10 g if using liquid sweeteners.
- For a heartier bun, swap up to half of the bread flour for whole wheat or rye flour and increase the water by 15–30 g as needed for a soft, supple dough.
You Must Know
- Doneness • If your buns look pale at 20 minutes… give them another 3–5 minutes until they’re a deeper golden and hit about 200°F/93°C internal; this guarantees the crumb is fully set and they won’t gum up when sliced.
- Troubleshoot • If your buns spread wide and bake up flat… shorten the bulk ferment slightly or chill the shaped buns for 20–30 minutes before the final proof; this tightens the gluten and keeps a taller, sandwich‑friendly shape.
- Troubleshoot • If the crumb feels dense or gummy… extend either bulk or final proof until the dough looks visibly airy and leaves a slow‑filling thumb dent; under-proofing is the most common cause of heavy sourdough buns.
- Flavor Boost • For a deeper sour and wheaty flavor… chill the shaped buns, covered, for 8–12 hours and bake from cold; the long, cool rise builds complexity without over‑acidifying the dough.
- Scale • To make 4 larger hoagies instead of 8… divide the dough into 4 pieces (~255 g each) and keep them a touch shorter but thicker; add 2–4 extra minutes to the bake so the centers reach 200°F/93°C.
Serving Tips
- Pile high with Italian cold cuts, provolone, shredded lettuce, tomato, and oil and vinegar.
- Fill with meatballs and marinara, then top with melted mozzarella and fresh basil.
- Stuff with grilled veggies, goat cheese, and pesto for a hearty vegetarian sandwich.
- Split, butter, and toast, then serve alongside soups or chowders for dipping.
- Make mini cheesesteaks with sliced steak, sautéed onions, peppers, and provolone or cheese sauce.
Storage & Make-Ahead
Sourdough hoagie buns keep in the fridge, well wrapped, for up to 4 days.
For make-ahead, refrigerate shaped buns overnight and bake the next day.
Fully cooled buns freeze very well for about 2 months; wrap tightly and thaw at room temperature before reviving briefly in a warm oven.
Reheating
For best texture, reheat buns in a 300°F (150°C) oven, wrapped in foil, 8–10 minutes.
Brief microwaving with a damp towel works, or warm cut sides on a covered skillet.
Hoagies in American Delis
Walk into almost any American deli and you’ll spot hoagie buns piled high behind the glass, each one promising a different kind of messy, wonderful sandwich.
I always pause there, watching the counter staff move with quick, confident hands, slicing rolls that look a lot like the sourdough buns cooling on my own counter at home.
In those delis, the hoagie feels like a quiet ritual.
You choose your bread, then the fillings, but it’s really the roll that holds the whole story together:
- Crust that shatters just slightly
- A tender, chewy interior
- Enough strength to cradle juicy fillings
- A flavor that lingers after the last bite
When I bake, I’m chasing that deli-counter magic for you.
Final Thoughts
Give these sourdough hoagie buns a try and enjoy how they elevate everything from simple sandwiches to hearty subs.
Once you’ve made them once, have fun tweaking the flavors—try adding seeds on top, a sprinkle of herbs, or even a bit of whole wheat flour to make the recipe your own.
Frequently Asked Questions
Can I Convert This Recipe to Use Commercial Yeast Instead of Sourdough Starter?
Yes, you can. I’d use 7–9 g instant yeast, add 120 g extra water, and keep the rest. I’ve done this on busy weeks; the dough still rises tall, bakes soft, and tastes gently sweet.
How Do I Adapt the Dough for a Gluten-Free Sourdough Hoagie Bun?
You’ll swap wheat flour for a gluten‑free bread blend, add 1–2 teaspoons psyllium husk, and mix a thick batter, not dough. I watch for a fluffy rise and promise the crumb still feels tender.
What’s the Best Way to Scale This Recipe for a Large Crowd?
I’d scale by weight: decide servings, multiply all grams, then mix in batches your mixer can handle. I do two or three slow rounds, stagger proofs, and bake back‑to‑back—crowds love the still‑warm rolls.
How Can I Troubleshoot Dense or Gummy Sourdough Hoagie Buns?
I fix dense, gummy buns by letting the dough ferment longer, proof until softly springy, and bake to 200°F. When mine turned chewy once, extending bulk and reducing hydration transformed them into tender, cloud-light rolls.
Which Flours Produce the Softest Crumb While Keeping a Chewy Hoagie Texture?
I’ve found a blend of bread flour and about 20–30% all-purpose, plus a spoonful or two of potato or milk powder, gives you that tender, cloud‑soft crumb while keeping the satisfying, sandwich‑shop chew.

Sourdough Hoagie Buns
Equipment
- 1 stand mixer with dough hook (optional, for mixing)
- 2 large mixing bowls
- 1 Kitchen scale
- 1 measuring cup
- 4 Measuring spoons
- 2 baking sheets
- 1 sheet of parchment paper
- 1 plastic wrap roll or 2 clean kitchen towels
- 1 bench scraper or sharp knife
- 1 pastry brush
- 1 Cooling rack
Ingredients
- 240 gram active sourdough starter 100% hydration
- 360 gram water room temperature
- 30 gram olive oil
- 30 gram granulated sugar
- 600 gram bread flour
- 11 gram fine sea salt
- 1 large egg for egg wash; beaten
- 15 milliliter water for egg wash
Instructions
- In a large mixing bowl, whisk together the active sourdough starter, water, olive oil, and sugar until well combined.
- Add the bread flour and salt to the wet mixture and stir until a rough shaggy dough forms.
- Knead the dough by hand for 8–10 minutes or with a stand mixer on medium-low speed for 5–6 minutes until smooth and slightly tacky.
- Shape the dough into a ball and place it in a lightly oiled bowl, turning once to coat the surface.
- Cover the bowl with plastic wrap or a damp kitchen towel and let it bulk ferment at room temperature for 4–6 hours, or until roughly doubled and puffy.
- Gently turn the dough out onto a lightly floured surface and flatten it into a rectangle.
- Use a bench scraper or knife to divide the dough into 8 equal pieces by weight.
- Pre-shape each piece into a loose ball, cover with a towel, and let rest for 15 minutes to relax the gluten.
- Working with one piece at a time, gently flatten into a small rectangle about 4×6 inches.
- Roll the rectangle tightly from the long side into a log, pinching the seam to seal.
- Roll the log gently back and forth to lengthen to about 6–7 inches, tapering the ends slightly if desired.
- Place each shaped bun seam-side down on a parchment-lined baking sheet, spacing them at least 2 inches apart.
- Cover the buns lightly with plastic wrap or a towel and let proof at room temperature for 1–2 hours, or until noticeably puffy.
- Near the end of proofing, preheat the oven to 400°F (200°C).
- In a small bowl, mix the beaten egg with 15 ml of water to make an egg wash.
- Gently brush the tops of the buns with the egg wash, taking care not to deflate them.
- Optionally, score a shallow lengthwise slash down the center of each bun with a sharp knife or razor.
- Bake the buns for 15–20 minutes, rotating the pan halfway, until golden brown and an internal temperature of about 200°F (93°C) is reached.
- Remove the baking sheet from the oven and transfer the buns to a cooling rack.
- Allow the buns to cool at least 30 minutes before slicing and filling.
Notes

Cynthia Weatherford is a seasoned chef and culinary enthusiast who serves as the Recipe creator of Somonday. With decades of experience in the kitchen and a passion for exploring diverse cuisines, Cynthia brings a blend of creativity and technique to every dish. Known for transforming simple ingredients into show-stopping meals, Cynthia believes that cooking is an art form anyone can master. Dedicated to inspiring home cooks, Cynthia shares approachable recipes, pro tips, and culinary wisdom to make every meal memorable.


