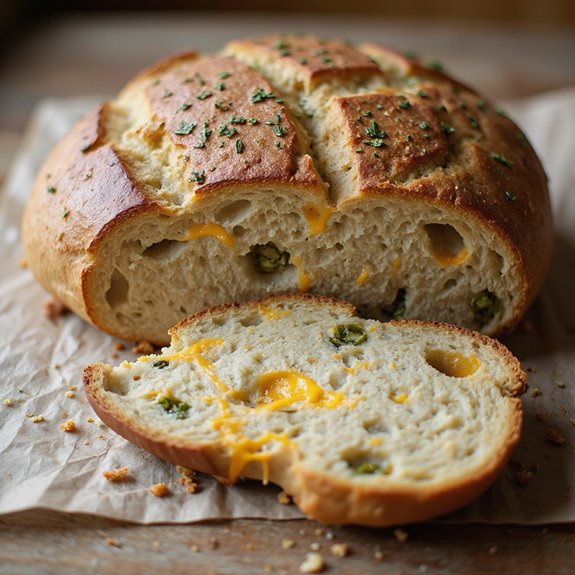
There’s something about pulling a burnished loaf of sourdough jalapeño cheese bread from the oven—the crackling crust, ribbons of melted cheddar bubbling at the edges, and the warm, tangy aroma laced with gentle heat.
This is cozy comfort food: a bakery-worthy bread that turns simple meals into something special, yet it’s still approachable enough for any home baker. It’s ideal for weekend bakers, sourdough lovers, and anyone who enjoys feeding a crowd with minimal fuss.
I still remember a Sunday when friends dropped by unexpectedly; a pot of soup was simmering, but it felt too plain.
I sliced into this loaf, steam puffed out, and those cheesy, spicy swirls instantly turned a basic dinner into an effortless feast.
It shines at game-day gatherings, casual entertaining, or whenever you’re craving something bold and comforting beside a bowl of chili or eggs. Ready to bring this bread to life?
Why You’ll Love It
- Delivers bold, tangy heat with pockets of melty sharp cheddar
- Elevates simple meals, from chili bowls to breakfast eggs and soups
- Relies on natural sourdough fermentation for better flavor and digestibility
- Bakes into an impressively crackly crust with soft, tender crumb
- Makes amazing leftovers: toast, grilled cheese, or hearty sandwiches
Ingredients
- 100 g active sourdough starter — use at peak rise for best oven spring
- 350 g water, room temperature — cooler side if your kitchen is warm
- 450 g bread flour — higher protein helps structure hold cheese
- 50 g whole wheat flour — adds flavor and a bit of extra fermentation food
- 10 g fine sea salt — fully dissolve into dough for even seasoning
- 120 g sharp cheddar cheese, small cubes — a firm, well-flavored cheddar melts best
- 2 medium fresh jalapeños, deseeded and finely chopped — remove membranes to tame heat
- 1 tbsp pickled jalapeño brine, optional — boosts tang and pepper flavor
- 10 g olive oil — for lightly greasing the bowl during bulk ferment
- 15 g rice flour, for dusting, optional — helps prevent sticking in the proofing basket
Step-by-Step Method
Mix the Starter and Water
Whisk the active sourdough starter with room-temperature water in a large mixing bowl. Stir until the starter mostly dissolves and the liquid looks milky and uniform.
This guarantees even fermentation throughout the dough. Scrape down the sides of the bowl so all starter is incorporated before adding any flour.
Combine the Flours
Add the bread flour and whole wheat flour directly into the starter mixture. Mix with a dough scraper or your hands until no dry bits remain.
Aim for a shaggy, slightly sticky mass. Don’t knead at this stage; just make sure all flour is hydrated and roughly incorporated.
Autolyse the Dough
Cover the bowl with a lid, plate, or towel and let the dough rest at room temperature for 45–60 minutes. Allow the flour to fully hydrate.
This rest helps gluten develop naturally and improves dough extensibility. Avoid disturbing the dough during this period so structure can begin forming on its own.
Incorporate Salt and Brine
Sprinkle the fine sea salt and optional jalapeño brine evenly over the dough. Use a pinch-and-fold motion: pinch sections of dough, then fold them over to distribute the salt.
Continue until the grains of salt are no longer visible. This step strengthens the dough and enhances flavor balance.
Rest Briefly After Salting
Cover the bowl again and let the dough rest for about 20 minutes at room temperature. Allow the salt to fully dissolve and integrate.
This short pause relaxes the gluten after handling. Keep the bowl in a draft-free area to maintain consistent temperature and encourage smooth fermentation.
Perform the First Stretch-and-Fold
Wet your hand lightly to prevent sticking. Grab one edge of the dough, stretch it upward gently, then fold it over toward the center.
Rotate the bowl and repeat on all four sides. Build strength without tearing the dough. Cover the bowl again once all sides are folded neatly.
Rest and Build Structure
Let the dough rest covered for 30 minutes at room temperature. During this time, gluten continues to develop and fermentation starts becoming more active.
Avoid additional handling to prevent overworking. Expect the dough to feel more elastic and cohesive after this rest, ready for inclusions.
Add First Half of Jalapeños and Cheese
Perform a second set of stretch-and-folds, then sprinkle half the chopped jalapeños and half the cheddar cubes over the dough. Gently fold the dough over itself to trap the additions.
Rotate and repeat, aiming for even distribution. Avoid aggressive mixing that could tear the gluten or mash the cheese.
Rest and Allow Fermentation
Cover the bowl and let the dough rest for another 30 minutes at room temperature. Give the dough time to relax and continue fermenting with the first batch of inclusions.
Expect slightly increased puffiness and small bubbles forming near the surface, indicating growing yeast activity.
Add Remaining Jalapeños and Cheese
Perform a third set of stretch-and-folds, now scattering the remaining jalapeños and cheddar over the dough. Fold as before, working gently to distribute everything evenly.
Ensure inclusions are embedded throughout, not just on top. Finish with the dough gathered into a cohesive mass in the bowl.
Bulk Ferment the Dough
Cover the bowl and let the dough rise at room temperature for 3–5 hours. Watch for a 50% increase in volume rather than relying strictly on time.
Look for an airy texture with visible bubbles along the sides and surface. Avoid letting it more than double to prevent overproofing and weak structure.
Turn Out the Dough Gently
Lightly flour your work surface to prevent sticking. Carefully tip the dough from the bowl onto the counter, using a scraper to coax it out.
Avoid pressing or deflating it aggressively. Preserve as much of the trapped gas as possible to maintain an open crumb and good oven spring.
Pre-Shape into a Loose Round
Fold the edges of the dough toward the center to create a rough round. Flip the dough so the seam faces down.
Use a bench scraper to gently tuck and drag, tightening it into a loose ball. Focus on forming light surface tension without tearing. Cover with a towel to rest.
Bench Rest the Dough
Let the pre-shaped dough rest for 20–30 minutes at room temperature. Keep it covered with a towel to prevent drying out.
Allow the gluten to relax, making final shaping easier and more effective. The dough should spread slightly but still hold its general round form when ready.
Prepare the Proofing Basket
Lightly flour a proofing basket or a bowl lined with a clean towel. Use rice flour if available, as it’s less likely to absorb moisture and stick.
Dust generously along the bottom and sides. Make sure the surface is evenly coated so the dough releases easily after cold proofing.
Perform Final Shaping
Flip the rested dough so the smooth side faces down and the seam side is up. Fold the edges toward the center to build tension.
Shape into a tight round or oval, depending on your proofing vessel. Use firm yet gentle motions, aiming for a smooth, taut surface that supports good oven spring.
Transfer Dough to Basket
Place the shaped dough seam-side up in the prepared proofing basket or lined bowl. Adjust its position so it sits centered and evenly supported.
Lightly flour the exposed surface if it seems sticky. This placement guarantees a defined base and attractive top once the loaf is inverted for baking.
Cold Proof in the Refrigerator
Cover the basket tightly with plastic wrap or a reusable cover. Place it in the refrigerator for 10–12 hours.
Allow the dough to slowly ferment and develop deeper flavor. Cold proofing also firms the dough, making scoring cleaner and easier. Avoid disturbing or uncovering during this period.
Preheat the Dutch Oven
About 45 minutes before baking, place the Dutch oven with its lid into your oven. Preheat to 475°F (245°C).
Let both the pot and lid fully heat to create a steamy environment when the dough is added. This high initial heat encourages maximum oven spring and crust development.
Invert the Chilled Dough
Cut a piece of parchment large enough to support the loaf. Remove the basket from the fridge and gently invert the dough onto the parchment so the seam side is now down.
Peel back the towel carefully if using one. Keep the dough centered and avoid pressing out the trapped gases.
Score the Dough
Use a very sharp knife or lame to score the top of the dough. Make a cross or a single long slash about ¼ inch deep.
Score confidently in one motion to avoid dragging. These cuts control where the loaf expands during baking, preventing random ruptures and promoting an attractive shape.
Load the Dutch Oven
Carefully remove the preheated Dutch oven from your oven and set it on a heat-safe surface. Lift the dough using the parchment as a sling and lower it into the hot pot.
Work quickly but carefully to retain heat. Cover immediately with the lid to trap steam for peak crust formation.
Bake Covered, Then Uncovered
Return the covered Dutch oven to the oven and bake at 475°F (245°C) for 20 minutes. Remove the lid, reduce the temperature to 450°F (230°C), and continue baking 15–20 minutes.
Look for a deep golden crust and an internal temperature near 205°F (96°C) to confirm doneness.
Cool Completely Before Slicing
Use the parchment to lift the baked loaf from the Dutch oven and transfer it to a wire cooling rack. Let it cool at least 1 hour so the crumb sets and the melted cheese firms.
Resist slicing early, which can compress the interior and cause gummy or collapsed sections. Then slice and serve.
Ingredient Swaps
- Use part or all all-purpose flour instead of bread flour; reduce water by 10–20 g if the dough feels too slack.
- Swap cheddar for any good melting cheese (Monterey Jack, Colby, Gouda, or Pepper Jack for extra heat).
- Replace fresh jalapeños with pickled jalapeños (drain well) or mild green chiles for less spice.
- For dairy-free, use a firm, meltable vegan cheese block, cut into cubes; for whole-grain emphasis, increase whole wheat flour up to 150 g and lower water slightly if needed.
You Must Know
– Avoid • To prevent cheese leakage and burnt spots, keep most cubes at least 1–1.5 cm from the outer surface during folds.
Cheese at the edge tends to melt out and scorch in the 450–475°F (230–245°C) heat, making bitter, tough patches on the crust.
Serving Tips
- Serve warm slices with chili, soups, or hearty stews for a cozy meal.
- Toast and top with cream cheese, avocado, or fried eggs for breakfast.
- Use as a base for grilled cheese or patty melts to amplify cheesiness.
- Slice thin for party crostini; top with salsa, beans, or guacamole.
- Pair with crisp lagers, IPAs, or margaritas to complement the jalapeño heat.
Storage & Make-Ahead
Store cooled sourdough jalapeño cheese bread in the fridge, wrapped, for up to 4–5 days.
For best texture, slice and toast to serve.
This bread freezes well: wrap tightly (whole or sliced) and freeze up to 2 months.
Thaw at room temperature, then refresh in a 350°F oven.
Reheating
Reheat slices gently: in a 300°F (150°C) oven for 8–10 minutes.
In a covered skillet over low heat.
Or briefly in the microwave wrapped in a damp towel to prevent drying.
Sourdough at Super Bowl Parties
On game day, I love setting out this sourdough jalapeño cheese bread as the centerpiece of the snack table, still faintly warm so the cheddar pockets are soft and aromatic.
Everyone drifts toward it, drawn by that mix of tangy sourdough and roasted pepper fragrance that cuts through the chaos of wings and chips.
I slice it thick on a wooden board, leaving the knife nearby so people can saunter past, carve a wedge, and keep cheering.
The crust shatters just enough, then gives way to a tender, cheesy crumb with tiny green flecks.
I like pairing it with a small bowl of cool sour cream or queso, the heat of the jalapeños meeting the chill between plays.
Final Thoughts
Give this sourdough jalapeño cheese bread a try, and you’ll be rewarded with a loaf that’s equal parts tangy, cheesy, and spicy.
Don’t be afraid to tweak the heat level, cheese type, or add-ins to make it your own signature bake.
Frequently Asked Questions
Can I Freeze the Unbaked Dough for Later Baking?
Yes, you can, but I wouldn’t. Freezing unbaked dough disrupts wild yeast, giving flat, dull loaves. I’d bake first, then freeze slices; you’ll rewarm them later, crust crackling and cheese fragrant, like fresh.
How Can I Adjust This Recipe for High-Altitude Baking?
You can, and I’d tweak a few things: I’d shorten bulk ferment, add 10–15 g water, drop the oven temp 15–25°F, and watch the dough’s rise closely—let its airy feel, not the clock, guide you.
Is This Bread Suitable for People With Mild Lactose Intolerance?
Yes, it usually is, as long as your intolerance’s mild. I’d keep the cheddar, since lactose is low, but I’d savor small, warm slices first, noticing your body’s response before sharing a whole loaf.
Can I Use This Dough to Make Sourdough Jalapeño Cheese Rolls Instead?
Yes, you can. I’d shape smaller rounds after bulk ferment, nestle them side by side in a buttered pan, proof overnight, then bake until their cheesy edges crisp and the centers stay pillowy-soft and fragrant.
What’s the Best Knife and Slicing Technique for This Crusty Loaf?
I reach for a long serrated bread knife and use gentle sawing strokes. I cradle the loaf, slice straight down, letting the crust crackle softly while the warm, tender interior yields in fragrant, steam-kissed slices.

Sourdough Jalapeño Cheese Bread
Equipment
- 1 large mixing bowl
- 1 Small bowl
- 1 digital kitchen scale
- 1 measuring spoon set
- 1 dough scraper or spatula
- 1 sharp knife
- 1 Cutting board
- 1 Dutch oven with lid
- 1 sheet parchment paper
- 1 wire cooling rack
Ingredients
- 100 gram active sourdough starter 100% hydration
- 350 gram water room temperature
- 450 gram bread flour
- 50 gram whole wheat flour
- 10 gram fine sea salt
- 120 gram cheddar cheese sharp; cut into small cubes
- 2 medium jalapeños fresh; deseeded and finely chopped
- 1 tablespoon pickled jalapeño brine optional
- 10 gram olive oil for greasing bowl
- 15 gram rice flour for dusting; optional
Instructions
- In a large mixing bowl, whisk together the active sourdough starter and water until mostly dissolved.
- Add the bread flour and whole wheat flour to the bowl and mix with a dough scraper or hands until no dry flour remains and a shaggy dough forms.
- Cover the bowl and let the dough rest (autolyse) at room temperature for 45–60 minutes.
- Sprinkle the salt and optional pickled jalapeño brine over the dough and gently pinch and fold the dough until the salt is fully incorporated.
- Cover the bowl and let the dough rest 20 minutes at room temperature.
- Perform the first set of stretch-and-folds by pulling one side of the dough up and folding it over itself, repeating on all four sides.
- Cover and rest the dough for 30 minutes at room temperature.
- Perform a second set of stretch-and-folds, then gently fold in half of the jalapeños and cheddar cubes.
- Cover and rest the dough for another 30 minutes at room temperature.
- Perform a third set of stretch-and-folds, folding in the remaining jalapeños and cheddar cubes as evenly as possible.
- Cover and let the dough bulk ferment at room temperature for 3–5 hours, or until it has risen by about 50% and looks airy with bubbles.
- Lightly flour a work surface and gently turn the dough out of the bowl without deflating it completely.
- Pre-shape the dough into a loose round by folding the edges toward the center, then flip seam-side down and tighten into a ball using a bench scraper.
- Cover the pre-shaped dough with a towel and let it rest for 20–30 minutes.
- Lightly flour a proofing basket or bowl lined with a towel, using rice flour if available to prevent sticking.
- Perform the final shaping by flipping the dough seam-side up, folding the edges toward the center to create tension, then shaping into a tight round or oval.
- Place the shaped dough seam-side up in the prepared proofing basket or bowl.
- Cover tightly with plastic wrap or a reusable cover and refrigerate for 10–12 hours for a cold retard proof.
- About 45 minutes before baking, place the Dutch oven with its lid in the oven and preheat to 475°F (245°C).
- Cut a piece of parchment large enough to fit under the dough and invert the chilled dough onto the parchment, now seam-side down.
- Score the top of the dough with a sharp knife in a cross or single long slash to allow for controlled expansion.
- Carefully remove the hot Dutch oven from the oven, lift the dough on the parchment, and lower it into the Dutch oven.
- Cover with the lid and bake for 20 minutes at 475°F (245°C).
- Remove the lid, reduce the temperature to 450°F (230°C), and bake for another 15–20 minutes, or until deep golden brown and internal temperature reaches about 205°F (96°C).
- Carefully remove the bread from the Dutch oven and transfer it to a wire cooling rack.
- Let the bread cool completely for at least 1 hour before slicing to allow the crumb to set and cheese to firm up.
Notes

Cynthia Weatherford is a seasoned chef and culinary enthusiast who serves as the Recipe creator of Somonday. With decades of experience in the kitchen and a passion for exploring diverse cuisines, Cynthia brings a blend of creativity and technique to every dish. Known for transforming simple ingredients into show-stopping meals, Cynthia believes that cooking is an art form anyone can master. Dedicated to inspiring home cooks, Cynthia shares approachable recipes, pro tips, and culinary wisdom to make every meal memorable.


