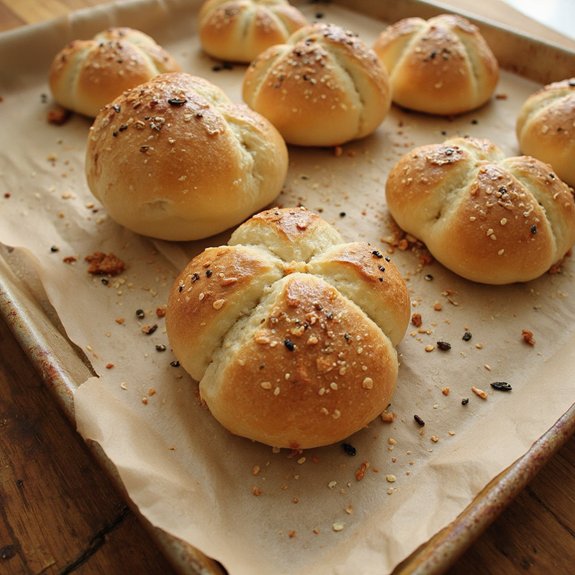
There’s something about a tray of sourdough Kaiser rolls coming out of the oven—deep golden spirals, crackly crusts dusted with flour, and that tangy, toasted aroma filling the kitchen.
These rolls are the kind you tear open to reveal a tender, airy crumb, perfect for soaking up gravy, cradling a juicy burger, or wrapping around simple lunch fillings.
They’re cozy, bakery-style bread that fits both slow, relaxing bake days and make-ahead meal prep, ideal for families, sandwich lovers, and anyone easing into sourdough baking.
I still remember a rainy Sunday when dinner plans fell apart; these rolls, baked from dough I’d started the night before, turned leftover soup into something special and comforting.
They shine at Sunday suppers, casual gatherings, and as a reliable stash in the freezer for busy weeknights or last-minute guests.
Ready to bring these sourdough Kaiser rolls to life?
Why You’ll Love It
- Delivers bold, tangy flavor with a classic Kaiser roll chew
- Elevates everyday sandwiches, burgers, and breakfast sandwiches instantly
- Makes ahead easily with an overnight chill for better flavor and flexibility
- Uses simple pantry ingredients plus your favorite active sourdough starter
- Freezes beautifully, then re-crisps in minutes for fresh-baked convenience
Ingredients
- 150 g active sourdough starter, 100% hydration — use recently fed, bubbly starter
- 260 g water, room temperature — filtered if your tap water is heavily chlorinated
- 30 g olive oil — plus a little extra for greasing the bowl
- 500 g bread flour — higher protein gives better chew and structure
- 10 g fine sea salt — avoid iodized table salt for cleaner flavor
- 10 g granulated sugar — just enough to boost browning and fermentation
- 1 large egg, beaten — for a shiny, golden egg wash
- 15 g sesame seeds (optional) — classic Kaiser topping for nutty flavor
- 15 g poppy seeds (optional) — traditional topping that adds subtle crunch
Step-by-Step Method
Mix the wet ingredients
Whisk the sourdough starter, room-temperature water, olive oil, and sugar in a large mixing bowl. Beat until the starter is mostly dissolved and the mixture looks milky and smooth.
This helps distribute the starter evenly. Scrape down the sides of the bowl so everything is well combined before adding the flour and salt.
Combine flour and salt
Add the bread flour and fine sea salt directly to the wet mixture. Stir firmly with a spoon or dough scraper until no dry flour remains.
The dough will look rough and shaggy at this stage. Scrape the bowl bottom and sides to guarantee all ingredients are incorporated into one cohesive, lumpy mass.
Rest the dough (autolyse)
Let the rough dough rest uncovered for 20–30 minutes. Keep it in the same bowl.
This rest allows the flour to fully hydrate, which improves gluten development. The dough will feel smoother and less sticky afterward.
Avoid skipping this step if you want better structure and easier kneading later on.
Develop the gluten
Knead the dough on a lightly floured surface for 8–10 minutes until smooth and elastic. Alternatively, keep it in the bowl and perform three sets of stretch-and-folds every 20 minutes.
Gently pull one edge up and fold it over the center, rotating the bowl. Stop when the dough feels stronger, supple, and cohesive.
Bulk ferment the dough
Shape the dough into a tight ball and place it in a lightly oiled bowl. Turn it once to coat with oil.
Cover with a reusable cover or plastic wrap. Let it rise at room temperature for 3–4 hours, or until roughly doubled, soft, and puffy. Adjust timing based on your room temperature and starter strength.
Divide the dough evenly
Turn the dough out gently onto a lightly floured surface. Use a dough scraper to avoid degassing too much.
Weigh the total dough, then divide into eight equal pieces by weight for uniform rolls. Shape each portion into a rough round. Light flour on your hands helps prevent sticking during this step.
Pre-shape into loose rounds
Form each piece into a loose ball by tucking edges to the center and rolling gently. Don’t tighten too much yet.
Arrange the pre-shaped balls on the work surface and cover lightly with a clean kitchen towel. Let them rest for about 15 minutes so the gluten relaxes, making the final shaping easier.
Shape classic Kaiser knots
Roll each rested ball into a rope about 12–14 inches long. Tie a loose single knot in the center of the rope.
Tuck one end underneath and the other into the center top to create the Kaiser pattern. Adjust gently to emphasize the star shape. Repeat with remaining pieces, keeping tension without tearing.
Arrange rolls for proofing
Place each shaped roll seam-side down on parchment-lined baking sheets. Space them apart to allow room for expansion.
Use two baking sheets if necessary to prevent crowding. Cover the rolls lightly with plastic wrap or a towel. Assure the covering doesn’t press directly onto the dough and disturb the shape.
Cold proof the shaped rolls
Transfer the covered baking sheets to the refrigerator. Let the rolls proof for 4–5 hours, or leave them overnight for deeper flavor and easier handling.
The cold environment slows fermentation while enhancing taste. The rolls should become lighter and slightly puffy, though not fully doubled in size.
Warm the rolls and preheat
Remove the rolls from the refrigerator about 45 minutes before baking. Keep them covered and let them come toward room temperature.
Meanwhile, preheat your oven to 425°F (220°C). Make sure the oven is fully heated before the rolls go in. This helps achieve good oven spring and a nicely developed crust.
Apply egg wash and toppings
Beat the egg in a small bowl until smooth. Gently brush the tops and sides of each roll with the egg wash using a pastry brush.
Sprinkle sesame and poppy seeds over the surface, if using. Cover evenly but lightly. The egg wash promotes a shiny, golden crust and helps the toppings adhere during baking.
Enhance the Kaiser pattern
Inspect the rolls and locate the folds of the knot. Use a small sharp knife or lame to deepen the indentations if they look faint.
Make shallow cuts along the natural lines of the knot. Avoid slicing too deep. This step emphasizes the traditional Kaiser appearance as the rolls expand in the oven.
Bake with optional steam
Place the baking sheets into the preheated oven. Optionally, create steam by spraying water onto the oven walls or placing a pan of hot water on a lower rack.
Bake the rolls for 18–22 minutes until deep golden brown. Check that they sound hollow when tapped on the bottom, indicating they’re fully baked.
Cool the rolls before serving
Transfer the hot rolls immediately to a wire rack. Let them cool for at least 30 minutes so the crumb sets and moisture redistributes.
Cutting too early can make the interior gummy. Once cooled slightly, serve them whole or sliced. Store fully cooled rolls in an airtight container or freeze for later.
Ingredient Swaps
- Use all-purpose flour instead of bread flour; the rolls will be slightly less chewy but still work well.
- Replace olive oil with any neutral oil or melted butter.
- For dairy-free egg wash, brush with plant milk mixed with a little oil; for richer color without egg, use milk or cream (if not dairy-free).
- Swap sugar with honey or maple syrup (use the same weight, not volume).
- For seed toppings, use whatever is available—sunflower, pumpkin, nigella, or just coarse salt and cracked pepper.
You Must Know
– Scale – *For a smaller batch,* cut all ingredients in half for 4 rolls (e.g., 75 g starter, 250 g flour, etc.), and aim for each dough piece to weigh about 95–100 g.
Keeping individual roll weight consistent guarantees even rise and matching bake times.
Serving Tips
- Split and pile with deli meats, mustard, pickles for classic sandwiches.
- Serve warm alongside soups, stews, or hearty salads as the main bread.
- Use as burger buns; their sturdy crumb holds juicy patties and sauces.
- Slice, toast, and top with scrambled eggs, smoked salmon, or avocado for breakfast.
- Present in a bread basket with softened butter, olive oil, and salt for guests.
Storage & Make-Ahead
Sourdough Kaiser rolls keep, covered at room temperature, 1–2 days.
Refrigerate up to 4 days, gently re-warming to refresh the crust.
The dough is ideal for make-ahead: refrigerate shaped rolls overnight, then bake fresh.
Baked, cooled rolls freeze well for 2–3 months.
Thaw and re-crisp in a hot oven.
Reheating
Reheat rolls gently to preserve texture.
Wrap in foil and warm in a 325°F oven 8–10 minutes.
Briefly microwave with a damp towel.
Re-crisp cut sides on a covered skillet.
Kaiser Rolls at Oktoberfest
Once you know how to bring leftover rolls back to life, it’s easy to imagine them fresh and warm on an Oktoberfest table, where they really shine.
I picture you tearing one open while tubas rumble in the background, steam curling into the cool evening air, sourdough aroma weaving through roasted malt and wood smoke.
I love serving these Kaiser rolls piled in a basket, crusts blistered and glossy from egg wash, seeds catching the light like confetti. You bite in and hear that thin crackle, then feel the tender, chewy crumb cradle juicy bratwurst and sharp mustard.
They soak up tangy sauerkraut brine, dark beer drips, and meat juices without falling apart—sturdy, festive, and utterly German.
Final Thoughts
Give these sourdough Kaiser rolls a try and enjoy the crisp crust, soft crumb, and rich flavor fresh from your own oven.
Once you’ve made them once, have fun tweaking the toppings, fermentation time, or size to make them your perfect everyday roll.
Frequently Asked Questions
Can I Make These Sourdough Kaiser Rolls Entirely by Hand Without a Mixer?
Yes, you can. I’d mix starter, water, oil, sugar, then flour and salt with my hands, feel the dough turn silky as I knead, folds tightening like warm skin, kitchen filling with tangy, toasty scent.
How Do Altitude Changes Affect Proofing and Baking Times for These Rolls?
Altitude shortens proofing and baking; I’d watch the dough, not the clock. In thin mountain air, it rises faster, crust colors sooner, crumb dries quicker—so I’d proof cooler, bake slightly cooler, and check doneness early.
Are These Rolls Suitable for People With Mild Sourdough Sensitivities or Digestion Issues?
Yes, they’re often gentler, but everyone’s different. I’d tell you to try a small, well-baked piece first—warm crust cracking, tangy aroma rising—and notice how your belly feels over a few quiet, mindful hours.
Can I Freeze the Shaped, Unbaked Rolls and Proof Them Later?
Yes, you can. I’d freeze them on the tray, firm as pebbles, then bag them. Later, let them thaw and proof until pillowy and airy, kissing your fingertip back slowly before baking.
How Can I Adapt This Recipe for a Commercial Bakery or Larger Batches?
You can scale by baker’s percentages: weigh everything, keep hydration and salt constant, then mix in a spiral mixer, bulk in dough tubs, divide/round mechanically, retard on trays, and bake on rotating deck ovens for consistent crust.

Sourdough Kaiser Rolls
Equipment
- 1 large mixing bowl
- 1 medium mixing bowl
- 1 digital kitchen scale
- 1 measuring cup
- 3 Measuring spoons
- 1 Dough scraper
- 1 clean kitchen towel
- 1 plastic wrap or reusable cover
- 2 baking sheets
- 2 sheets parchment paper
- 1 small sharp knife or lame
- 1 pastry brush
Ingredients
- 150 gram active sourdough starter 100% hydration
- 260 gram water room temperature
- 30 gram olive oil plus extra for greasing
- 500 gram bread flour
- 10 gram fine sea salt
- 10 gram granulated sugar
- 1 large egg beaten for egg wash
- 15 gram sesame seeds optional for topping
- 15 gram poppy seeds optional for topping
Instructions
- In a large mixing bowl whisk together sourdough starter, water, olive oil, and sugar until mostly smooth.
- Add the bread flour and salt to the wet mixture and stir with a spoon or dough scraper until a rough, shaggy dough forms.
- Let the dough rest uncovered for 20–30 minutes to allow the flour to hydrate (autolyse).
- Knead the dough on a lightly floured surface for 8–10 minutes until smooth and elastic, or perform 3 sets of stretch-and-folds every 20 minutes in the bowl.
- Shape the dough into a tight ball, place it in a lightly oiled bowl, cover, and let it rise at room temperature for 3–4 hours until roughly doubled and puffy.
- Gently turn the dough out onto a lightly floured surface and divide it into 8 equal pieces by weight.
- Pre-shape each piece into a loose ball, cover with a towel, and let rest for 15 minutes to relax the gluten.
- Shape each roll by rolling into a rope about 12–14 inches long, tying a loose knot, and tucking the ends underneath to form the classic Kaiser shape.
- Place shaped rolls seam-side down on parchment-lined baking sheets, leaving space between each roll.
- Cover the rolls lightly with plastic wrap or a towel and refrigerate for 4–5 hours or overnight for a slow, cold proof.
- About 45 minutes before baking, remove the rolls from the refrigerator and let them sit at room temperature while the oven preheats to 425°F (220°C).
- Brush the tops of the rolls with beaten egg and sprinkle with sesame and poppy seeds if using.
- Use a small sharp knife or lame to deepen the pattern of the folds if needed to emphasize the Kaiser look.
- Place the rolls in the preheated oven and optionally add steam by spraying water into the oven or placing a pan of hot water on the lower rack.
- Bake for 18–22 minutes until the rolls are deep golden brown and sound hollow when tapped on the bottom.
- Transfer the baked rolls to a wire rack and let cool for at least 30 minutes before slicing or serving.
Notes

Cynthia Weatherford is a seasoned chef and culinary enthusiast who serves as the Recipe creator of Somonday. With decades of experience in the kitchen and a passion for exploring diverse cuisines, Cynthia brings a blend of creativity and technique to every dish. Known for transforming simple ingredients into show-stopping meals, Cynthia believes that cooking is an art form anyone can master. Dedicated to inspiring home cooks, Cynthia shares approachable recipes, pro tips, and culinary wisdom to make every meal memorable.


