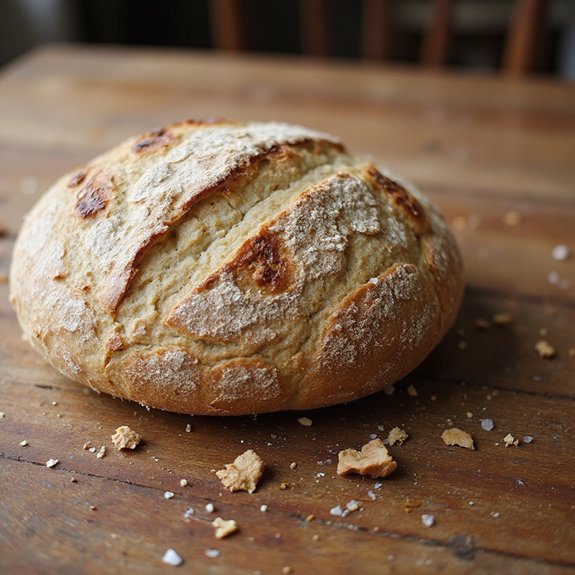
There’s something about pulling a tray of golden sourdough sandwich rolls from the oven—the crackle of their crisp edges, the warm tangy aroma, the soft, cloud-like centers—that makes any ordinary meal feel special.
These rolls are perfect for building hearty sandwiches, stacking with deli meats, or simply tearing apart and spreading with butter.
They’re ideal for meal-preppers, sandwich lovers, and families who like having something homemade and versatile ready to go.
I still remember a hectic week when dinner felt impossible; a batch of these rolls turned leftover roast chicken into comforting, deli-style sandwiches that everyone actually got excited about.
Suddenly, lunches and quick weeknight meals were solved.
These sourdough rolls shine at casual gatherings, Sunday suppers, packed lunches, and those last-minute “what’s for dinner?” moments.
Ready to bring this cozy, bakery-style staple to your own kitchen and table?
Why You’ll Love It
- Delivers rich, tangy sourdough flavor in a soft, tender roll
- Makes sturdy sandwich rolls that don’t fall apart under fillings
- Skips commercial yeast, relying entirely on your active starter
- Fits busy schedules with flexible rise and proof times
- Freezes beautifully for quick, homemade sandwich bread anytime
Ingredients
- 150 g active sourdough starter — 100% hydration, freshly fed and bubbly
- 250 g warm water — about 27°C, comfortably warm to the touch
- 30 g olive oil — plus extra for greasing the bowl and rolls
- 20 g honey — mild-flavored, runny honey mixes best
- 400 g bread flour — higher protein for better structure
- 50 g whole wheat flour — adds flavor and light nuttiness
- 10 g fine sea salt — fine grain dissolves more evenly
- 1 large egg — beaten for egg wash, room temperature if possible
- 15 g sesame seeds — optional topping for flavor and crunch
Step-by-Step Method
Mix the Wet Ingredients
Whisk the active sourdough starter, warm water, olive oil, and honey in a large mixing bowl. Combine until the mixture looks smooth and uniform.
Proper mixing is pivotal the starter is evenly distributed, which supports good fermentation and rise. Keep the water warm, not hot, to avoid damaging the natural yeast and bacteria in your starter.
Combine with the Flours
Add the bread flour and whole wheat flour to the wet mixture. Mix thoroughly with a spatula or your hand until no dry spots of flour remain.
Aim for a shaggy, slightly sticky dough. Avoid adding extra flour at this stage. A slightly tacky dough will yield softer, lighter rolls after fermentation and baking.
Rest the Dough (Autolyse)
Cover the bowl with a towel or plastic wrap and let the dough rest for 30 minutes. This autolyse period allows the flour to fully hydrate and gluten to begin forming naturally.
The dough will feel more cohesive and easier to handle afterward. Don’t add salt yet; delaying it helps the gluten strengthen more easily.
Incorporate the Salt
Sprinkle the fine sea salt evenly over the dough’s surface. Pinch and fold the dough repeatedly to distribute the salt throughout.
Use your fingers to squeeze sections, then fold them over. Continue until the salt is fully mixed in. This step strengthens gluten and improves flavor, so be thorough but gentle with the dough.
Perform Stretch-and-Folds
Over the next 1.5–2 hours, perform 3–4 sets of stretch-and-folds every 30 minutes. To do one set, grab a portion of dough, stretch it up, and fold it over itself.
Rotate the bowl and repeat several times. Keep the bowl covered between sets. The dough should gradually become smoother, stronger, and more elastic.
Bulk Ferment the Dough
Lightly oil a clean bowl and transfer the dough into it. Cover well and let it rise at room temperature for 1.5–2 hours.
Watch for a 50% increase in volume rather than rigid timing. The dough should feel lighter and slightly jiggly when you gently shake the bowl. Avoid over-proofing, which can weaken structure.
Shape into a Rectangle
Turn the dough out onto a lightly floured surface. Gently pat it into a rectangle about 2–3 cm thick.
Avoid pressing out all the gas; keep some bubbles for light texture. Use your hands rather than a rolling pin to maintain dough integrity. Keep flour minimal so the rolls stay soft and not dry.
Divide into Equal Pieces
Use a sharp knife or dough scraper to cut the dough into 8 equal pieces. For precision, weigh each piece with a digital scale.
Equal sizing guarantees even baking and consistent sandwich rolls. Handle pieces gently to avoid tearing. Place cut portions aside on a lightly floured area while you prepare to shape.
Shape Tight Rounds
Shape each piece into a tight ball by cupping your hand around it and gently dragging it against the counter. Create surface tension on top without tearing the dough.
Rotate as you drag until the ball feels smooth and firm. This tension helps the rolls rise upward, not sideways, during proofing and baking.
Arrange on the Baking Sheet
Line a baking sheet with parchment paper or a silicone baking mat. Place each dough ball on the sheet, leaving space between for expansion.
Lightly brush the tops with a thin coat of oil. This prevents sticking to the cover and keeps the surface supple. Prepare them for their final proof at room temperature.
Proof Until Puffy
Cover the rolls loosely with a kitchen towel or plastic wrap. Let them proof 1.5–2 hours, or until noticeably puffy and airy.
They should wobble slightly when the tray is gently shaken. Adjust time based on room temperature; cooler kitchens need longer. Proper proofing guarantees an open, tender crumb and good oven spring.
Preheat the Oven
About 30 minutes before baking, preheat your oven to 220°C. Ensure the rack is in the middle position for even heating.
A fully preheated oven is essential for oven spring and proper browning. Don’t rush this step; underheated ovens can cause dense rolls and pale crusts, even if the dough was well prepared.
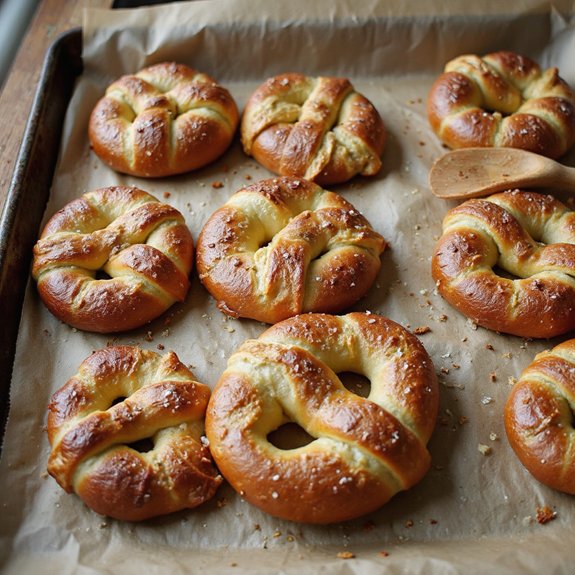
Apply Egg Wash and Seeds
Just before baking, brush each roll with beaten egg using a pastry brush. Coat evenly for a shiny, golden crust.
If desired, sprinkle sesame seeds generously over the tops while the egg wash is still wet. The egg acts as glue, helping the seeds adhere and adding both flavor and attractive texture.
Score the Rolls
Use a sharp knife or lame to make a shallow slash across the top of each roll. Keep the cuts quick and confident to avoid dragging.
Scoring controls how the rolls expand in the oven, encouraging a nice ear and preventing random splitting. Aim for consistent depth so all rolls bake and open similarly.
Bake Until Golden
Place the baking sheet in the preheated oven. Bake for 18–25 minutes, watching for deep golden-brown color.
The rolls should sound hollow when tapped on the bottom. If browning too quickly, tent lightly with foil. Avoid opening the oven repeatedly, which drops temperature and can reduce oven spring and texture.
Cool Completely Before Slicing
Transfer the rolls to a wire rack as soon as they finish baking. Let them cool completely before slicing, which helps set the crumb and prevents squashing.
For a softer crust, drape a clean towel loosely over them while they cool. Once cooled, slice horizontally for sandwiches or freeze in an airtight bag.
Ingredient Swaps
- Use up to 50% whole wheat or spelt in place of bread flour; add 10–20 g extra water if the dough feels stiff, as whole grains absorb more liquid.
- Swap honey with sugar or maple syrup 1:1 by weight, or omit for a less-sweet roll (you may need a slightly longer fermentation).
- For dairy-free, the base recipe already qualifies; for egg-free, skip the egg wash and brush with milk or water + a little oil instead.
- If you don’t have bread flour, use all-purpose and reduce water by 10–20 g if the dough feels too slack.
- Replace sesame seeds with poppy seeds, everything bagel seasoning, or coarse salt, or omit the topping entirely.
You Must Know
- Doneness – If you’re unsure the rolls are fully baked, tap the bottom of one: it should sound hollow and feel light for its size; an internal temp of about 95–98°C is a reliable cue that the crumb has set without drying out.
- Troubleshoot – If your dough feels stiff and doesn’t jiggle after 2 hours of rising, extend fermentation by 30–60 minutes and keep it somewhere slightly warmer (around 24–26°C); sluggish dough usually needs more time, not more flour.
- Avoid – Avoid using extra flour when handling the dough; instead, use a light film of oil on your hands and work surface so the dough stays tacky—too much added flour makes rolls dense and they won’t puff as well in the final 18–25 minute bake.
- Flavor Boost – For deeper sour and wheat flavor, refrigerate the shaped rolls (covered) for 8–16 hours before the final proof at room temperature; the cold slow rise develops lactic tang and more complex aromas without extra starter.
- Scale – To adjust batch size, keep ingredient ratios the same: total flour is 450 g, so starter at 150 g is roughly 33% of flour weight and water at 250 g is about 55% hydration relative to flour; multiply all ingredients by the same factor, and expect larger batches to need 10–20 minutes more for each rise.
Serving Tips
- Serve sliced with turkey, cheddar, lettuce, and cranberry mayo for a hearty sandwich.
- Pile with grilled vegetables, hummus, and arugula for a vegetarian lunch.
- Toast lightly and use as buns for smash burgers or pulled pork.
- Split, butter, and griddle for breakfast rolls alongside eggs and bacon.
- Make mini party sliders with deli meats, cheeses, and pickles on a platter.
Storage & Make-Ahead
Store rolls in an airtight container at room temperature for 2–3 days or in the fridge up to 5 days.
For make-ahead, bake, cool completely, and freeze up to 2 months.
Thaw at room temperature, then refresh in a 175°C oven for 5–8 minutes to revive the crust.
Reheating
Reheat rolls gently: microwave wrapped in a damp paper towel 10–20 seconds.
Warm in a 160°C oven 5–10 minutes.
Or reheat covered in a skillet over low heat until soft and warmed through.
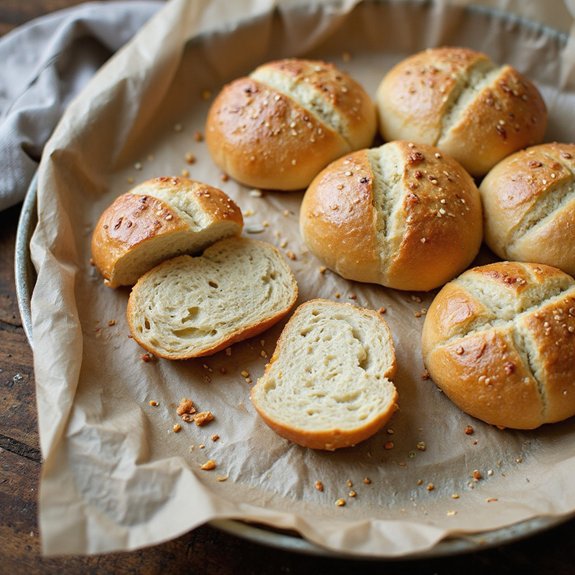
Sourdough Rolls in Delis
When you walk into a good deli and catch that toasty, tangy aroma coming from the sandwich counter, there’s a good chance sourdough rolls are doing the heavy lifting.
I always notice how they stack them in tall, sun‑golden rows, crusts crackling slightly each time the deli knife presses through.
Bite into one and you get that thin, glossy shell from the egg wash, then a tender, stretchy crumb that soaks up juices without collapsing.
The mild acidity cuts through fatty pastrami, smoky turkey, or melted cheddar, so every layer tastes sharper, more focused.
As you plan your own rolls, picture that deli counter. You’re not just baking bread—you’re building the foundation for a sandwich that actually lingers in memory.
Final Thoughts
Give these sourdough sandwich rolls a try and see how they fit into your weekly routine—whether for burgers, breakfast sandwiches, or simple snacks.
Don’t be afraid to tweak the flour blend, toppings, or size to make them perfectly yours.
Frequently Asked Questions
Can I Make These Rolls Without a Stand Mixer or Special Baking Tools?
You can, absolutely. I’d mix the dough by hand in a big bowl, feel it become silky under my palms, let it puff on the counter, then bake until the kitchen smells warm, nutty, irresistible.
How Do High Altitudes Affect Fermentation and Baking Time for These Rolls?
They’ll ferment and bake faster at high altitude. I’d watch the dough, not the clock—look for a soft, jiggly puff, then bake, expecting quicker browning and a lighter, airier crumb with crackling crust.
Can I Cold-Proof the Shaped Rolls Overnight for Better Flavor?
Yes, you can. I’d shape them, let them puff slightly, then chill overnight. In the morning they’ll smell lightly tangy; bake straight from the fridge, watching as golden crusts bloom and steam escapes like whispers.
Are These Rolls Suitable for Vegan Diets, and How Do I Replace the Egg Wash?
Yes, they’re easily vegan. I’d simply skip honey or swap maple syrup, then brush the rolls with silky plant milk or olive oil; they’ll still bake up fragrant, golden, and beautifully glossy.
How Do I Adjust Fermentation During Very Hot or Very Cold Weather?
You’ll slow fermentation in heat by using cooler water, less starter, and a shady spot; in the cold, I do the opposite, then let the dough rise until softly domed, jiggly, and fragrant.

Sourdough Sandwich Rolls
Equipment
- 1 digital kitchen scale
- 2 large mixing bowls
- 1 Small bowl
- 1 dough scraper or rubber spatula
- 1 clean kitchen towel or plastic wrap
- 1 Baking sheet
- 1 sheet of parchment paper or silicone baking mat
- 1 sharp knife or lame
- 1 pastry brush
Ingredients
- 150 gram active sourdough starter 100% hydration
- 250 gram warm water about 27°C
- 30 gram olive oil plus extra for greasing
- 20 gram honey
- 400 gram bread flour
- 50 gram whole wheat flour
- 10 gram fine sea salt
- 1 large egg beaten; for egg wash
- 15 gram sesame seeds optional; for topping
Instructions
- In a large mixing bowl, whisk together the active sourdough starter, warm water, olive oil, and honey until well combined.
- Add the bread flour and whole wheat flour to the wet mixture and mix with a spatula or your hand until no dry flour remains and a shaggy dough forms.
- Cover the bowl and let the dough rest for 30 minutes to allow the flour to hydrate (autolyse).
- Sprinkle the salt over the dough, then pinch and fold the dough several times to incorporate the salt evenly.
- Perform 3–4 sets of stretch-and-folds every 30 minutes over 1.5–2 hours, keeping the dough covered between sets, until it becomes smoother and more elastic.
- Lightly oil a clean bowl, transfer the dough into it, cover, and let it rise at room temperature for 1.5–2 hours, or until it has risen by about 50%.
- Transfer the dough onto a lightly floured surface and gently pat it into a rectangle about 2–3 cm thick.
- Using a sharp knife or dough scraper, divide the dough into 8 equal pieces by weight for even-sized rolls.
- Shape each piece into a tight round by cupping your hand around the dough and dragging it gently against the counter to create surface tension.
- Line a baking sheet with parchment paper or a silicone mat and arrange the shaped rolls on it, leaving space between each.
- Lightly brush the tops of the rolls with oil, cover loosely with a kitchen towel or plastic wrap, and let them proof at room temperature for 1.5–2 hours, or until noticeably puffy.
- About 30 minutes before baking, preheat the oven to 220°C.
- Just before baking, brush the tops of the rolls with beaten egg and, if using, sprinkle with sesame seeds.
- Use a sharp knife or lame to score a shallow slash across the top of each roll to control expansion.
- Place the baking sheet in the preheated oven and bake for 18–25 minutes, or until the rolls are deep golden brown and sound hollow when tapped on the bottom.
- Transfer the baked rolls to a wire rack and let them cool completely before slicing for sandwiches.
Notes

Cynthia Weatherford is a seasoned chef and culinary enthusiast who serves as the Recipe creator of Somonday. With decades of experience in the kitchen and a passion for exploring diverse cuisines, Cynthia brings a blend of creativity and technique to every dish. Known for transforming simple ingredients into show-stopping meals, Cynthia believes that cooking is an art form anyone can master. Dedicated to inspiring home cooks, Cynthia shares approachable recipes, pro tips, and culinary wisdom to make every meal memorable.