Imagine yourself stepping into a South Indian kitchen, where the aroma of ripe bananas and freshly grated coconut fills the air.
You’re about to create Banana Dosa, a delightful blend of sweetness and savory tradition.
The soft batter sizzles as it hits the hot skillet, transforming into a golden-brown delicacy.
Paired with spicy chutney, each bite tells a story of rich culinary heritage.
Curious about how this simple dish captures such magic?
Kitchen Tools Required
As you prepare to create this delightful South Indian breakfast treat, having the right kitchen tools can make all the difference.
Begin with a sturdy mixing bowl, inviting you to blend ripe bananas with fragrant spices.
A trusty whisk will then swirl the ingredients into a smooth, aromatic batter, reminiscent of South India’s vibrant morning markets.
The non-stick skillet or griddle becomes your canvas, where the ladle assists in crafting perfect, golden rounds.
As the dosa sizzles, a spatula lets you flip it gracefully, releasing a hint of tropical sweetness into the air.
Each tool, from the ladle’s gentle pour to the spatula’s precise turn, guarantees your Banana Dosa is as authentic and satisfying as those found on the bustling streets of Chennai.
Recipe
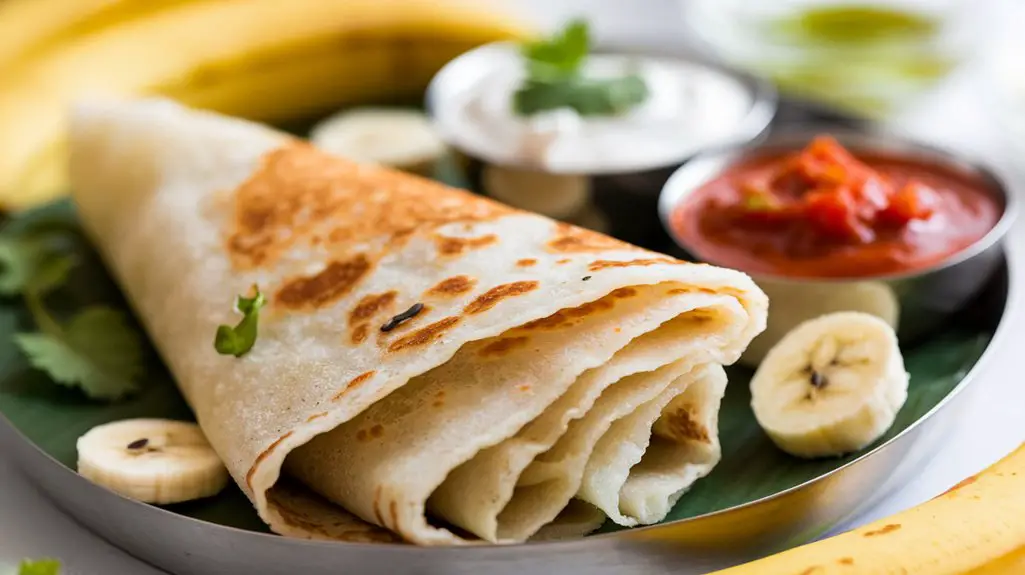
Banana Dosa is a delightful South Indian breakfast dish that combines the natural sweetness of ripe bananas with the crispiness of dosas.
This recipe is a perfect choice for those looking to add a fruity twist to their morning meal.
The combination of mashed bananas, rice flour, and a hint of coconut creates a unique and delicious flavor profile.
It’s a quick and easy dish to prepare, making it ideal for busy mornings.
This dish isn’t only tasty but also nutritious, as bananas provide essential nutrients like potassium and vitamin C.
The inclusion of rice flour makes the dosa gluten-free, catering to those with dietary restrictions.
The subtle sweetness from the bananas and sugar pairs wonderfully with savory accompaniments like chutney or sambar, offering a balanced meal to start your day.
Ingredients:
- 2 ripe bananas, mashed
- 1 cup rice flour
- 1/4 cup all-purpose flour
- 1/4 cup grated coconut
- 2 tablespoons sugar
- 1/4 teaspoon salt
- 1/4 teaspoon baking soda
- 1/2 cup water
- 2 tablespoons ghee or oil
To make Banana Dosa, begin by combining the mashed bananas, rice flour, all-purpose flour, grated coconut, sugar, salt, and baking soda in a mixing bowl.
Gradually whisk in water until you achieve a smooth batter consistency.
Allow the batter to rest for about 10 minutes.
Meanwhile, heat a non-stick skillet over medium heat and lightly grease it with ghee or oil.
Pour a ladleful of batter onto the skillet, spreading it into a round dosa shape.
Cook until bubbles appear on the surface, then flip and cook the other side until golden brown.
Repeat the process with the remaining batter. Serve the dosas hot with your choice of chutney or sambar.
For the best results, verify that the bananas are ripe, as they provide natural sweetness to the dosa.
Adjust the water as required to get the right consistency; the batter should be pourable but not too runny.
Cooking on a medium flame is vital to prevent burning and to guarantee the dosa cooks evenly.
Enjoy your Banana Dosa fresh off the skillet for the best taste and texture.
Cook & Prep Time
In just 35 minutes, you can transform humble ingredients into a cherished South Indian breakfast experience.
Imagine this: the aroma of ripe bananas mingling with the nutty scent of rice flour as you whisk together a silky batter.
Your anticipation grows during the brief resting time, allowing the flavors to meld seamlessly.
Here’s what you’ll need for this delightful culinary journey:
- Prep Time: 10 minutes of engaging with fragrant ingredients.
- Cook Time: 15 minutes of sizzling sounds and golden hues.
- Resting Time: 10 minutes for the batter to reach perfection.
- Servings: Enough to satisfy four hungry souls.
- Cuisine: Immerse yourself in the essence of Indian tradition.
As you cook, the kitchen becomes a symphony of sizzling joy and cultural richness.
Cooking Steps
Picture yourself in a cozy kitchen, mashing ripe bananas in a mixing bowl until their sweet aroma fills the air.
Slowly add water and whisk the mixture smoothly, feeling the batter transform under your fingertips, then let it rest briefly to bring out the flavors.
As you heat the skillet, the comforting scent of ghee envelops the room; spread the batter into a perfect circle, ready to embrace the warmth.
Step 1. Mash Bananas in Bowl
Grab those ripe bananas, their peels speckled with brown spots and calling for attention.
Feel their soft, yielding flesh beneath your fingers as you peel them, releasing their sweet aroma into the air.
Place them in a mixing bowl, the heart of your dosa creation, and begin mashing.
Use a fork or a potato masher, whichever feels right in your hand.
As you press down, the bananas transform into a creamy, golden mush, their natural sweetness heightened by their ripeness.
This is where the essence of South Indian warmth begins.
- Listen to the soft squelch as you mash.
- Notice the golden hue of ripe perfection.
- Feel the smooth texture under your fingers.
- Smell the sweet fragrance wafting up.
- Envision the dosa’s delightful flavor.
Step 2. Add Water, Whisk Smoothly
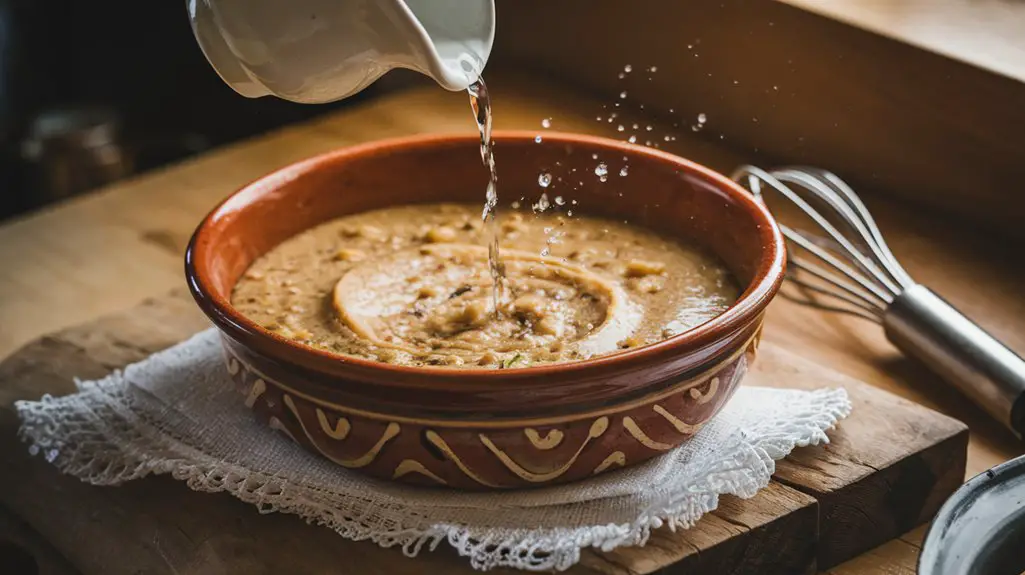
With the bananas perfectly mashed, your mixture awaits the next transformation.
Slowly pour half a cup of water into the bowl, watching as it mingles with the golden banana puree and snowy flours.
As you whisk, feel the resistance fade, leaving behind a silky, fragrant batter.
The aroma of coconut and banana swirls in the air, reminiscent of bustling South Indian kitchens where dosas sizzle on hot griddles.
To guide you:
| Ingredient | Amount | Purpose |
|---|---|---|
| Mashed Bananas | 2 | Sweetness |
| Rice Flour | 1 cup | Structure |
| Water | 1/2 cup | Consistency |
| Grated Coconut | 1/4 cup | Flavor |
| Baking Soda | 1/4 tsp | Lightness |
Ensure the batter is smooth, not lumpy, for the perfect dosa.
Step 3. Let Batter Rest Briefly
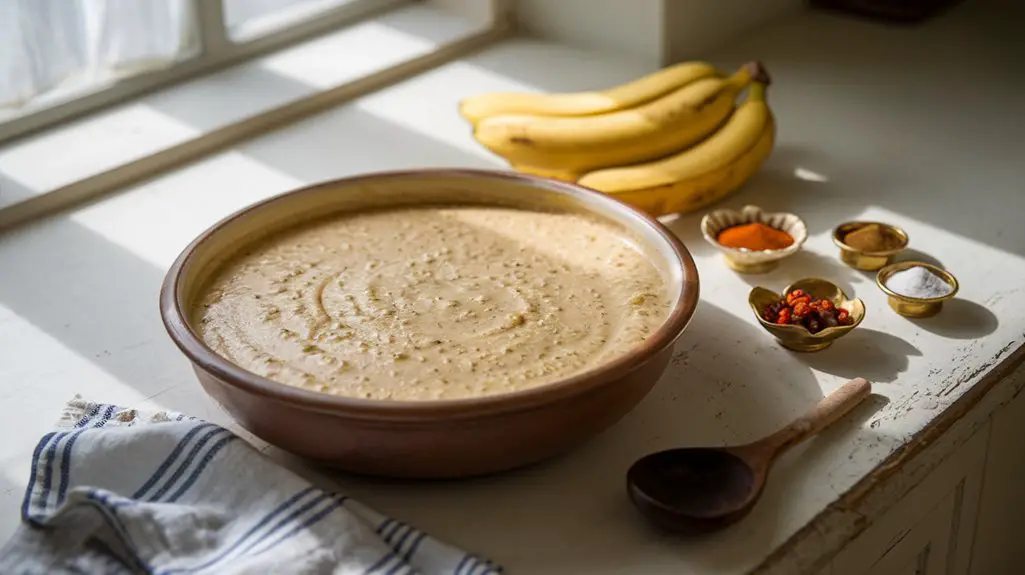
Once your batter reaches that perfect, velvety consistency, it’s crucial to let it rest for a brief period.
This pause, steeped in tradition, allows the ingredients to meld harmoniously, enhancing the dosa’s flavor and texture.
As you wait, imagine the gentle hum of a South Indian kitchen, where patience is as important as spices.
The resting time is a small ritual that guarantees soft, fluffy dosas.
During this moment:
- Envision the sweet aroma of ripe bananas mingling with coconut.
- Anticipate the light, crispy edges forming on the pan.
- Relish in the anticipation of a nourishing breakfast.
- Savor the cultural significance of dosa-making.
- Appreciate the simplicity and love in every bite.
Let the batter rest, and your dosas will sing with authenticity.
Step 4. Grease Skillet With Ghee

Begin the cooking process by heating your non-stick skillet over medium heat, feeling the gentle warmth rise as you prepare.
As the skillet warms, the kitchen fills with anticipation, reminiscent of bustling South Indian homes on a lazy Sunday morning.
Gently spoon a dollop of ghee onto the skillet’s surface.
Watch as it melts, transforming into a golden, aromatic pool.
The ghee’s rich fragrance whispers tales of traditional Indian kitchens, where meals are a celebration of flavors and textures.
Use a spatula to spread the ghee evenly, making sure the entire surface gleams with a glossy sheen.
This vital step guarantees your banana dosa glides effortlessly, achieving that perfect crispiness that complements its sweet, tender heart.
You’re ready to create!
Step 5. Spread Batter Into Circle
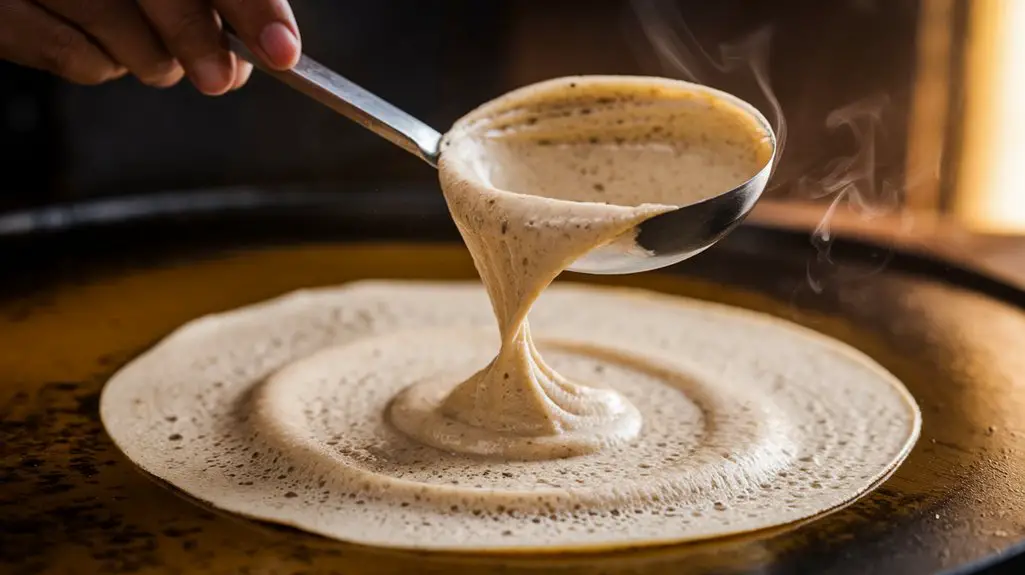
As the skillet gleams with ghee’s golden sheen, take a ladleful of the fragrant banana dosa batter and let it cascade onto the hot surface.
Feel the warmth rising from the pan, infusing your kitchen with the sweet essence of bananas.
With a swift, practiced motion, use the back of the ladle to spread the batter into a thin, even circle.
The dosa should be delicate, almost translucent, hinting at the golden hue to come.
- Listen to the sizzle as the batter meets the skillet.
- Watch as tiny bubbles form, promising a crisp, airy texture.
- Smell the caramelized banana aroma wafting through the air.
- Imagine the dosa absorbing the rich cultural heritage of South Indian kitchens.
- Anticipate the satisfying crunch with each bite.
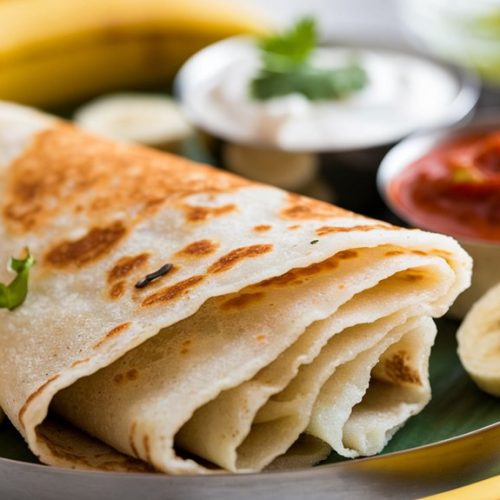
Final Thoughts
While savoring the warm, fragrant aroma of banana dosa wafting through your kitchen, you’ll appreciate the magic of transforming simple ingredients into a delightful breakfast treat.
The subtle sweetness of ripe bananas paired with the nutty charm of coconut creates a sensory symphony that dances on your taste buds.
As you craft these golden, crispy dosas, you’re embracing a time-honored South Indian tradition, rich in cultural nuances and culinary artistry.
Each bite connects you to the vibrant tapestry of Indian cuisine, where every ingredient tells a story.
Whether enjoyed with a spicy chutney or a comforting sambar, banana dosa isn’t just a dish—it’s an experience.
Relish the harmony of flavors and textures, knowing you’ve captured a piece of Indian culinary heritage in your home.
Frequently Asked Questions
Can I Use Whole Wheat Flour Instead of All-Purpose Flour?
You can definitely swap whole wheat flour for all-purpose flour. It adds a nutty depth and rustic texture, enhancing the dosa’s aroma. Just guarantee the batter’s consistency remains smooth, adjusting water if necessary for perfect golden crispiness.
What Can I Substitute for Grated Coconut?
You can replace grated coconut with finely chopped nuts or desiccated coconut. Nuts add a delightful crunch and a rich aroma, enhancing the dosa’s flavor profile. Imagine the warm, nutty essence complementing the sweet, ripe bananas.
How Can I Make the Dosa Gluten-Free?
To make the dosa gluten-free, replace all-purpose flour with more rice flour. Feel the batter’s silky texture, reminiscent of Indian kitchens. Savor the aroma as it cooks, delivering traditional flavors without gluten’s interference. Enjoy!
Are There Any Vegan Alternatives to Ghee?
You can replace ghee with coconut oil for a vegan touch, adding a subtle tropical aroma. It enhances the dosa’s crispiness while keeping it plant-based, aligning with South Indian culinary traditions. Enjoy the delightful transformation!
Can I Add Spices for Extra Flavor?
Absolutely, you can! Add a pinch of cinnamon or cardamom for a warm, aromatic twist. Imagine the enticing aroma wafting through your kitchen, blending with ripe bananas. It’s a delightful way to enhance your dish’s flavor.
South Indian Banana Dosa
Equipment
- 1 Mixing bowl
- 1 Whisk
- 1 Non-stick skillet or griddle
- 1 Ladle
- 1 Spatula
Ingredients
- 2 Ripe bananas mashed
- 1 cup Rice flour
- 1/4 cup All-purpose flour
- 1/4 cup Grated coconut
- 2 tablespoons Sugar
- 1/4 teaspoon Salt
- 1/4 teaspoon Baking soda
- 1/2 cup Water
- 2 tablespoons Ghee or oil
Instructions
- In a mixing bowl, combine the mashed bananas, rice flour, all-purpose flour, grated coconut, sugar, salt, and baking soda.
- Gradually add water to the mixture and whisk until you achieve a smooth batter consistency.
- Allow the batter to rest for 10 minutes.
- Heat a non-stick skillet over medium heat and lightly grease it with ghee or oil.
- Pour a ladleful of batter onto the skillet and spread it into a round dosa shape.
- Cook until bubbles appear on the surface, then flip and cook the other side until golden brown.
- Remove from the skillet and repeat with the remaining batter.
- Serve hot with your choice of chutney or sambar.
Notes

Cynthia Weatherford is a seasoned chef and culinary enthusiast who serves as the Recipe creator of Somonday. With decades of experience in the kitchen and a passion for exploring diverse cuisines, Cynthia brings a blend of creativity and technique to every dish. Known for transforming simple ingredients into show-stopping meals, Cynthia believes that cooking is an art form anyone can master. Dedicated to inspiring home cooks, Cynthia shares approachable recipes, pro tips, and culinary wisdom to make every meal memorable.