
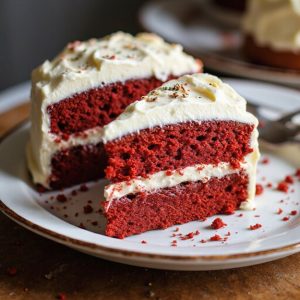
Picture a slice the color of a Southern sunset—crimson crumb so tender it yields beneath your fork, crowned with billowy swirls of tangy cream cheese frosting that smell faintly of vanilla and sweet dairy.
Imagine tapping the layers and hearing the soft sigh of moisture, then tasting cocoa’s whisper meeting buttermilk’s gentle tang; it’s comfort wrapped in celebration.
This cake matters to me because it turns ordinary moments into heirloom memories—the kind you carry from porch gatherings to holiday tables.
It’s the dessert that bridges busy weeknights or Sunday suppers, potlucks or birthdays, when you need something at once simple and stunning.
Once, after a long week and a last-minute dinner guest, this red velvet saved the evening—mixed in minutes, baked while we set the table, and frosted into a showstopper that felt like a hug.
I’ll guide you step by step so yours bakes up flawless.
Ready? Let’s cook!
Why You’ll Love It
- Delivers classic cocoa-vanilla tang with plush, tender crumb
- Mixes easily—no stand mixer required for batter
- Strikes perfect sweetness with luscious cream cheese frosting
- Slices cleanly and stays moist for days
- Eye-catching, vibrant layers for any celebration
Ingredients
- 2 1/2 cups all-purpose flour, sifted — measure after sifting for accuracy
- 1 1/2 cups granulated sugar — fine granules dissolve evenly
- 1 teaspoon baking soda — check it’s fresh for proper rise
- 1 teaspoon fine salt — fine grains distribute better
- 1 tablespoon unsweetened natural cocoa powder — use natural, not Dutch-processed
- 1 1/2 cups vegetable oil — neutral flavor like canola
- 2 large eggs, room temperature — room temp blends smoother
- 1 cup buttermilk, room temperature — don’t substitute milk + lemon if possible
- 2 teaspoons vanilla extract — pure extract for best flavor
- 1 teaspoon white vinegar — reacts with soda for tender crumb
- 2 tablespoons red liquid food coloring — adjust for vibrancy
- 8 ounces cream cheese, softened — full-fat for best texture
- 1/2 cup unsalted butter, softened — room temp, not melted
- 3 cups powdered sugar, sifted — prevents lumpy frosting
- 1 teaspoon vanilla extract (for frosting) — adds warmth to frosting
- 1 pinch fine salt (for frosting) — balances sweetness
Step-by-Step Method
Prepare the Pans
Preheat the oven to 350°F (175°C). Grease two 9-inch round cake pans, line bottoms with parchment rounds, then lightly flour the sides. Tap out excess flour. Proper prep prevents sticking and guarantees clean release.
Set pans aside on a baking sheet for easy handling and even heat transfer in the oven.
Sift and Combine Dry Ingredients
Sift flour, sugar, baking soda, salt, and cocoa powder into a medium bowl. Whisk to evenly distribute leavening and cocoa. Sifting removes lumps and aerates the mixture for a tender crumb.
Keep this bowl nearby so you can quickly incorporate it into the wet ingredients without overmixing.
Whisk the Wet Ingredients
In a large bowl, whisk together the oil, eggs, buttermilk, vanilla, vinegar, and red food coloring. Mix until completely smooth and uniformly colored.
Guarantee eggs and buttermilk are at room temperature for a stable emulsion. Adjust food coloring gradually to reach a vibrant, not overly dark, red hue.
Combine Wet and Dry Mixtures
Add the dry ingredients to the wet in two additions. Whisk just until a smooth batter forms. Avoid overmixing to preserve a soft, tender crumb.
Scrape the bowl and fold with a rubber spatula to incorporate any pockets of flour. Stop as soon as no dry streaks remain in the batter.
Fill and Settle the Pans
Divide the batter evenly between the prepared pans. Use a scale or eyeball carefully for equal layers. Smooth the tops with an offset spatula.
Tap each pan gently on the counter to release trapped air bubbles. This step promotes even baking and helps prevent doming in the oven.
Bake Until Just Done
Place pans on the center rack and bake 25 to 28 minutes. Check for doneness when centers spring back lightly and a toothpick comes out with a few moist crumbs.
Avoid overbaking to keep the cake moist. Rotate pans once if needed for even browning, but don’t open the oven early.
Cool and Unmold the Layers
Cool cakes in their pans on a wire rack for 10 minutes. Run a knife around the edges, invert onto the rack, and peel off parchment.
Cool completely for about 1 hour. Fully cooled layers are easier to level and frost cleanly. If warm, condensation can soften frosting and cause slipping.
Beat the Cream Cheese and Butter
In a mixing bowl, beat softened cream cheese and butter on medium-high until smooth, creamy, and fluffy, about 2 minutes. Scrape the bowl as needed.
Proper aeration creates a light texture. If your kitchen is warm, chill the bowl briefly to keep the mixture stable and not overly soft.
Finish the Frosting
Add sifted powdered sugar, vanilla, and a pinch of salt. Beat on low until incorporated to avoid a sugar cloud, then increase to medium until smooth and spreadable.
Adjust consistency by chilling briefly if too soft. The frosting should hold soft peaks and spread easily without sliding.
Level, Fill, and Stack
Level the cake tops if needed using a serrated knife. Place one layer on a stand. Spread a generous, even layer of frosting to the edges.
Set the second layer on top, aligning sides. Press gently to secure. Check for level, then scrape any excess frosting from the sides before crumb coating.
Crumb-Coat and Finish Frosting
Apply a thin crumb coat over the sides and top to trap crumbs. Chill for 10 minutes to set.
Apply the final frosting layer smoothly with an offset spatula, rotating the cake for even coverage. Create swirls or smooth finishes as desired. Clean the base edge for a neat, professional look.
Chill, Slice, and Serve
Chill the assembled cake for 20 minutes to set the frosting. Bring to near room temperature before slicing for best texture.
Use a warm, clean knife for tidy slices, wiping between cuts. Serve generously. Store covered in the refrigerator up to 4 days, and refresh at room temperature before serving.
Ingredient Swaps
– No buttermilk: 1 cup whole milk + 1 tbsp white vinegar or lemon juice; rest 5 minutes.
Dairy-free: 1 cup unsweetened soy/almond milk + 1 tbsp vinegar.
- Eggs: 2 flax eggs (2 tbsp ground flax + 6 tbsp water, rest 10 min) or 1/2 cup unsweetened applesauce (slightly denser crumb).
- Oil: Same amount of neutral oil (canola, sunflower) or 1 1/2 cups melted refined coconut oil; budget: 1 1/2 cups mild olive oil; lighter: 1 cup oil + 1/2 cup unsweetened applesauce.
- Cocoa powder: Natural preferred; if using Dutch-process, add extra 1/4 tsp vinegar to keep tang/color.
- Red food coloring: Gel color (use less); natural: beet powder (2–3 tbsp) or red puree (1/4 cup roasted beet puree; reduce buttermilk by 1/4 cup).
Omit for “velvet” cake without red hue.
- Gluten-free: Use a 1:1 gluten-free all-purpose blend with xanthan gum; sift well and don’t overmix.
- Cream cheese: Neufchâtel (lower fat) or plant-based cream cheese; budget: make ermine (flour) frosting instead.
Butter: plant-based stick butter works.
– Sugar: Coconut sugar works in cake (darker crumb); powdered sugar can be made by blitzing granulated sugar with a little cornstarch.
You Must Know
Doneness • If the cake domes or the center feels jiggly at 20 minutes, rotate pans and continue until centers spring back and an instant-read reads 200–205°F; a toothpick should show a few moist crumbs, not wet batter. This guarantees set structure without drying.
Troubleshoot • If layers sink slightly after coming out, extend the next bake by 2–3 minutes or reduce your leavening by 1/8 teaspoon; sinking often signals slight underbake or overaeration. Look for edges pulling 1/8 inch from the pan as a visual cue.
Scale • For a 3-layer 8-inch cake, make 1.5x batter and frosting; fill each pan with about 520–560 g batter and adjust time to 22–26 minutes. This keeps layer thickness consistent for even doneness.
Flavor Boost • For deeper cocoa-tang balance, swap 1 tablespoon of the buttermilk with 1 tablespoon strong brewed coffee or add 1/4 teaspoon almond extract; you should smell a subtle nutty note and slightly rounder chocolate aroma without masking vanilla.
Make-Ahead • To keep crumb ultra-moist, wrap cooled layers tightly and chill up to 24 hours or freeze up to 2 months; thaw wrapped at room temp 1–2 hours. Frosting can be refrigerated 3–4 days—rebeat 30–60 seconds if it looks slightly grainy or slack.
Serving Tips
- Slice chilled, then let stand 20 minutes for the creamiest frosting texture.
- Serve with fresh strawberries or raspberries to brighten the tangy crumb.
- Add a dollop of lightly sweetened whipped cream beside each slice.
- Drizzle plates with warm chocolate or caramel sauce for contrast.
- Pair with coffee, black tea, or a glass of cold buttermilk.
Storage & Make-Ahead
Refrigerate the frosted cake, covered, for up to 4 days.
Bring to room temperature before serving.
Layers can be baked 1–2 days ahead, wrapped and chilled.
Frosting keeps 5 days refrigerated.
For longer storage, wrap unfrosted layers tightly and freeze up to 2 months.
Thaw wrapped in the fridge overnight.
Reheating
Reheat slices gently.
Microwave 10–15 seconds at 50% power.
Oven at 300°F, loosely tented, 8–10 minutes.
Or steam briefly on stovetop, covered, until just warm.
Avoid melting the frosting.
Juneteenth Table Staple
If you’ve warmed a slice just enough to wake up the cocoa and tang, you’ve tasted why this cake belongs on a Juneteenth table. I bring it out bright as a banner—deep red crumb, snowy swirls of cream cheese—because color speaks here.
Red honors resilience; velvet texture whispers celebration. I’m careful with the cocoa’s shadow and the buttermilk’s lift so each bite lands balanced, not cloying, not shy.
Set it among collards, cornbread, and barbecue smoke, and watch it bridge plates and stories. I cut generous squares, pass extra forks, and let the frosting soften just to gloss.
You’ll taste warmth, yes, but also memory—home kitchens, handed-down measures, and a promise sweet enough to share again and again.
Final Thoughts
Ready to bake? Give this Southern Red Velvet Cake a try, and don’t be afraid to tweak the sweetness, food coloring, or frosting style to make it your own!
Frequently Asked Questions
How Do I Convert This Recipe to Cupcakes or a Sheet Cake?
Bake as 24 cupcakes at 350°F for 18–22 minutes, or a 9×13-inch sheet at 350°F for 28–34 minutes. I’d fill cups 2/3 full, rotate halfway, cool completely, then crown with swoops of frosting.
Can I Make It Gluten-Free Without Sacrificing Texture and Rise?
Yes—you can. I’d swap in a quality 1:1 gluten‑free flour with xanthan gum, add 1 tablespoon cornstarch, and beat an extra minute. Let batter rest 10 minutes. Expect tender crumb, buoyant rise, and lush frosting contrast.
What’s the Best Natural Alternative to Red Food Coloring?
Use beet powder—I love its earthy hue and stable color. I mix 1–2 tablespoons into the dry ingredients. For deeper crimson, add a splash of pomegranate juice; it brightens without watering the batter.
How Do Altitude Changes Affect Baking Time and Leavening?
Higher altitude speeds evaporation and makes gases expand, so batters rise faster, then collapse. I reduce leaveners, add a touch more liquid, mix gently, increase oven temp slightly, and bake shorter, watching for set edges and springy centers.
How Can I Prevent Domed or Sinking Cake Layers?
I prevent domed or sinking layers by leveling batter, tapping pans, and baking at 325°F. I avoid overmixing, weigh batter evenly, use bake-even strips, don’t overfill, check doneness early, and cool upside down on racks.
Southern Red Velvet Cake
Equipment
- 2 9-inch round cake pans
- 1 stand mixer or hand mixer
- 3 Mixing bowl
- 1 Whisk
- 1 Rubber spatula
- 1 Wire rack
- 1 offset spatula
- 1 Measuring cups set
- 1 Measuring spoons set
- 1 sifter or fine-mesh sieve
- 1 parchment paper sheet cut into 2 rounds
Ingredients
- 2 1/2 cup all-purpose flour sifted
- 1 1/2 cup granulated sugar
- 1 teaspoon baking soda
- 1 teaspoon fine salt
- 1 tablespoon unsweetened natural cocoa powder
- 1 1/2 cup vegetable oil
- 2 large eggs room temperature
- 1 cup buttermilk room temperature
- 2 teaspoon vanilla extract
- 1 teaspoon white vinegar
- 2 tablespoon red liquid food coloring
- 8 ounce cream cheese softened
- 1/2 cup unsalted butter softened
- 3 cup powdered sugar sifted
- 1 teaspoon vanilla extract for frosting
- fine salt pinch, for frosting
Instructions
- Preheat the oven to 350°F (175°C), grease the cake pans, line with parchment rounds, and lightly flour the sides.
- In a medium bowl whisk together flour, sugar, baking soda, salt, and cocoa powder.
- In a large bowl whisk together oil, eggs, buttermilk, vanilla, vinegar, and red food coloring until smooth.
- Add the dry ingredients to the wet in two additions, whisking just until a smooth batter forms without overmixing.
- Divide batter evenly between the pans and tap each pan gently to release air bubbles.
- Bake for 25 to 28 minutes until the centers spring back and a toothpick comes out with a few moist crumbs.
- Cool cakes in pans on a wire rack for 10 minutes, then invert, remove parchment, and cool completely for 1 hour.
- For the frosting beat cream cheese and butter on medium-high until creamy and fluffy, about 2 minutes.
- Add powdered sugar, vanilla, and a pinch of salt and beat on low to combine then on medium until smooth and spreadable.
- Level cake tops if needed, place one layer on a stand, spread frosting, top with second layer, and frost the sides and top.
- Chill the assembled cake for 20 minutes to set the frosting before slicing.
Notes

Cynthia Weatherford is a seasoned chef and culinary enthusiast who serves as the Recipe creator of Somonday. With decades of experience in the kitchen and a passion for exploring diverse cuisines, Cynthia brings a blend of creativity and technique to every dish. Known for transforming simple ingredients into show-stopping meals, Cynthia believes that cooking is an art form anyone can master. Dedicated to inspiring home cooks, Cynthia shares approachable recipes, pro tips, and culinary wisdom to make every meal memorable.


