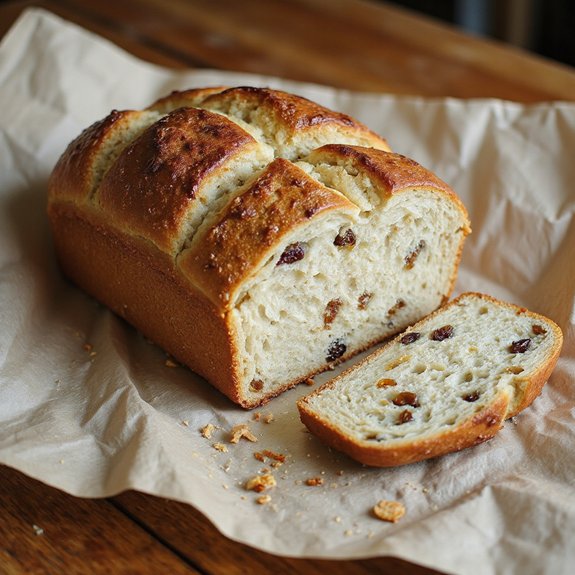
There’s something about a crackling, flour-dusted loaf of sourdough cooling on the counter that makes a kitchen feel like home.
The crust is deep golden and blistered, the interior pale cream with glossy, irregular holes, and the aroma—tangy, toasty, slightly nutty—wraps around you like a blanket.
This is cozy, slow-baked comfort food, not a rush-job dinner; the process stretches over a day, but most of it’s hands-off.
It’s ideal for curious beginners, mindful bakers, and anyone who loves turning simple ingredients into something extraordinary.
I still remember one gray Sunday when a rough week finally caught up with me.
Mixing dough, folding it gently, then hearing that first crackle as the loaf emerged from the oven felt like hitting a reset button.
Sourdough shines at relaxed Sunday suppers, casual gatherings, or quiet mornings with butter and jam.
Ready to bring this loaf to life?
Why You’ll Love It
- Delivers a tender, slightly sweet crumb with gentle sourdough tang
- Makes an impressive loaf with minimal hands-on time and effort
- Uses simple pantry staples plus starter—no commercial yeast needed
- Adapts easily with cinnamon, raisins, or cranberries for variation
- Stays soft for days and toasts beautifully for breakfast or snacks
Ingredients
- 150 g active sourdough starter — 100% hydration and very bubbly
- 250 ml whole milk — lukewarm so it doesn’t shock the starter
- 50 g unsalted butter — melted then cooled to just warm
- 80 g granulated sugar — adds sweetness and tender crumb
- 1 large egg — at room temperature for better mixing
- 450 g bread flour — higher protein for good structure
- 7 g fine sea salt — balances sweetness and strengthens gluten
- 1 tsp vanilla extract — for warm, dessert-like aroma
- 1 tsp ground cinnamon (optional) — adds gentle spice if desired
- 50 g raisins or dried cranberries (optional) — fold in for bursts of sweetness
- 1 tbsp milk — for brushing the top before baking
- 1 tbsp coarse sugar (optional) — sprinkle on top for crunch and sparkle
Step-by-Step Method
Mix the Wet Ingredients
Whisk the lukewarm milk, active sourdough starter, melted and cooled butter, sugar, egg, and vanilla in a large mixing bowl.
Combine until the mixture looks smooth and uniform. Make sure the milk is only slightly warm so it doesn’t weaken the starter.
Set aside while you prepare the dry ingredients in a separate bowl.
Combine the Dry Ingredients
Stir together the bread flour, fine sea salt, and cinnamon (if using) in a small mixing bowl. Mix until the salt and spice are evenly distributed.
This helps prevent pockets of salt and make certain the cinnamon flavors the loaf consistently. Once fully combined, you’re ready to bring both mixtures together into a cohesive dough.
Form a Shaggy Dough
Add the dry ingredients into the wet mixture. Stir with a wooden spoon or dough whisk until no dry flour remains.
Expect a sticky, rough dough at this stage. Scrape down the sides of the bowl as needed. Avoid adding extra flour yet; the dough will strengthen and smooth during resting and folding.
Rest for Autolyse
Cover the bowl with a clean kitchen towel and let the dough rest for 20–30 minutes. Allow the flour to fully hydrate and gluten to begin developing.
Resist the urge to knead during this period. This simple rest makes the dough easier to handle and ultimately improves texture and rise in the finished loaf.
Stretch and Fold the Dough
Perform a series of stretch-and-folds in the bowl for 2–3 minutes. Grab a section of dough, stretch it upward, and fold it over itself.
Rotate the bowl and repeat several times. Feel the dough become smoother and more elastic. Stop once it feels stronger but still soft. Don’t overwork; gentle handling is key.
Add Dried Fruit, If Using
Gently knead or fold in the raisins or dried cranberries. Sprinkle them over the dough and fold repeatedly until evenly distributed.
Avoid aggressive kneading, which can tear the dough and expel gas. Make certain the fruit is well incorporated so each slice contains a pleasant amount without clumping in one area.
Bulk Ferment Until Puffy
Cover the bowl and let the dough bulk ferment at room temperature for 6–8 hours. Wait until it looks roughly doubled, domed, and airy.
Expect slower rising than lean sourdough due to sugar and butter. Adjust time for your kitchen temperature. The dough should feel light and jiggly when gently shaken.
Shape the Dough Gently
Lightly flour your work surface and turn the dough out carefully, preserving gas. Use a bench scraper to help lift and guide it.
Shape into a tight round or log, depending on your baking vessel. Tuck edges underneath to build surface tension. Avoid heavy pressing that could deflate the dough excessively.
Proof in Basket or Bowl
Place the shaped dough seam side up in a lightly floured proofing basket or a bowl lined with a floured kitchen towel. Cover to prevent drying.
Let it proof at room temperature for 1–2 hours, or refrigerate 6–8 hours. A cold proof improves flavor and makes the dough easier to score cleanly before baking.
Preheat the Dutch Oven
About 45 minutes before baking, place your Dutch oven with its lid into the oven. Preheat to 220°C (430°F).
Allow sufficient time for the pot and oven to fully heat. A thoroughly preheated Dutch oven traps steam, helping the loaf rise well and develop a shiny, crisp crust with good color.
Prepare and Score the Loaf
When ready to bake, invert the dough onto a piece of parchment paper, seam side down. Brush the top lightly with milk for a tender, golden crust.
Sprinkle coarse sugar if desired. Score the loaf with a sharp knife or lame. Make confident cuts about 0.5–1 cm deep to control expansion in the oven.
Bake and Cool Completely
Carefully transfer the dough on parchment into the hot Dutch oven and cover with the lid. Bake for 20 minutes, then remove the lid and continue 15–20 minutes more.
Aim for a deep golden brown crust and an internal temperature around 94°C (200°F). Cool on a wire rack at least 1 hour before slicing.
Ingredient Swaps
- Use whole or 2% milk for best softness; dairy-free options like oat or soy milk also work but may yield a slightly denser crumb.
- Substitute up to half the bread flour with all-purpose; for a heartier loaf, swap 10–20% with whole wheat and add 1–2 tbsp extra milk if the dough feels stiff.
- Replace butter 1:1 with a neutral oil or vegan butter; use brown sugar, coconut sugar, or honey (by weight) instead of granulated sugar, knowing honey will make the dough slightly stickier.
You Must Know
– Avoid • To prevent a pale, soft crust, don’t cut the covered time in the Dutch oven short and resist slicing for at least 1 hour after baking; full time under steam plus complete cooling lets the crust dry and set, giving a better chew and color.
Serving Tips
- Serve slightly warm with salted butter and a drizzle of honey or maple syrup.
- Slice thick for French toast; soak well, then griddle in butter and cinnamon.
- Pair with soft cheeses like brie or mascarpone and fresh berries for brunch.
- Toast and top with almond butter, banana slices, and a sprinkle of cinnamon.
- Use for a sweet bread pudding with custard, vanilla, and dried fruit.
Storage & Make-Ahead
Sweet sourdough bread keeps in the fridge for up to 5 days, wrapped tightly or stored in an airtight container to prevent drying out.
For make-ahead, slice and freeze the cooled loaf for up to 2 months.
Toast slices straight from frozen or thaw at room temperature before serving.
Reheating
Reheat slices gently.
Wrap in foil and warm in a 150°C (300°F) oven.
Briefly microwave with a cup of water nearby.
Toast in a covered skillet over low heat.
Sweet Starters in History
Long before we whisk sugar into our sourdough, bakers around the world were already coaxing sweetness from bubbling crocks of starter that perfumed their kitchens like warm honey and toasted grain.
I imagine clay jars tucked near wood stoves, lids askew, as wild yeast slowly transformed milky mash into something tender and fragrant.
When I stir my own starter, I feel linked to those early sweet loaves: Egyptian doughs laced with dates, medieval breads enriched with ale and spice, New England kitchens feeding starters with molasses and warm milk.
They didn’t chase sharp tang; they wanted gentle, lingering sweetness—crumbs that tasted like festival days.
Each feeding was a quiet promise: tomorrow’s bread will rise higher, taste deeper, feel softer.
Final Thoughts
Give this sweet sourdough bread a try and see how beautifully your starter shines in an enriched loaf.
Once you’ve made it once, have fun tweaking it with different spices, dried fruits, or toppings to make it your own.
Frequently Asked Questions
Can I Convert This Sweet Sourdough Into Burger Buns or Dinner Rolls?
Yes, you can. I’d divide the dough into small rounds, let them puff like little pillows, then bake until bronzed and fragrant—soft, tangy–sweet buns perfect for juicy burgers or buttery, steam-kissed dinner rolls.
How Do Altitude Changes Affect Fermentation and Baking Time for This Loaf?
Altitude makes your dough rise faster yet bake slower. I’d watch the dough, not the clock: shorten fermentation, proof until softly domed, then bake longer, savoring the toasty aroma while you check color and hollow sound.
Is This Recipe Suitable for Bread Machines or Stand Mixers?
Yes, you can use both. I’d let a stand mixer knead on low, watching for a silky, windowpane dough. In a bread machine, I’d use “dough” mode only, then bake in a hot, steamy oven.
Can I Add a Filled Swirl, Like Cinnamon Sugar or Chocolate, to This Dough?
Yes, you can. I’d gently roll the dough into a soft rectangle, scatter cinnamon sugar or chocolate, then roll it snugly. You’ll slice into warm, spiraled clouds, streaked with sweetness and fragrant steam.
How Do I Adapt This Recipe for Vegan or Dairy-Free Diets?
You’ll swap milk for creamy oat or soy milk, butter for coconut oil or vegan butter, and egg for 50 g applesauce. I still brush with plant milk; the loaf bakes tender, fragrant, and gently sweet.

Sweet Sourdough Bread
Equipment
- 1 large mixing bowl
- 1 Small mixing bowl
- 1 kitchen scale (optional but preferred)
- 1 wooden spoon or dough whisk
- 1 bench scraper
- 1 proofing basket or medium bowl
- 1 clean kitchen towel
- 1 Dutch oven with lid or loaf pan
- 1 sheet of parchment paper
- 1 sharp knife or bread lame
- 1 wire cooling rack
Ingredients
- 150 gram active sourdough starter 100% hydration
- 250 milliliter whole milk lukewarm
- 50 gram unsalted butter melted and cooled
- 80 gram granulated sugar
- 1 large egg room temperature
- 450 gram bread flour
- 7 gram fine sea salt
- 1 teaspoon vanilla extract
- 1 teaspoon ground cinnamon optional
- 50 gram raisins or dried cranberries optional
- 1 tablespoon milk for brushing
- 1 tablespoon coarse sugar for topping; optional
Instructions
- In a large mixing bowl whisk together the lukewarm milk, active sourdough starter, melted butter, sugar, egg, and vanilla until well combined.
- In a separate bowl mix the bread flour, salt, and cinnamon (if using) until evenly distributed.
- Add the dry ingredients to the wet mixture and stir with a wooden spoon or dough whisk until a shaggy dough forms and no dry flour remains.
- Cover the bowl with a kitchen towel and let the dough rest for 20–30 minutes to hydrate (autolyse).
- After resting, perform a series of stretch-and-folds in the bowl for about 2–3 minutes until the dough feels smoother and more elastic.
- If using raisins or dried cranberries, gently knead or fold them into the dough until evenly incorporated.
- Cover the bowl and let the dough bulk ferment at room temperature for 6–8 hours, or until roughly doubled and puffy.
- Lightly flour your work surface and gently turn the dough out, being careful not to deflate it completely.
- Use a bench scraper and your hands to shape the dough into a tight round or log, depending on your baking vessel.
- Place the shaped dough seam side up in a lightly floured proofing basket or bowl lined with a floured kitchen towel.
- Cover and let the dough proof at room temperature for 1–2 hours, or refrigerate for 6–8 hours for improved flavor and easier scoring.
- About 45 minutes before baking, place a Dutch oven (with lid) in the oven and preheat to 220°C (430°F).
- When ready to bake, place the dough onto a piece of parchment paper seam side down and brush the top lightly with milk.
- Sprinkle coarse sugar on top if desired and score the loaf with a sharp knife or bread lame.
- Carefully transfer the dough with parchment into the preheated Dutch oven, cover with the lid, and bake for 20 minutes.
- Remove the lid and continue baking for another 15–20 minutes, or until the crust is deep golden brown and the internal temperature reaches about 94°C (200°F).
- Lift the bread out of the Dutch oven and place it on a wire rack to cool completely for at least 1 hour before slicing.
Notes

Cynthia Weatherford is a seasoned chef and culinary enthusiast who serves as the Recipe creator of Somonday. With decades of experience in the kitchen and a passion for exploring diverse cuisines, Cynthia brings a blend of creativity and technique to every dish. Known for transforming simple ingredients into show-stopping meals, Cynthia believes that cooking is an art form anyone can master. Dedicated to inspiring home cooks, Cynthia shares approachable recipes, pro tips, and culinary wisdom to make every meal memorable.


