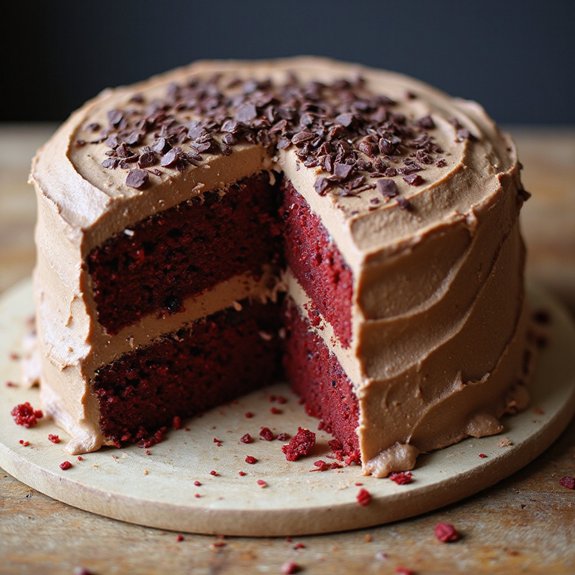
Picture a cake cloaked in plush cocoa frosting, its crimson crumb gleaming against swirls of silky chocolate, releasing a warm aroma of vanilla and coffee-kissed cocoa as you slice.
Imagine the tender layers melting into triple waves of chocolate—melted, studded, and dusted—comfort in every forkful after a long day.
Why this matters to me: red velvet has always been my family’s “we made it” cake—the one we pull out for small victories, big birthdays, and those evenings when we need an edible hug.
This version doubles down on joy with three kinds of chocolate for depth without heaviness, a plush crumb from buttermilk, and a frosting that’s velvety yet balanced.
It’s perfect for busy weeknights when you need a make-ahead dessert, Sunday suppers that deserve a finale, or potlucks where you want guaranteed smiles.
When a chaotic week threatened my daughter’s party, this cake saved the day.
Ready? Let’s cook!
Why You’ll Love It
- Delivers bold chocolate depth with three types of chocolate
- Achieves classic crimson hue without thinning batter
- Bakes into ultra-moist, tender, velvety crumb
- Whips up easily with simple pantry ingredients
- Finishes with lush cocoa-cream cheese frosting
Ingredients
- 2 1/2 cups all-purpose flour, sifted — measure after sifting (unbleached if possible)
- 2 cups granulated sugar — fine granules dissolve evenly
- 3 tablespoons unsweetened natural cocoa powder — not Dutch here for color balance
- 1 teaspoon baking soda — fresh, not clumpy
- 1 teaspoon baking powder — check expiration date
- 1 teaspoon fine salt — finely ground for even dispersion
- 1 1/2 cups buttermilk, room temperature — real cultured for best tang
- 1 cup vegetable oil — neutral flavor (canola or grapeseed)
- 3 large eggs, room temperature — grade A
- 2 teaspoons pure vanilla extract — real vanilla, not imitation
- 1 tablespoon white vinegar — balances color and lift
- 2 tablespoons red gel food coloring — gel type for vivid hue
- 4 ounces semi-sweet chocolate, finely chopped — 55–60% cacao
- 4 ounces milk chocolate, finely chopped — creamy, good-quality bar
- 1/2 cup hot coffee, freshly brewed — enhances chocolate notes
- 1/2 cup mini chocolate chips — toss in a pinch of flour if sinking
- 8 ounces cream cheese, softened — full-fat block style
- 8 tablespoons unsalted butter, softened — room temp but not greasy
- 3 cups powdered sugar, sifted — prevents frosting lumps
- 1/3 cup Dutch-process cocoa powder, sifted — for deep chocolate frosting
- 1 teaspoon pure vanilla extract — for frosting aroma
- 1/4 teaspoon fine salt — balances sweetness in frosting
- 2 tablespoons heavy cream, cold — adjust for spreadable consistency
- 2 ounces dark chocolate, shaved — garnish with a vegetable peeler
Step-by-Step Method
Prep the Pans and Heat the Oven
Preheat the oven to 350°F. Line two 9-inch round cake pans with parchment circles and grease the sides. Dust lightly with cocoa or flour, then tap out excess. Set pans aside on a baking sheet for easy transfer. Prepare a wire rack for cooling later. Gather all tools and measure ingredients before starting.
Combine Dry Ingredients Evenly
Whisk flour, granulated sugar, natural cocoa, baking soda, baking powder, and salt in a large bowl. Sift if lumpy to secure a fine, even texture. Keep the bowl wide to make folding easier later. Create a well in the center to help with mixing. Set aside while you prepare the wet mixture.
Whisk the Wet Base Until Smooth
In a second bowl, whisk buttermilk, vegetable oil, eggs, vanilla, white vinegar, and red gel food coloring. Mix until the color is uniform and the mixture looks glossy. Ensure no streaks of egg remain. Adjust gel color as needed for a deep crimson hue. Keep ingredients at room temperature for best texture.
Melt Chocolates with Hot Coffee
Add chopped semi-sweet and milk chocolate to a heatproof bowl. Pour in freshly brewed hot coffee. Let sit 1 minute, then stir until fully melted and silky. If needed, warm gently over a bain-marie. Cool for 5 minutes so it doesn’t seize the batter. The coffee boosts chocolate flavor without tasting like coffee.
Bring the Batter Together Gently
Pour the wet mixture into the dry ingredients. Mix on low just until no dry streaks remain. Avoid overmixing to keep the crumb tender. Scrape the bowl with a rubber spatula to incorporate edges. The batter should be thick, smooth, and evenly red. Prepare to add the melted chocolate mixture next.
Fold in the Melted Chocolate
Stream the cooled chocolate-coffee mixture into the batter. Fold with a spatula until just incorporated. Don’t beat vigorously or you’ll deflate the batter. Aim for a uniform color and sheen with no swirls. Work quickly to maintain fluidity. Make certain the chocolate is cool to the touch before adding.
Stir in Mini Chocolate Chips
Sprinkle mini chocolate chips over the batter. Fold gently to distribute evenly without overmixing. Reserve a tablespoon if you want to add a few to the top before baking. The chips add pockets of chocolate and texture. Scrape the bowl bottom to catch any settled chips.
Divide Batter and Smooth Tops
Evenly divide the batter between the prepared pans. Weigh pans or use a measuring scoop for accuracy. Smooth tops with an offset spatula to level. Tap pans lightly on the counter to release air bubbles. Rotate pans to ensure even distribution. Work swiftly to maintain rise.
Bake Until Set with Moist Crumbs
Place pans on the center rack and bake for 30 to 35 minutes. Check at 28 minutes. Cakes are done when centers spring back and a tester has a few moist crumbs. Avoid overbaking to retain moisture. Rotate pans once if your oven bakes unevenly. Remove to a rack when ready.
Cool, Release, and Rest the Layers
Cool cakes in pans for 10 minutes. Run a knife around edges. Invert onto a wire rack, peel off parchment, and flip upright. Let cool completely before frosting, about 1 hour. For neater assembly, chill layers briefly. Level domes with a serrated knife if needed.
Beat the Cream Cheese and Butter
In a mixing bowl, beat softened cream cheese and butter on medium until creamy and lump-free, about 2 minutes. Scrape the bowl to ensure uniform texture. Aim for a smooth base before adding dry ingredients. Keep the mixture cool to prevent slack frosting. Switch to low speed for the next step.
Add Cocoa, Sugar, and Flavor
Sift powdered sugar and Dutch-process cocoa over the bowl. Add vanilla and salt. Mix on low until combined to avoid a sugar cloud. Increase to medium-high and beat until fluffy. Drizzle in cold heavy cream to reach a spreadable consistency. Beat just until smooth and billowy.
Stack and Fill the Cake
Place one cooled layer on a board or stand. Spread about 1 cup of frosting evenly over the top, pushing to the edges. Keep the layer level. Set the second layer on top, bottom-side up for a flat surface. Check alignment from all sides. Press gently to secure without squeezing out filling.
Crumb-Coat and Chill to Set
Apply a thin layer of frosting over the top and sides to trap crumbs. Smooth with an offset spatula for even coverage. Chill the cake for 20 minutes to firm the coat. This step secures a clean final finish. Clean tools and prepare garnish while the cake sets.
Finish Frosting and Add Shavings
Apply the final coat of frosting generously. Smooth sides and top with long strokes for a polished look. Create swirls if desired. Garnish with dark chocolate shavings over the top and edges. Wipe the base clean for presentation. Chill briefly if your kitchen is warm.
Slice Cleanly and Serve
Warm a sharp knife under hot water and dry it. Slice with steady downward motions, wiping the blade between cuts. Serve slices at cool-room temperature for the best texture and flavor. Store leftovers covered in the refrigerator for up to 4 days. Let slices soften slightly before enjoying.
Ingredient Swaps
- Dairy-free: Use unsweetened almond or oat milk + 1 tbsp lemon juice per cup as buttermilk; swap cream cheese and butter for plant-based cream cheese and vegan butter; replace heavy cream with coconut cream.
- Egg-free: Substitute 3 large eggs with 3 flax eggs (3 tbsp ground flax + 9 tbsp water, rested 10 minutes).
- Gluten-free: Use a 1:1 gluten-free all-purpose flour blend with xanthan gum; sift well.
- Cocoa/chocolate: If Dutch cocoa isn’t available for frosting, use natural cocoa plus a pinch of espresso powder; for melted chocolates, use all semi-sweet or all milk to simplify; mini chips can be omitted or swapped with chopped chocolate.
- Coloring: If red gel isn’t available, use liquid food color (increase amount) or beet powder (1–2 tbsp) for a natural tint.
- Buttermilk: Swap with 1 1/2 cups milk + 1 1/2 tbsp vinegar or lemon juice; rest 5 minutes.
- Oil: Use neutral oils (canola, sunflower) or 1 cup melted refined coconut oil (room temp).
- Coffee: Replace with equal hot water or hot brewed black tea.
- Budget/availability: Use one type of chocolate throughout, and garnish with cocoa dusting instead of shaved dark chocolate.
You Must Know
- Doneness • If the centers look set but you’re unsure, press lightly; they should spring back and a toothpick should show a few moist crumbs, not wet streaks. Pull at 202–208°F internal to avoid dryness.
- Troubleshoot • If the batter looks pink or too pale after coloring, add 1/2–1 tsp more gel; the shade should be deep lipstick-red in the bowl to stay vivid after 30–35 minutes of heat.
- Avoid • If your chocolate-coffee mixture feels hot to the touch, let it drop below 110°F before adding. Too hot can partially curdle the batter (greasy pockets) and deflate lift.
- Scale • For a 3-layer 6-inch cake, use 2/3 of the recipe (bake ~26–30 min); for a 9×13-inch sheet, use the full recipe (bake ~32–38 min). Visual cue: edges pull 1/8 inch from the pan.
- Flavor Boost • Swap 1 tsp vanilla for 1/2 tsp vanilla + 1/2 tsp espresso powder and add a pinch (1/8 tsp) of fine salt to the frosting at the end; amplifies cocoa notes and balances sweetness without tasting “coffee.”
Serving Tips
- Serve slices with a dollop of lightly sweetened whipped cream.
- Pair with cold milk, espresso, or a ruby port for richness.
- Plate with fresh raspberries and a drizzle of warm chocolate sauce.
- Add a scoop of vanilla bean or salted caramel ice cream.
- Garnish plates with cocoa dust and extra dark chocolate shavings.
Storage & Make-Ahead
Refrigerate covered for up to 4 days.
Let slices sit 20–30 minutes at room temp before serving for best texture.
Cake layers can be baked a day ahead, wrapped, and chilled.
Frosting keeps 1 week refrigerated.
The whole cake or unfrosted layers freeze well up to 2 months.
Thaw overnight.
Reheating
Reheat slices gently.
Microwave 50% power 15–25 seconds, covered.
Oven: wrap in foil, 300°F, 8–10 minutes.
Stovetop: steam slice over simmering water 3–5 minutes.
Avoid overheating to prevent drying.
Juneteenth Bake-Sale Staple
Joy meets remembrance when I bring this Triple Chocolate Red Velvet Cake to a Juneteenth bake sale—it’s a showstopper that honors tradition while leaning into bold, celebratory flavor.
I set it down and watch eyes light up: deep crimson crumb, glossy cocoa frosting, a snowfall of dark chocolate shavings.
It nods to red’s symbolism while delivering pure pleasure.
For bake-sale ease, I bake the layers a day ahead, wrap them tight, and frost the morning of.
I pre-slice with a warm knife for clean edges and tidy portions—twelve generous, fundraiser-friendly slices.
A small sign lists buttermilk, cocoa, and cream cheese frosting, plus the triple-chocolate twist.
Serve at cool room temperature so the crumb stays tender, the frosting silky, and every bite tastes like celebration.
Final Thoughts
Ready to bake? Give this Triple Chocolate Red Velvet Cake a try and make it your own—swap in your favorite chocolates, adjust the cocoa for more depth, or add a hint of espresso for extra richness.
Can’t wait to hear how you customize it!
Frequently Asked Questions
Can I Bake This as Cupcakes Instead of a Layer Cake?
Yes—you can. I’d portion the batter into lined tins, two-thirds full, and bake at 350°F for 18–22 minutes. I’ll cool them completely, then swirl on frosting; the crumb stays tender, the chocolate sings.
How Do I Convert This Recipe for High-Altitude Baking?
Bake at 375°F, reduce sugar 2 tablespoons, increase flour 2 tablespoons, add 2 tablespoons buttermilk, and 1/4 teaspoon extra baking soda. Mix gently, don’t overbake; expect quicker set. I’ll watch domes rise like little mountains, then cool completely.
What’s the Best Way to Transport the Frosted Cake Safely?
Chill it well, box it snug in a cake carrier, and wedge with non-slip mat. I’ll drive like it’s glass: flat surface, cool car, slow turns. Bring repairs—offset spatula, extra frosting, napkins, and a serrated knife.
Which Tools Help Achieve Ultra-Smooth Frosting Edges?
Use a tall metal bench scraper, offset spatula, and turntable. I chill the crumb coat, warm the tools, and glide confidently. A parchment or acetate collar helps tame sides; a hot knife finishes edges like glass.
Can I Freeze the Unfrosted Layers for Longer Than a Month?
Yes—you can freeze unfrosted layers up to 2–3 months. I double-wrap in plastic, then foil, press out air, and label. Thaw overnight in the fridge, unwrapped in the last hour so condensation evaporates.

Triple Chocolate Red Velvet Cake
Equipment
- 2 9-inch round cake pan
- 1 stand mixer or hand mixer
- 3 Mixing bowl
- 1 Whisk
- 1 Rubber spatula
- 1 Wire rack
- 1 offset spatula
- 1 Measuring cups set
- 1 Measuring spoons set
- 1 Fine mesh sieve
- 1 parchment paper sheet
- 1 Cooling rack
Ingredients
- 2 1/2 cup all-purpose flour sifted
- 2 cup granulated sugar
- 3 tablespoon unsweetened cocoa powder natural
- 1 teaspoon baking soda
- 1 teaspoon baking powder
- 1 teaspoon fine salt
- 1 1/2 cup buttermilk room temperature
- 1 cup vegetable oil
- 3 large eggs room temperature
- 2 teaspoon pure vanilla extract
- 1 tablespoon white vinegar
- 2 tablespoon red gel food coloring
- 4 ounce semi-sweet chocolate finely chopped
- 4 ounce milk chocolate finely chopped
- 1/2 cup hot coffee freshly brewed
- 1/2 cup mini chocolate chips
- 8 ounce cream cheese softened
- 8 tablespoon unsalted butter softened
- 3 cup powdered sugar sifted
- 1/3 cup Dutch-process cocoa powder sifted
- 1 teaspoon pure vanilla extract
- 1/4 teaspoon fine salt
- 2 tablespoon heavy cream cold
- 2 ounce dark chocolate shaved, garnish
Instructions
- Preheat the oven to 350°F and line two 9-inch round cake pans with parchment and grease the sides.
- In a large bowl whisk flour, granulated sugar, natural cocoa, baking soda, baking powder, and salt until evenly combined.
- In a second bowl whisk buttermilk, oil, eggs, vanilla, vinegar, and red gel coloring until smooth and uniformly red.
- Pour the wet ingredients into the dry ingredients and mix on low just until combined with no dry streaks.
- Combine chopped semi-sweet chocolate, milk chocolate, and hot coffee in a heatproof bowl and stir until melted and smooth then cool 5 minutes.
- Fold the melted chocolate mixture into the batter until just incorporated.
- Fold in mini chocolate chips, then divide the batter evenly between the prepared pans and smooth the tops.
- Bake for 30 to 35 minutes until the centers spring back and a tester comes out with a few moist crumbs.
- Cool cakes in pans 10 minutes, then turn out onto a wire rack, peel parchment, and cool completely.
- Beat cream cheese and butter on medium until creamy and lump-free, about 2 minutes.
- Add powdered sugar, Dutch cocoa, vanilla, and salt, then beat on low to combine and on medium-high until fluffy, adding cream to reach spreadable consistency.
- Level cake layers if needed, place one layer on a board, spread 1 cup frosting over the top, and place the second layer over it.
- Crumb-coat the cake with a thin layer of frosting and chill for 20 minutes to set.
- Apply the final coat of frosting smoothly with an offset spatula and garnish with dark chocolate shavings.
- Slice with a warm knife and serve.
Notes

Cynthia Weatherford is a seasoned chef and culinary enthusiast who serves as the Recipe creator of Somonday. With decades of experience in the kitchen and a passion for exploring diverse cuisines, Cynthia brings a blend of creativity and technique to every dish. Known for transforming simple ingredients into show-stopping meals, Cynthia believes that cooking is an art form anyone can master. Dedicated to inspiring home cooks, Cynthia shares approachable recipes, pro tips, and culinary wisdom to make every meal memorable.


