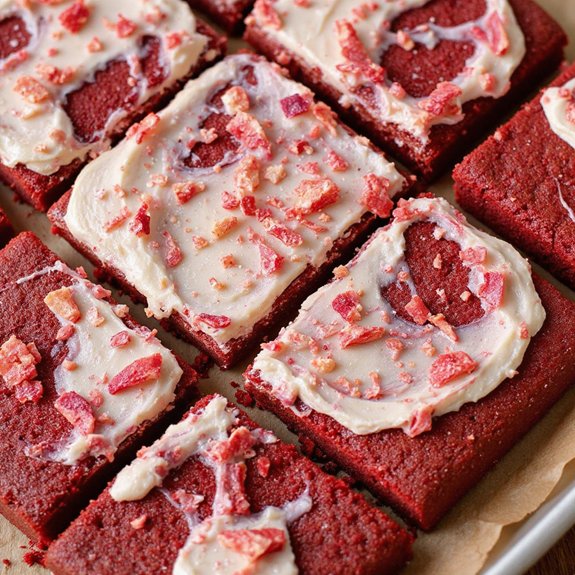
Picture a tray of deep-red squares crowned with snowy swirls of cream cheese frosting, the cocoa’s gentle aroma meeting the tang of buttermilk as you lift a piece that’s tender, plush, and impossibly moist.
Imagine that first bite: a soft crumb that melts into velvety richness, the frosting’s light sweetness balancing a whisper of chocolate—comfort you can hold in your hand.
Red velvet has always been my shortcut to celebration; when a last-minute guest list doubled, this one-pan batch baked up fast, sliced clean, and made everyone feel looked after.
These cake squares fit beautifully into real life—bake-ahead treats for busy weeknights, tidy desserts for school events, or a sweet finish to slow Sunday suppers.
They’re unfussy, portable, and reliably gorgeous, with just enough nostalgia to feel special and just enough ease to make often.
I’ll walk you through every step so yours turn out ultra moist and vibrant.
Ready? Let’s cook!
Why You’ll Love It
- Delivers bold flavor with cocoa, vanilla, and tangy buttermilk
- Stays ultra moist thanks to hot-water cocoa bloom technique
- Mixes quickly in one bowl; minimal equipment and cleanup
- Slices cleanly into sturdy squares; perfect for sharing
- Crowd-pleasing cream cheese frosting balances sweetness and tang
Ingredients
- 1.5 cups all-purpose flour — spoon and level for accuracy
- 1 cup granulated sugar — fine, free-flowing crystals
- 0.5 teaspoon baking soda — fresh, not clumpy
- 0.5 teaspoon fine salt — evenly seasons the crumb
- 1 tablespoon unsweetened cocoa powder — natural style for classic tang
- 0.75 cup buttermilk, room temperature — full-fat for tenderness
- 0.5 cup neutral oil (canola or vegetable) — keeps crumb ultra moist
- 2 large eggs, room temperature — for better emulsification
- 1 teaspoon vanilla extract — pure, not imitation
- 1 teaspoon white vinegar — reacts with cocoa and leavening
- 1 tablespoon red liquid food coloring (or 2–3 teaspoons gel) — adjust for deep red
- 0.25 cup hot water — blooms cocoa and loosens batter
- 4 ounces cream cheese, softened — block style for best texture
- 2 tablespoons unsalted butter, softened — brings frosting together
- 1.25 cups powdered sugar, sifted — lump-free, fluffy frosting
- 0.5 teaspoon vanilla extract (for frosting) — smooth aroma
- 1 pinch fine salt (for frosting) — balances sweetness
Step-by-Step Method
Line the Pan and Preheat
Preheat oven to 350°F (175°C). Line a 9×9-inch pan with parchment, leaving overhangs for lifting. Lightly grease the exposed sides. Set a wire rack nearby for cooling. Gather tools and measure ingredients. Make sure buttermilk and eggs are at room temperature for a tender crumb and even mixing.
Whisk the Dry Ingredients
In a large bowl, whisk flour, sugar, baking soda, salt, and cocoa until evenly combined. Break up any cocoa clumps. Keep the mixture airy—do not compact it. Set aside.
This guarantees even leavening and consistent color. Proper dry mixing prevents pockets of flour in the batter later.
Blend the Wet Mixture
In a separate bowl, whisk buttermilk, oil, eggs, vanilla, vinegar, and red food coloring until smooth. Aim for a uniform deep red hue. Adjust coloring as needed, especially if using gel. Make sure no streaks remain.
The vinegar boosts lift and tang, classic to red velvet.
Combine Wet and Dry Gently
Pour the wet mixture into the dry ingredients. Whisk or mix on low just until a few faint streaks of flour remain. Don’t overmix. Keep the batter light to avoid developing gluten.
Scrape the bowl sides and bottom with a spatula to capture any pockets of dry mix.
Bloom with Hot Water
Stir in the hot water until the batter is smooth and slightly fluid. Mix briefly and gently. The heat blooms the cocoa, enhancing flavor and color while locking in moisture.
Avoid vigorous mixing. The batter should pour easily but not feel thin or watery.
Fill the Pan and Smooth
Immediately pour the batter into the prepared pan. Use a rubber spatula to spread and level the surface for even baking. Tap the pan lightly on the counter to pop large air bubbles.
Work promptly to take advantage of the activated leavening.
Bake Until Just Set
Bake 26 to 30 minutes. Check at 26 minutes. Insert a toothpick into the center; it should come out with a few moist crumbs, not wet batter. Rotate the pan if needed for even baking.
Avoid overbaking to keep the squares ultra moist and tender.
Cool and Release Cleanly
Cool the pan on a wire rack for 20 minutes. Lift the cake out using the parchment overhangs. Set it on the rack and cool completely for at least 40 minutes.
Don’t frost warm cake. Full cooling prevents melting and ensures a clean, sturdy crumb.
Beat the Cream Cheese Frosting
Beat softened cream cheese and butter until creamy and lump-free. Add sifted powdered sugar, vanilla, and a pinch of salt. Beat until fluffy and spreadable.
Adjust consistency with a teaspoon of powdered sugar if too soft. Keep frosting smooth for neat slicing.
Frost, Chill Briefly, and Slice
Spread frosting evenly over the cooled cake. Chill 10 to 15 minutes to set the surface. For sturdier bars, chill 30 minutes.
Wipe a sharp knife between cuts and slice into 16 squares. Serve at room temperature. Store covered in the fridge up to 4 days.
Ingredient Swaps
- Buttermilk: 3/4 cup milk + 2 tsp white vinegar or lemon juice (rest 5 minutes), or 3/4 cup plain kefir/yogurt thinned with 1–2 tbsp water.
- Neutral oil: same amount melted butter, light olive oil, or coconut oil (expect slightly denser crumb with butter/coconut).
- Eggs (2): replace with 1/2 cup unsweetened applesauce + 1 tsp additional vinegar, or 2 flax eggs (2 tbsp ground flax + 6 tbsp water).
- Cocoa powder: natural unsweetened works best; in a pinch, Dutch-process is fine since vinegar/buttermilk provide acid.
- Red food coloring: use gel for stronger color; natural options include beet powder (1–2 tbsp) or reduced beet juice—color will be more muted.
- Gluten-free: swap flour 1:1 with a good GF all-purpose blend that contains xanthan gum.
- Dairy-free: use unsweetened dairy-free milk + vinegar for buttermilk, plant oil as written, and a vegan cream cheese and butter for frosting.
- Sugar: substitute 1:1 with coconut sugar (darker flavor) or 3/4 cup plus 2 tbsp light brown sugar (be sure to break up lumps).
- Cream cheese frosting: if unavailable, make a simple buttercream (1/2 cup butter + 1.5–2 cups powdered sugar + 1 tsp vanilla + pinch salt + 1–2 tbsp milk).
You Must Know
- Doneness • If the center looks set but edges domed or pulling away early, tent loosely with foil and continue 3–5 minutes until a toothpick shows moist crumbs, not wet streaks; prevents dry edges and underdone middle.
- Troubleshoot • When the batter looks thick like pancake batter (not “slightly fluid”), add 1–2 teaspoons hot water and fold just to loosen; thick batter can tunnel and bake up dense—aim for ribboning off the spatula in a slow pour.
- Flavor Boost • For deeper cocoa notes without losing red, bloom 1 extra teaspoon cocoa in 1 tablespoon hot water, then increase gel color by 1/2–1 teaspoon; balances chocolate and hue while keeping volume constant.
- Scale • To serve 24–25 squares, use a 9×13-inch pan and increase all ingredients by 1.5×; bake about 28–34 minutes, checking at 26—visual cue is a flat, matte top with tiny pores and a springy center.
- Make-Ahead • For cleaner cuts and sturdier texture for transport, chill the frosted slab 30–45 minutes until the frosting firms to the touch, then slice with a hot, dry knife, wiping between cuts; keeps edges sharp and bars intact.
Serving Tips
- Serve slightly chilled, then let sit 10 minutes for the creamiest texture.
- Top each square with fresh raspberries and a dusting of powdered sugar.
- Pair with cold milk, hot coffee, or a lightly sweetened black tea.
- Add a dollop of whipped cream and chocolate shavings for flair.
- Plate with a drizzle of raspberry coulis or white chocolate sauce.
Storage & Make-Ahead
Refrigerate covered up to 4 days; bring to room temperature before serving for best texture.
Make cake a day ahead and frost day-of, or bake, cool, and wrap unfrosted overnight.
Freezes well: wrap unfrosted squares tightly and freeze up to 2 months; thaw in fridge, then frost and serve.
Reheating
Reheat gently: microwave single squares 10–15 seconds at 50% power.
Oven 300°F, covered, 8–10 minutes.
Stovetop steam slices briefly.
Avoid overheating frosting—bring to room temperature before warming.
Juneteenth Potluck Favorite
Once those warm squares are gently warmed or brought to a soft room temp, I love carrying them to a Juneteenth potluck like a crimson gift—velvety crumb, snowy swirls of cream cheese frosting, and a whisper of cocoa blooming through.
The color glows against summer sunlight, a cheerful nod to celebration and resilience. I tuck the pan in a cool tote, edges neatly cut, frosting set just enough to travel.
When I lift the parchment and present the platter, you’ll catch that soft butter-vanilla scent first.
One bite: plush crumb, tang from buttermilk and vinegar, mellow cocoa, and a creamy swoon of frosting. They disappear between laughter, grilled smoke drifting by, ice clinking in cups.
Simple, shareable, and utterly welcome—sweet comfort in bright red squares.
Final Thoughts
Ready to bake? Give these ultra moist red velvet cake squares a try, and feel free to tweak the color, cocoa, or frosting sweetness to make them your own!
Frequently Asked Questions
Can I Make This Recipe Gluten-Free Without Sacrificing Texture?
Yes—you can. I swap in a 1:1 gluten-free flour blend with xanthan gum, sift it, and keep the hot-water bloom. The batter stays silky, the crumb tender, and the frosted squares taste plush and velvety.
What’s the Best Natural Alternative to Red Food Coloring?
Beet powder’s my favorite; it tints batter a warm, earthy crimson without off-flavors. I whisk 1–2 tablespoons into the dry mix. For deeper hue, add a touch of pomegranate juice—ruby ripples, gentle sweetness, no synthetic glare.
How Do Altitude Adjustments Affect Baking Time and Leavening?
Altitude speeds evaporation and expansion, so I bake longer, lower leaveners slightly, add a touch more liquid, and boost oven temp 15–25°F. You’ll hear batter whisper thinner, smell sugars toast deeper, and slice tender, sky-light crumbs.
Can I Convert This Into Cupcakes or a Layer Cake?
Yes—you can. I’d fill 12 cupcake liners two-thirds full, bake 18–22 minutes. For a layer cake, divide into two 8-inch pans, bake 22–28 minutes. I’ll frost generously, letting silky swirls cradle each tender crumb.
How Do I Prevent Cream Cheese Frosting From Becoming Runny?
Chill your ingredients, sift sugar, and don’t overbeat. I use full-fat cream cheese, a touch of cornstarch or extra sugar, and chill the bowl. Frost slowly; the frosting firms like morning frost on windowpanes—lush, stable, dreamy.

Ultra Moist Red Velvet Cake Squares
Equipment
- 1 9×9 inch baking pan
- 2 Mixing bowl
- 1 Whisk
- 1 hand mixer or stand mixer
- 1 Rubber spatula
- 1 Measuring cups set
- 1 Measuring spoons set
- 1 Wire rack
- 1 parchment paper sheet
- 1 toothpick
Ingredients
- 1 1/2 cup all-purpose flour
- 1 cup granulated sugar
- 1/2 teaspoon baking soda
- 1/2 teaspoon fine salt
- 1 tablespoon unsweetened cocoa powder
- 3/4 cup buttermilk room temperature
- 1/2 cup neutral oil such as canola or vegetable
- 2 large eggs room temperature
- 1 teaspoon vanilla extract
- 1 teaspoon white vinegar
- 1 tablespoon red liquid food coloring or 2 to 3 teaspoons gel
- 1/4 cup hot water
- 4 ounce cream cheese softened
- 2 tablespoon unsalted butter softened
- 1 1/4 cup powdered sugar sifted
- 1/2 teaspoon vanilla extract for frosting
- 1 pinch fine salt for frosting
Instructions
- Preheat the oven to 350°F (175°C), line a 9×9-inch pan with parchment with overhangs, and lightly grease the sides.
- In a large bowl whisk together flour, sugar, baking soda, salt, and cocoa powder until evenly combined.
- In a separate bowl whisk buttermilk, oil, eggs, vanilla, vinegar, and red food coloring until smooth and uniformly colored.
- Pour the wet mixture into the dry ingredients and mix with a whisk or mixer on low just until a few streaks of flour remain.
- Stir in the hot water until the batter is smooth and slightly fluid, avoiding overmixing.
- Immediately pour the batter into the prepared pan and smooth the top with a spatula.
- Bake for 26 to 30 minutes until a toothpick inserted in the center comes out with a few moist crumbs.
- Cool the pan on a wire rack for 20 minutes, then lift the cake out using the parchment and cool completely for at least 40 minutes.
- For the frosting, beat cream cheese and butter until creamy, then add powdered sugar, vanilla, and a pinch of salt and beat until fluffy.
- Spread the frosting evenly over the cooled cake, chill 10 to 15 minutes to set, and cut into 16 squares with a clean sharp knife.
Notes

Cynthia Weatherford is a seasoned chef and culinary enthusiast who serves as the Recipe creator of Somonday. With decades of experience in the kitchen and a passion for exploring diverse cuisines, Cynthia brings a blend of creativity and technique to every dish. Known for transforming simple ingredients into show-stopping meals, Cynthia believes that cooking is an art form anyone can master. Dedicated to inspiring home cooks, Cynthia shares approachable recipes, pro tips, and culinary wisdom to make every meal memorable.


