There’s something about rolling smooth, vanilla-scented dough between your palms that feels instantly calming.
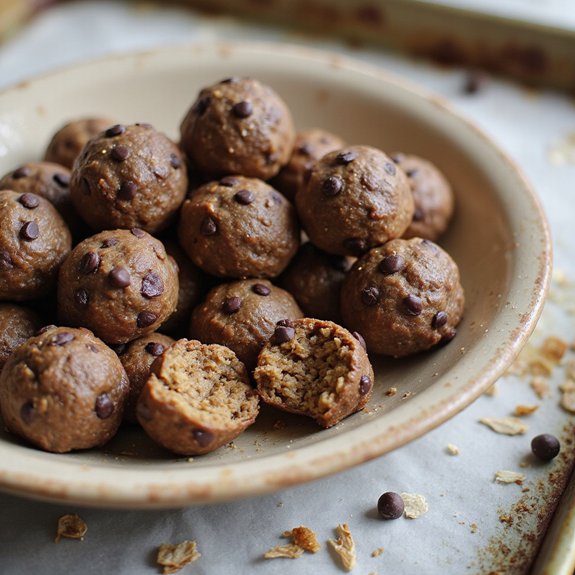
These vanilla protein balls are a no-bake, grab-and-go snack: soft and chewy inside, lightly sweet, with a hint of warmth from vanilla and a satisfying, nutty backbone.
They come together in minutes—no oven, no fuss—making them perfect for busy weekdays, beginners in the kitchen, and dedicated meal-preppers who like their snacks lined up and ready.
I still remember a hectic Monday when back-to-back meetings meant lunch never quite happened.
A small container of these tucked in my bag saved the afternoon. Two bites later, that gentle vanilla aroma and tender texture felt like a deep breath I didn’t have time to take.
They shine during rushed mornings, post-workout refuels, school snacks, and late-night cravings when you want something nourishing but still a little cozy. Ready to bring this dish to life?
Why You’ll Love It
- Delivers classic vanilla flavor with a satisfying, cookie-dough-like texture
- Packs in protein, fiber, and healthy fats for lasting energy
- Comes together in one bowl with simple pantry ingredients
- Requires no baking, just mix, roll, and chill
- Stores and freezes well for easy grab-and-go snacks
Ingredients
- 1½ cups rolled oats — use old-fashioned oats for best texture
- 1 cup vanilla protein powder — choose a brand you like the taste of
- ½ cup natural peanut butter, creamy — “drippy” style helps mixture bind
- ¼ cup honey — adjust slightly to match sweetness of your protein powder
- ¼ cup unsweetened shredded coconut — adds chew and mild coconut flavor
- 2 tablespoons ground flaxseed — for extra fiber and healthy fats
- 1 teaspoon vanilla extract — boosts the vanilla flavor of the protein powder
- ¼ teaspoon fine sea salt — balances sweetness and enhances flavor
- 2–4 tablespoons water — add gradually until mixture just holds together
Step-by-Step Method
Prep the Tray
Line a baking sheet or large plate with parchment paper or a silicone mat.
Make sure it lies flat so the balls don’t roll around. Set the tray aside near your work area.
This will be where you place the formed protein balls before chilling them in the refrigerator to firm up.
Combine the Dry Ingredients
Add rolled oats, vanilla protein powder, shredded coconut, ground flaxseed, and fine sea salt to a medium mixing bowl.
Stir thoroughly with a wooden spoon or spatula.
Distribute the ingredients evenly so every bite has the same texture and flavor. Break up any clumps of protein powder as you mix.
Add the Wet Ingredients
Spoon the natural peanut butter into the bowl, then drizzle in the honey. Add the vanilla extract.
Place the peanut butter and honey on different spots in the bowl to help them spread more easily.
These ingredients act as both sweeteners and binders, helping the dry mixture come together smoothly.
Mix Until Clumpy
Stir the mixture vigorously with your spoon or spatula. Press the wet ingredients into the dry ones, scraping the sides and bottom of the bowl as you go.
Continue until the mixture starts to clump together. It should look crumbly but slightly sticky, with no big pockets of dry oats or powder left.
Adjust with Water
Add water 1 tablespoon at a time. Stir after each addition to see how the texture changes.
Stop as soon as the mixture holds together when pressed between your fingers.
Avoid adding too much water, which can make the mixture sticky and hard to roll into neat, compact balls.
Scoop the Portions
Use a tablespoon or small cookie scoop to portion the mixture. Level off each scoop for evenly sized balls.
Drop each portion onto the prepared, lined tray. Space them slightly apart so you have room to roll them later.
Continue scooping until you have used all of the mixture in the bowl.
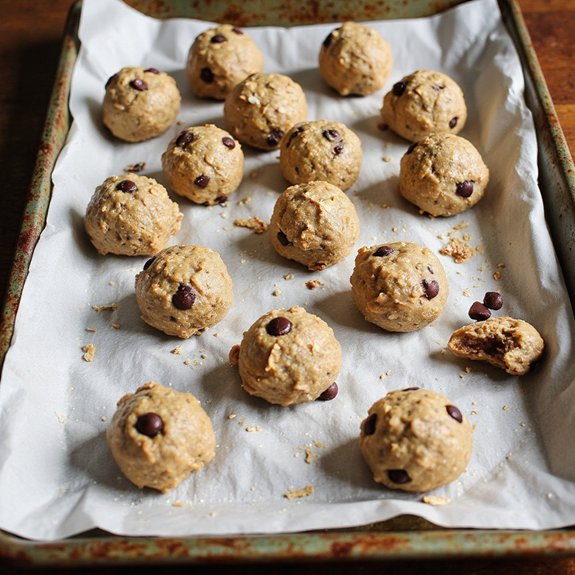
Roll into Balls
Lightly oil your hands if the mixture feels sticky. Pick up each portion and roll it between your palms to form a smooth, compact ball.
Apply gentle pressure to help the mixture bind. Place each finished ball back on the lined tray. Repeat this process until every scoop is shaped.
Chill to Firm Up
Transfer the tray of rolled protein balls to the refrigerator. Chill them for at least 30 minutes.
Allowing this resting time helps the balls firm up and hold their shape.
Once they’re set, they’ll be easier to handle, pack, and store without squishing or falling apart.
Store and Serve
Move the chilled protein balls into an airtight container, stacking them gently.
Store the container in the refrigerator to keep them fresh and firm. Enjoy them straight from the fridge as a quick snack.
For longer storage, freeze them and thaw briefly at room temperature before eating.
Ingredient Swaps
- Nut-free: Swap peanut butter for sunflower seed butter or tahini; make sure they’re “natural” and runny so the mixture isn’t dry.
- Dairy-free: Use a plant-based vanilla protein powder and confirm your chocolate/chips (if adding) are dairy-free.
- Budget/availability: Rolled oats can be replaced with quick oats; ground flaxseed can be swapped for chia seeds or omitted with a tablespoon or two more oats.
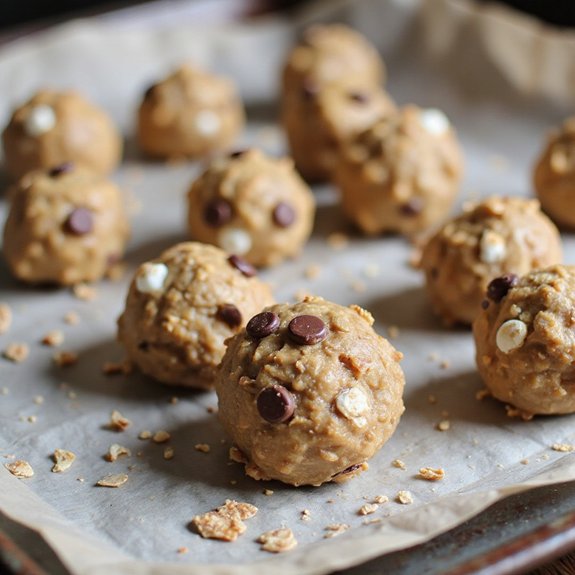
- Flavor tweaks: Use almond or cashew butter instead of peanut, maple syrup instead of honey (vegan), and add cinnamon or a few tablespoons of mini chocolate chips for variation.
You Must Know
– Troubleshoot • If the mixture feels crumbly and won’t hold a ball shape
Add 1–2 teaspoons of water at a time and press some in your fingers; it’s ready when a squeezed bit stays in a clump with only a few oat flecks falling off (usually around the 3–4 tablespoon water mark). This prevents dry, chalky balls.
– Troubleshoot • If the mixture is sticky and glues to your hands
Work in 1–2 extra tablespoons of oats or 1 tablespoon of protein powder, then lightly oil your palms and roll again; the surface should feel tacky, not wet, and leave almost no residue on your fingers. This keeps the balls shapely and easy to store.
– Flavor Boost • For more vanilla-cookie flavor
Add ½–1 teaspoon extra vanilla and a small pinch more salt (up to ⅜ teaspoon total) and taste a pinch of the dough; it should smell like vanilla oatmeal cookies and taste slightly sweeter than you want, since flavor dulls a bit when chilled. This balances protein powder’s dullness.
– Scale • When doubling or halving the recipe
Keep the water flexible instead of multiplying exactly—start with half the listed range and adjust by feel until the mixture presses into cohesive clumps. Different batch sizes and protein brands hydrate differently, so this avoids gummy or dry results.
– Make-Ahead • To keep texture ideal for days
Chill on the tray until firm (about 30–45 minutes), then move to an airtight container and enjoy within 5–7 days refrigerated; for freezing, limit storage to about 2 months and thaw 5–10 minutes at room temp so the centers aren’t icy-firm when you bite.
Serving Tips
- Serve chilled in mini cupcake liners for a neat, bite‑size snack tray.
- Pair with Greek yogurt and fresh berries for a higher‑protein breakfast.
- Pack in small snack bags with apple slices or grapes for on‑the‑go fuel.
- Arrange on a board with nuts, dark chocolate, and dried fruit for a “snack charcuterie.”
- Crumble over smoothie bowls or oatmeal as a protein‑packed topping.
Storage & Make-Ahead
Store vanilla protein balls in an airtight container in the refrigerator for up to 1 week.
They’re perfect for making ahead; prep a batch on Sunday for grab-and-go snacks.
They also freeze well for 2–3 months—freeze on a tray first, then transfer to a container or bag.
Reheating
For a gentle warm-up, briefly microwave 1–2 protein balls on low power.
Or place them on a low-heat oven tray.
Avoid stovetop reheating.
Direct pan heat can dry or scorch them.
Protein Balls in Pop Culture
From fitness vlogs to cozy “what I eat in a day” reels, I keep spotting little containers of vanilla protein balls popping up like supporting characters in a food-obsessed movie.
They’re tucked into gym bags, perched beside laptops, passed across car consoles like secret handshakes of the wellness world.
I still remember pausing a video because the creator casually grabbed a protein ball between Zoom calls, like it was as essential as her laptop charger.
Suddenly, these bites weren’t just snacks; they were props in a busy-but-balanced lifestyle.
When I roll my own batch, I feel that same cinematic energy—cool tray, parchment rustling, the quiet promise that I’ll have something small, sweet, and steadying waiting in the wings.
Final Thoughts
Give these vanilla protein balls a try and see how easy it’s to whip up a satisfying snack in minutes. Feel free to tweak the mix-ins or nut butter to make them perfectly your own!
Frequently Asked Questions
Can I Make These Protein Balls Without Any Added Sweeteners Like Honey?
Yes, you can. I’d skip the honey, then add a splash more water and a bit more peanut butter. When I do this, I taste as I go so the texture stays chewy, not crumbly.
How Do I Calculate the Exact Macros per Protein Ball Serving?
You’ll add each ingredient’s calories, protein, carbs, and fat, divide totals by 16 balls, then per your serving size. I do this with a nutrition calculator app—watching numbers shift feels oddly satisfying.
Can I Ship These Protein Balls Through the Mail Safely?
You can mail them, but I’d treat them like fragile little comets of nutty sweetness—pack tight, insulate with cold packs, ship fast. I’ve had them arrive fine after two days, but never in blazing heat.
What Type of Protein Powder Works Best for a Low-Carb Version?
Use a whey or egg white protein powder that’s unsweetened or sweetened with stevia or monk fruit. When I do this, I can almost taste the carbs disappearing while the vanilla and peanut butter melt together.
Vanilla Protein Balls
Equipment
- 1 medium mixing bowl
- 1 Wooden spoon or spatula
- 1 set measuring cups
- 1 set measuring spoons
- 1 baking sheet or plate
- 1 sheet parchment paper or silicone mat
- 1 airtight container
Ingredients
- 1 1/2 cup rolled oats
- 1 cup vanilla protein powder
- 1/2 cup natural peanut butter creamy
- 1/4 cup honey
- 1/4 cup unsweetened shredded coconut
- 2 tablespoon ground flaxseed
- 1 teaspoon vanilla extract
- 1/4 teaspoon fine sea salt
- 1 2–4 tablespoons water as needed
Instructions
- Line a baking sheet or plate with parchment paper or a silicone mat.
- Add rolled oats, vanilla protein powder, shredded coconut, ground flaxseed, and sea salt to a medium mixing bowl and stir to combine.
- Add peanut butter, honey, and vanilla extract to the dry ingredients.
- Stir with a wooden spoon or spatula until the mixture begins to clump together.
- Add water 1 tablespoon at a time, stirring after each addition, until the mixture holds together when pressed between your fingers.
- Scoop out portions of the mixture using a tablespoon or small cookie scoop.
- Roll each portion between your palms to form smooth balls and place them on the prepared baking sheet.
- Continue until all of the mixture is rolled into balls.
- Refrigerate the protein balls for at least 30 minutes to firm up.
- Transfer the chilled protein balls to an airtight container and store in the refrigerator until serving.
Notes

Cynthia Weatherford is a seasoned chef and culinary enthusiast who serves as the Recipe creator of Somonday. With decades of experience in the kitchen and a passion for exploring diverse cuisines, Cynthia brings a blend of creativity and technique to every dish. Known for transforming simple ingredients into show-stopping meals, Cynthia believes that cooking is an art form anyone can master. Dedicated to inspiring home cooks, Cynthia shares approachable recipes, pro tips, and culinary wisdom to make every meal memorable.