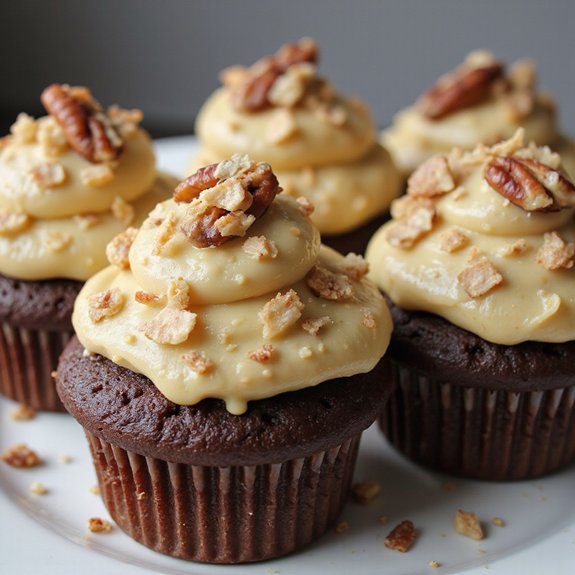
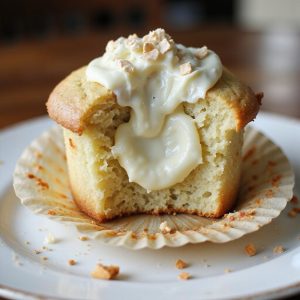
There’s something about breaking into a cupcake and finding a surprise pool of silky, ivory-white filling that makes everything slow down for a second.
This white chocolate cupcake filling is a cozy dessert component—velvety, glossy, and sweet without being cloying.
It comes together quickly on the stovetop, then chills while you bake, so you can have filled cupcakes ready in under an hour.
It’s perfect for sweet-tooth fans, beginner bakers, and anyone who loves to dress up a simple box mix or basic vanilla cupcake.
I still remember a late Sunday evening when friends dropped by unannounced; I filled a batch of plain cupcakes with this creamy center, dusted them with powdered sugar, and suddenly the night felt special and intentional instead of rushed.
This filling shines for birthday parties, last-minute celebrations, or whenever you need a little extra comfort in dessert form. Ready to bring this dish to life?
Why You’ll Love It
- Delivers rich, velvety white chocolate flavor in every single bite
- Creates a creamy, truffle-like center that feels bakery–quality special
- Comes together quickly with simple ingredients and minimal equipment needed
- Stays pipeable yet stable, perfect for filling cupcakes cleanly
- Adapts easily to flavors like citrus, almond, or berry mix-ins
Ingredients
- 170 g white chocolate chips — choose real cocoa butter white chocolate
- 120 ml heavy cream, cold — at least 30–36% fat for best texture
- 30 g unsalted butter, softened — let sit at room temp until pliable
- 30 g powdered sugar, sifted — removes lumps for a smoother filling
- 1 tsp vanilla extract — pure extract adds better flavor than imitation
- 1 pinch fine sea salt — balances sweetness and boosts flavor
Step-by-Step Method
Warm the Cream
Heat the cold heavy cream in a small saucepan over medium-low heat. Watch closely and avoid boiling.
Look for small bubbles forming around the edges and gentle steam rising. Turn off the heat as soon as it reaches this stage.
Overheating can cause the white chocolate to separate later, so keep the temperature controlled.
Melt the White Chocolate
Place the white chocolate chips in a heatproof bowl. Immediately pour the hot cream over the chips, fully covering them.
Let the mixture sit undisturbed for about two minutes. This resting time helps soften the chocolate evenly.
After resting, begin whisking gently from the center outward until the mixture becomes smooth and glossy.
Enrich the Ganache
Add the softened unsalted butter, sifted powdered sugar, vanilla extract, and a pinch of fine sea salt to the warm ganache. Whisk thoroughly until the butter melts completely.
Make certain everything is fully incorporated and the texture is silky. This step builds flavor and body in the filling, giving it a rich, creamy consistency perfect for piping.
Cool to Thicken
Cover the bowl and let the mixture cool at room temperature for 15–20 minutes. This gradual cooling helps the ganache begin to thicken evenly.
Afterward, transfer the bowl to the refrigerator for an additional 10–15 minutes.
Check frequently until it reaches a scoopable, spoonable consistency—not too firm, but no longer runny.
Smooth and Bag the Filling
Stir the chilled filling with a rubber spatula to smooth out any firm spots. Make certain the texture is creamy and uniform.
Spoon the mixture into a piping bag or a small zip-top bag. Push the filling toward one corner and twist the top. Snip off a small tip, creating a neat opening ready for controlled piping.
Core and Fill the Cupcakes
Use a small knife or cupcake corer to remove the center of each completely cooled cupcake. Be careful not to cut through the bottom.
Pipe the white chocolate filling into each cavity until just full. Replace the removed tops if desired. If your kitchen is warm, refrigerate the filled cupcakes until serving time.
Ingredient Swaps
- Use 170 g chopped white baking bars instead of chips if that’s what you have—avoid candy melts, which won’t taste or set the same.
- For dairy-free: swap heavy cream with full-fat coconut cream and use vegan butter plus high-quality dairy-free white chocolate.
- For less sweetness, replace 25–50% of the white chocolate with good-quality cream cheese (softened) and reduce or omit the powdered sugar.
You Must Know
- Troubleshoot – If the ganache looks oily or curdled after combining, add 1–2 tsp cold heavy cream and stir gently from the center until it comes back together; the cooler cream helps re-emulsify the fats for a smooth, glossy texture.
- Doneness – To know the filling is at the right thickness for piping, drag a spoon through it: if a channel stays visible for 3–4 seconds before slowly closing, it’s ready; if it flows back instantly, chill another 5–10 minutes.
- Avoid – Avoid overheating the cream past a gentle steam and tiny edge bubbles (about 175–185°F / 80–85°C); hotter liquid can scorch the milk solids in white chocolate, causing graininess that’s hard to fix.
- Scale – For a half batch (fills ~6 cupcakes), use 85 g white chocolate, 60 ml cream, 15 g butter, 15 g powdered sugar, ½ tsp vanilla, and a tiny pinch of salt; this keeps the fat-to-liquid ratio identical so the texture sets the same.
- Flavor Boost – For a more complex flavor, replace 30 ml of the cream with 30 ml fruit purée, strong brewed coffee, or citrus juice, then increase powdered sugar by 5–10 g; the added acidity/bitterness brightens the sweetness while the extra sugar helps maintain body.
Serving Tips
- Serve in chilled, cored cupcakes, then top with a swirl of vanilla or raspberry buttercream.
- Pair with fresh berries and a dusting of powdered sugar for color and brightness.
- Drizzle filled cupcakes with dark chocolate ganache to balance the sweetness.
- Present on a tiered stand with white chocolate shavings and edible gold accents.
- Offer alongside coffee or espresso; the creamy filling complements bold, bitter flavors.
Storage & Make-Ahead
Store white chocolate cupcake filling in an airtight container in the fridge for up to 4–5 days.
Give it a good stir before using and let it soften slightly at room temperature.
It also freezes well for about 1 month.
Thaw overnight in the refrigerator before piping.
Reheating
Gently reheat leftover white chocolate cupcake filling briefly in the microwave at 50% power.
Or warm in a heatproof bowl over a pan of barely simmering water, stirring constantly until just loosened.
Café-Inspired Dessert Trends
When I think about café-inspired dessert trends, I picture sunlit counters lined with small-batch treats, each hiding a surprise center—exactly where a lush white chocolate cupcake filling fits in.
I see glass cloches fogged slightly with warmth, the air scented with espresso and caramelized sugar.
Baristas aren’t just pulling shots anymore; they’re pairing drinks with “signature” bakes.
I imagine our cupcakes beside a flat white, the filling echoing its velvety microfoam. Cafés lean into texture—gooey middles, crackly tops, chilled centers against warm crumbs.
There’s a move toward nostalgic-but-upgraded desserts: childhood flavors, adult polish.
Our white chocolate filling slips right in, tasting like a truffle tucked inside a bake-sale classic, ready to be unwrapped with the first curious bite.
Final Thoughts
Give this white chocolate cupcake filling a try and see just how much it elevates your favorite cupcakes.
Don’t be afraid to tweak the flavors with different extracts or mix-ins to make it your own!
Frequently Asked Questions
Can I Turn This Filling Into a Stable White Chocolate Frosting?
Yes, you can. I’d whip the chilled mixture, then beat in extra powdered sugar and a little more softened butter until it’s fluffy, holds peaks, and spreads like a thick, creamy blanket over your cupcakes.
Is This Filling Suitable for Layered Cakes or Only Cupcakes?
It suits both, but I’d tuck it between cake layers, not use it to frost the outside. Picture silky, truffle-soft ribbons melting into tender crumbs, best kept chilled, then brought to a gentle, dreamy cool.
How Can I Make This Filling Less Sweet Without Ruining the Texture?
You can gently tip the sweetness down by swapping some white chocolate for cream cheese, adding a whisper of extra salt, and a splash of vanilla; I’ll whisk until it’s silky, tangy, and softly rich.
Can I Flavor the Filling With Fruit Purees or Alcohol Without It Separating?
You can, but I’d stir in only a little cooled puree or alcohol at a time. I watch the ganache, keeping it thick and silky, like candlelit frosting, adding more only if it stays smooth.
White Chocolate Cupcake Filling
Equipment
- 1 Small saucepan
- 1 heatproof bowl
- 1 Whisk
- 1 Rubber spatula
- 1 Measuring cups set
- 1 Measuring spoons set
- 1 piping bag or small zip-top bag
Ingredients
- 170 gram white chocolate chips
- 120 milliliter heavy cream cold
- 30 gram unsalted butter softened
- 30 gram powdered sugar sifted
- 1 teaspoon vanilla extract
- 1 pinch fine sea salt
Instructions
- Add white chocolate chips to a heatproof bowl and set aside.
- Pour heavy cream into a small saucepan and heat over medium-low until just simmering at the edges.
- Immediately pour the hot cream over the white chocolate chips and let sit for 2 minutes.
- Whisk the mixture gently from the center outward until completely smooth and melted.
- Add softened butter, powdered sugar, vanilla extract, and salt to the warm mixture.
- Whisk until the butter is melted and the filling is smooth and glossy.
- Cover the bowl and let the mixture cool at room temperature for 15–20 minutes.
- Transfer the bowl to the refrigerator and chill until thickened to a scoopable consistency, about 10–15 minutes.
- Stir the chilled filling with a spatula to smooth it out before using.
- Spoon the filling into a piping bag or zip-top bag and snip off the tip.
- Core the center of each cooled cupcake using a small knife or cupcake corer.
- Pipe the white chocolate filling into each cupcake cavity until just full, then replace the tops if desired.
Notes

Cynthia Weatherford is a seasoned chef and culinary enthusiast who serves as the Recipe creator of Somonday. With decades of experience in the kitchen and a passion for exploring diverse cuisines, Cynthia brings a blend of creativity and technique to every dish. Known for transforming simple ingredients into show-stopping meals, Cynthia believes that cooking is an art form anyone can master. Dedicated to inspiring home cooks, Cynthia shares approachable recipes, pro tips, and culinary wisdom to make every meal memorable.