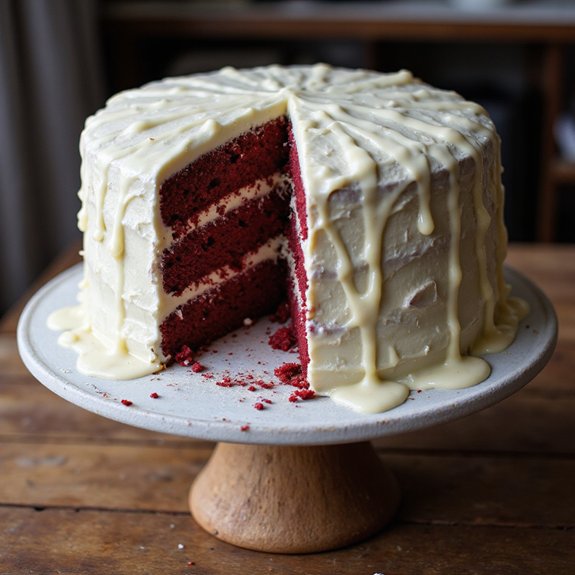
Picture a crimson cake cloaked in snowy frosting, the sheen of white chocolate dripping in soft rivulets down velvety sides.
Imagine slicing through plush, cocoa-kissed layers that release a gentle tang of buttermilk and the sweet aroma of vanilla—comfort you can see, inhale, and hold on a fork.
This cake matters to me because it feels like celebration made simple: familiar red velvet warmth lifted by a glossy white chocolate finish. It’s the dessert I lean on when I want something stunning without fuss—perfect for busy weeknights turned special, Sunday suppers, birthdays, or any “just because” moment that needs a little sparkle.
Once, after a hectic day, I brought this to the table and watched tired faces soften with that first bite—silence, then smiles, problem solved.
I’ll guide you through a reliable method, with practical tips that assure bakery-level results at home. Ready? Let’s cook!
Why You’ll Love It
- Delivers bold cocoa-vanilla flavor with classic red velvet charm
- Showcases silky cream cheese frosting and elegant white chocolate drizzle
- Stays incredibly moist from oil and buttermilk blend
- Preps easily with simple steps and common equipment
- Slices cleanly for picture-perfect layers and party-worthy presentation
Ingredients
- 2 1/2 cups all-purpose flour, sifted — measure after sifting for accuracy (use fresh, unbleached)
- 1 1/2 cups granulated sugar — standard white cane sugar (avoid super-fine)
- 1 teaspoon baking soda — check freshness for proper rise (no clumps)
- 1 teaspoon fine salt — balances sweetness (not coarse)
- 2 tablespoons unsweetened natural cocoa powder — not Dutch-processed (fresh, aromatic)
- 1 1/2 cups vegetable oil — neutral flavor like canola (fresh, no off-odor)
- 1 cup buttermilk, room temperature — full-fat if available (shake well)
- 2 large eggs, room temperature — grade A (no cracks)
- 2 tablespoons red liquid food coloring — gel may need less (vivid hue)
- 2 teaspoons pure vanilla extract — real vanilla, not imitation (warm aroma)
- 1 teaspoon white vinegar — reacts with soda for lift (distilled)
- 4 ounces cream cheese, softened — full-fat block style (not whipped)
- 4 tablespoons unsalted butter, softened — 1/2 stick (high-quality)
- 1 1/2 cups powdered sugar, sifted — 10x confectioners’ (lump-free)
- 1 teaspoon pure vanilla extract — for frosting (consistent flavor)
- 6 ounces white chocolate, chopped — real cocoa butter, not coating (good brand)
- 2 tablespoons heavy cream, warm — at least 36% fat (loosens drizzle)
- 1 pinch salt — balances frosting sweetness (fine grain)
Step-by-Step Method
Preheat, Prep & Pan
Preheat oven to 350°F (175°C). Grease two 8-inch round pans, line bottoms with parchment, and lightly flour sides. Set a wire rack nearby. Bring eggs and buttermilk to room temperature.
Gather equipment and measure ingredients. Sift flour and powdered sugar to remove lumps. Chop white chocolate. Warm heavy cream slightly so it blends smoothly later.
Whisk Dry Ingredients
Whisk flour, granulated sugar, baking soda, fine salt, and natural cocoa powder in a medium bowl. Distribute cocoa and leavening evenly to avoid streaks. Break up any clumps with the whisk. Set aside.
Keep the mixture airy to encourage a tender crumb. Avoid adding wet ingredients here to maintain accuracy during mixing.
Blend Wet Ingredients
In a large bowl, whisk vegetable oil, buttermilk, eggs, red food coloring, vanilla, and white vinegar until smooth. Emulsify fully for a uniform batter. Adjust coloring gradually if using gel.
Make certain no streaks of egg remain. Keep the mixture fluid and glossy. This base helps the dry ingredients hydrate evenly without overworking gluten.
Combine & Mix Briefly
Add dry mixture to wet in two additions. Stir gently with a whisk or mixer on low just until a smooth batter forms. Scrape bowl and spatula sides to incorporate pockets of flour.
Avoid overmixing to prevent toughness. Stop as soon as no dry streaks remain. Tap bowl lightly to release large air bubbles.
Divide, Smooth & Bake
Divide batter evenly between pans. Use a scale for accuracy. Smooth tops with an offset spatula. Tap pans gently on the counter to pop bubbles. Bake 28 to 32 minutes until a toothpick emerges with a few moist crumbs.
Rotate pans once if needed for even baking. Avoid opening the oven early.
Cool, Release & Rest
Cool cakes in pans on a wire rack for 10 minutes. Run a thin knife around edges if needed. Invert onto the rack, peel off parchment, and cool completely. Let layers rest until room temperature before frosting.
Level domes with a serrated knife for stability. Brush crumbs away to keep the finish clean.
Beat Creamy Frosting
Beat softened cream cheese and unsalted butter until smooth and fluffy. Add sifted powdered sugar, vanilla, and a pinch of salt. Whip until light and spreadable.
Adjust consistency with a teaspoon of cream if needed. Keep the frosting slightly firm to support layers. Chill briefly if it softens too much.
Assemble & Crumb-Coat
Place the first layer on a stand. Spread half the frosting evenly to the edges. Set the second layer on top, aligning sides.
Spread remaining frosting thinly over top and sides to seal crumbs. Smooth with an offset spatula. Chill 15 to 20 minutes to set the crumb coat. Prepare the drizzle meanwhile.
Melt & Emulsify Drizzle
Microwave chopped white chocolate in 20-second bursts, stirring between, until nearly melted. Stir in warm heavy cream until glossy and pourable. Adjust with a teaspoon more cream if thick.
If seizing occurs, add warm cream gradually to restore smoothness. Let the mixture cool slightly to thicken for controlled drips.
Drip, Spread & Set
Spoon drizzle along the cake’s top edge, nudging small drips down the sides. Spread remaining over the top for a smooth cap. Clean edges with a spatula.
Chill the cake for 30 minutes to set the drizzle and stabilize. Wipe any smudges. Allow the cake to come to room temperature before slicing.
Slice, Serve & Store
Slice with a warm, sharp knife, wiping between cuts for neat layers. Serve at room temperature for best texture. Cover leftovers and refrigerate up to 3 days. Let slices stand 20 to 30 minutes before eating. For stronger color or flavor next time, adjust food coloring and cocoa slightly. Enjoy the tender crumb.
Ingredient Swaps
- Buttermilk: 1 cup milk + 1 tablespoon lemon juice or white vinegar (rest 5–10 minutes); or dairy-free use unsweetened almond/soy milk with 1 tbsp acid.
- Vegetable oil: equal amount of melted coconut oil or neutral oil (canola/grapeseed); budget butter flavor use 70% melted butter + 30% oil for tenderness.
- Eggs: 2 flax eggs (2 tbsp ground flax + 6 tbsp water) or commercial egg replacer for vegan.
- Food coloring: beet powder (2–3 tsp) or boiled beet puree (2–3 tbsp, reduce buttermilk slightly); gel colors need less.
- Cocoa powder: natural can sub Dutch-process in equal amount; for deeper chocolate, add 1–2 tsp more and a splash more buttermilk.
- Cream cheese/butter frosting: dairy-free cream cheese and vegan butter 1:1; or make ermine frosting (flour-milk roux) if cream cheese is unavailable.
- Powdered sugar: blend granulated sugar with 1 tsp cornstarch per cup until fine.
- White chocolate drizzle: use good-quality chips or bars; dairy-free use vegan white chocolate; if unavailable, a simple vanilla glaze (1 cup powdered sugar + 2–3 tbsp milk) works.
- Buttermilk/acid balance: if skipping vinegar, add 1 extra teaspoon lemon juice to wet ingredients.
You Must Know
- Doneness • If centers look set but layers spring back too slowly, give 3–5 more minutes; aim for a toothpick with a few moist crumbs, not wet batter, and cake tops that bounce back within 1 second.
- Troubleshoot • If batter looks curdled after combining wet ingredients, add 2 tablespoons of the dry mix and stir just until uniform; this helps emulsify fat and liquids so the crumb stays tender.
- Avoid • To prevent a dense ring at the edges, fill pans no more than 2/3 full and rotate once at the 18–20 minute mark; look for even rise without a domed center or pulled-away sides.
- Scale • For a 9-inch two-layer version, multiply all ingredients by 1.25 and extend time by 3–6 minutes; for cupcakes, use the base formula, portion 3 tablespoons batter each, and check at 16–18 minutes.
- Flavor Boost • For deeper chocolate notes without losing the red hue, sift in +1 teaspoon natural cocoa and use 1 teaspoon espresso powder; you’ll get rounder cocoa flavor while keeping the crumb vivid.
Serving Tips
- Serve slices slightly chilled, then rest 15 minutes for the creamiest texture.
- Garnish with fresh raspberries and a mint sprig for color contrast.
- Add a dollop of lightly sweetened whipped cream alongside each slice.
- Drizzle extra melted white chocolate on plates before placing slices.
- Pair with hot coffee, black tea, or a glass of cold milk.
Storage & Make-Ahead
Refrigerate covered up to 3 days.
Let slices sit 20–30 minutes before serving for best texture.
Layers can be baked a day ahead, wrapped, and chilled.
Frost day of serving.
The fully frosted cake or unfrosted layers freeze well up to 2 months—wrap tightly.
Thaw overnight in the fridge.
Reheating
Reheat slices gently: microwave 50% power 15–25 seconds, covered.
Whole cake: oven 300°F, tented, 8–12 minutes.
Individual frosting or drizzle: warm stovetop double-boiler or brief microwave bursts, stirring until just supple.
Juneteenth Picnic Favorite
Often, I bring this White Chocolate Red Velvet Cake to a Juneteenth picnic and watch it glow like a ruby under the sun—velvety crumbs tinted deep red, a tangy cream cheese sweep, and glossy white-chocolate drips catching the light.
I slice it as music floats over grills and laughter, and the first bite hushes the table. You taste buttermilk tenderness, a whisper of cocoa, and that cool cream-cheese tang beneath silky white chocolate. It’s sweet, yes, but balanced—made for hot afternoons and paper plates.
I chill the cake before the drive so the drips set, then let it warm on the blanket until the frosting relaxes. One slice turns into second helpings, crimson crumbs dotting napkins like confetti—celebration in every forkful.
Final Thoughts
Ready to bake? Give this White Chocolate Red Velvet Cake a try, then make it your own—tweak the cocoa, play with the drizzle, or add festive sprinkles for your perfect slice.
Enjoy!
Frequently Asked Questions
Can I Make This Cake Gluten-Free Without Compromising Texture?
Yes—you can. I swap in a 1:1 gluten-free baking blend with xanthan gum, add an extra egg white, and rest the batter 20 minutes. The cake bakes plush, crimson, tender, with creamy frosting sighing between layers.
How Do Altitude Adjustments Affect Baking Time and Rise?
At higher altitudes, I shorten bake time slightly, expect faster rise, then risk collapse. I add a bit more flour, reduce sugar, increase liquid, and bump oven temperature—watching the crumb puff like sunrise and set delicately.
What’s the Best Way to Transport This Layered Cake?
Chill it well, box it snug in a cake carrier, non-slip mat beneath. I anchor layers with skewers, pack ice packs below, drive gently. I keep it shaded, level, and slice on arrival—drips still gleaming.
Can I Convert This Recipe Into Cupcakes or a Sheet Cake?
Yes—you can. I’d bake cupcakes at 350°F for 18–22 minutes, or a 9×13 sheet for 28–34. I’ll swirl cream cheese frosting like clouds, then lace warm white chocolate drizzle into glossy ribbons.
How Do I Prevent Red Food Coloring From Staining Cookware?
Use stainless bowls and silicone tools; I lightly oil surfaces first, stir gently, and rinse fast with cold water. I wear gloves, line counters with parchment, and bleach-solution soak any blush of red before it blooms.

White Chocolate Drizzle Red Velvet Cake
Equipment
- 2 round cake pan 8-inch
- 1 stand mixer or hand mixer
- 3 Mixing bowl medium
- 1 Whisk
- 1 Rubber spatula
- 1 Wire rack
- 2 parchment paper sheet
- 1 Measuring cups set
- 1 Measuring spoons set
- 1 offset spatula
- 1 microwave-safe bowl
- 1 toothpick
Ingredients
- 2 1/2 cup all-purpose flour sifted
- 1 1/2 cup granulated sugar
- 1 teaspoon baking soda
- 1 teaspoon fine salt
- 2 tablespoon unsweetened cocoa powder natural
- 1 1/2 cup vegetable oil
- 1 cup buttermilk room temperature
- 2 large eggs room temperature
- 2 tablespoon red liquid food coloring
- 2 teaspoon pure vanilla extract
- 1 teaspoon white vinegar
- 4 ounce cream cheese softened
- 4 tablespoon unsalted butter softened
- 1 1/2 cup powdered sugar sifted
- 1 teaspoon pure vanilla extract
- 6 ounce white chocolate chopped
- 2 tablespoon heavy cream warm
- 1 pinch salt
Instructions
- Preheat oven to 350°F (175°C), grease two 8-inch round cake pans, line bottoms with parchment, and lightly flour the sides.
- In a medium bowl whisk flour, sugar, baking soda, salt, and cocoa powder until evenly combined.
- In a large bowl whisk oil, buttermilk, eggs, red food coloring, vanilla, and vinegar until smooth and uniform.
- Add dry ingredients to wet in two additions and mix just until a smooth batter forms without overmixing.
- Divide batter evenly between prepared pans and smooth the tops with an offset spatula.
- Bake for 28 to 32 minutes until a toothpick inserted in the center comes out with a few moist crumbs.
- Cool cakes in pans on a wire rack for 10 minutes, then invert onto the rack, peel parchment, and cool completely.
- For the frosting, beat cream cheese and butter until creamy, then add powdered sugar, vanilla, and a pinch of salt and whip until fluffy.
- Level cake layers if needed, place one layer on a stand, spread half the frosting, top with second layer, and spread remaining frosting thinly over top and sides.
- For the white chocolate drizzle, microwave white chocolate in 20-second bursts stirring between until nearly melted, then stir in warm cream until smooth and pourable.
- Let the drizzle cool slightly to thicken, then spoon along the top edge to create drips and spread remaining over the top.
- Chill the cake for 30 minutes to set the drizzle, then slice and serve at room temperature.
Notes

Cynthia Weatherford is a seasoned chef and culinary enthusiast who serves as the Recipe creator of Somonday. With decades of experience in the kitchen and a passion for exploring diverse cuisines, Cynthia brings a blend of creativity and technique to every dish. Known for transforming simple ingredients into show-stopping meals, Cynthia believes that cooking is an art form anyone can master. Dedicated to inspiring home cooks, Cynthia shares approachable recipes, pro tips, and culinary wisdom to make every meal memorable.


