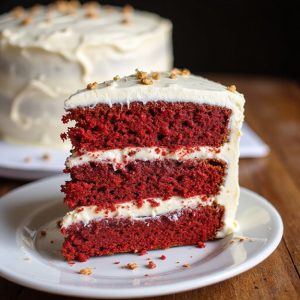
Imagine slicing into a scarlet crumb that’s tender as velvet, the tang of buttermilk meeting the sweet, creamy sigh of white chocolate mousse.
Picture swirls of snowy frosting catching the light, a hint of cocoa on the air, and that first forkful—pillowy, cool, and deeply comforting—melting into joy.
This cake matters to me because it feels like a celebration you can hold: nostalgic red velvet grounded in tradition, lifted by a cloudlike mousse that makes each bite unforgettable.
It’s the showstopper you bring for birthdays, the make-ahead dessert that rescues busy weeknights, and the centerpiece that crowns Sunday suppers without demanding your whole day.
When my nephew’s party shifted two hours early, this cake—baked the night before and assembled cold—looked pristine and tasted bakery-fresh, saving both dessert and my sanity.
We’ll keep the crumb plush, the mousse airy, and the finish elegant yet doable at home.
Ready? Let’s cook!
Why You’ll Love It
- Delivers striking contrast: tangy red velvet and silky white chocolate
- Feels luxuriously light thanks to airy stabilized mousse layers
- Slices cleanly with buttercream dam and crumb coat
- Preps ahead easily; components chill and set beautifully
- Uses reliable, accessible ingredients and straightforward techniques
Ingredients
- 2 1/2 cups all-purpose flour, sifted — fluff and measure for accuracy
- 2 cups granulated sugar — fine, free-flowing
- 1 teaspoon baking soda — fresh, not clumpy
- 1 teaspoon fine salt — not flaky
- 2 tablespoons natural cocoa powder — not Dutch-processed for bright color
- 1 1/2 cups vegetable oil — neutral flavor (canola or grapeseed)
- 1 cup buttermilk, room temperature — shake before measuring
- 2 large eggs, room temperature — grade AA if possible
- 2 teaspoons vanilla extract — pure, not imitation
- 1 teaspoon white vinegar — balances leavening
- 1 tablespoon red gel food coloring — concentrated gel for vivid hue
- 6 ounces white chocolate, finely chopped — real cocoa butter, not coating
- 1 1/2 cups heavy cream, cold — 36% fat or higher
- 8 ounces cream cheese, room temperature — full-fat block, not spread
- 1/3 cup powdered sugar, sifted — for cream cheese sweetening
- 1 teaspoon gelatin, powdered — unflavored
- 2 tablespoons water, cold — for blooming gelatin
- 1/2 cup whole milk — warms to melt chocolate/gelatin
- 1/2 cup unsalted butter, room temperature — for stability buttercream
- 1 1/2 cups powdered sugar, sifted — for crumb coat and stability
- 1/8 teaspoon fine salt — balances frosting sweetness
- 1 teaspoon vanilla extract — for frosting aroma
Step-by-Step Method
Preheat, Prep Pans
Preheat oven to 350°F. Line two 9-inch round pans with parchment; grease sides. Set out eggs, buttermilk, cream cheese, and butter to reach room temperature.
Chill a mixing bowl and whisk for whipping cream later. Sift flour and powdered sugar to remove lumps. Assemble equipment so everything is within reach for smooth workflow.
Whisk Dry Ingredients
Sift flour, granulated sugar, baking soda, salt, and cocoa into a large bowl. Whisk until evenly combined with no streaks. Make certain cocoa is fully dispersed to avoid dark pockets in the red batter.
Set aside. This base makes certain even rise and a tender crumb. Keep the bowl ready for the wet mixture.
Combine Wet Ingredients
In another bowl, whisk oil, buttermilk, eggs, vanilla, vinegar, and red gel coloring until smooth and uniform. Avoid overwhisking to prevent adding excess air. The vinegar activates baking soda for lift. Confirm the color intensity now; adjust gel coloring if needed for a vivid red hue.
Mix Batter Briefly
Pour wet ingredients into dry. Whisk just until no flour streaks remain. Scrape bowl sides and bottom with a spatula to catch hidden dry bits. Don’t overmix to avoid a tough cake. The batter should look silky and well-colored. Proceed quickly to maintain leavening power.
Divide, Bake
Divide batter evenly between prepared pans. Smooth tops with an offset spatula. Bake 30 to 35 minutes until a toothpick shows a few moist crumbs. Rotate pans once if needed for even baking. Don’t overbake. Remove and cool in pans 10 minutes to set structure.
Cool Completely
Invert cakes onto a wire rack. Peel off parchment. Cool completely to room temperature before trimming and assembling. Warm cake will melt mousse and buttercream, causing slippage. If baking ahead, wrap cooled layers tightly and refrigerate overnight for easier handling and cleaner cuts.
Bloom Gelatin
Sprinkle gelatin over cold water in a small bowl. Let stand 5 minutes to bloom fully. Don’t stir aggressively. Proper blooming guarantees smooth dissolution and a stable mousse. Start heating milk just as the gelatin finishes blooming so both are ready together for the next step.
Heat Milk, Dissolve Gelatin
Warm milk in a small saucepan until steaming, not boiling. Remove from heat. Add bloomed gelatin and stir until completely dissolved and clear. Avoid overheating, which can weaken gelatin. This mixture will be poured over white chocolate to create a silky base for the mousse.
Melt White Chocolate
Place finely chopped white chocolate in a heatproof bowl. Pour hot milk-gelatin mixture over it. Let sit 2 minutes to soften, then whisk gently until smooth and glossy. Cool to room temperature, stirring occasionally. Don’t add whipped cream while warm to prevent deflation or splitting.
Beat Cream Cheese
Beat room-temperature cream cheese with 1/3 cup sifted powdered sugar until creamy and lump-free. Scrape the bowl to make sure smoothness. This mixture adds tang and structure to the mousse. Keep it at cool room temperature so it folds easily without seizing the chocolate mixture.
Whip Cream to Soft Peaks
Using the chilled bowl, whip cold heavy cream to soft peaks. Stop before stiff to keep mousse airy. Overwhipped cream can separate when folded. Use medium speed for control and fine bubbles. The cream should hold a gentle peak that just tips over when the whisk is lifted.
Fold Mousse Gently
Fold whipped cream into the cooled white chocolate mixture in two additions. Use a spatula with broad strokes to preserve air. Then fold in the cream cheese mixture until fully combined and light. Refrigerate 20 to 30 minutes to lightly thicken so it spreads without running.
Trim, Level Layers
Use a serrated knife to trim domes from cooled cakes, creating level surfaces. Brush away crumbs. Place the first layer on a serving board. Keep the second layer nearby. Level layers ensure stability and even filling thickness. Save trimmings for snacks or trifles if desired.
Make Stability Buttercream
Beat butter with 1 1/2 cups sifted powdered sugar, fine salt, and vanilla until light and fluffy. This quick buttercream forms a dam and crumb coat. Adjust consistency with a teaspoon of milk if needed. Keep it slightly firm to hold the mousse. Transfer to a piping bag.
Pipe Dam, Fill Mousse
Pipe a 1/2-inch buttercream dam around the edge of the first cake layer. Spoon half the mousse inside. Spread evenly to the dam with an offset spatula. Top with the second cake layer. Gently press to level. Pipe another dam. Spread remaining mousse evenly within the border.
Chill to Set Layers
Refrigerate the stacked cake 30 to 45 minutes to set the mousse and stabilize the structure. Don’t rush this step. Chilling prevents bulging and sliding during final coating. Meanwhile, stir the buttercream briefly to refresh texture before applying the crumb coat.
Apply Crumb Coat
Use remaining buttercream to spread a thin crumb coat around the cake, sealing loose crumbs. Smooth with an offset spatula or scraper. Chill 20 minutes to firm the coating. This barrier guarantees a clean final finish. Check edges for gaps and fill lightly if needed.
Finish, Chill Thoroughly
Apply a smooth outer coat of buttercream, or leave a semi-naked finish by scraping lightly. Clean edges for a neat look. Refrigerate at least 2 hours, preferably longer, before slicing. The rest sets the mousse and yields tidy slices. Wipe the knife between cuts for clean layers.
Ingredient Swaps
- Dairy-free: use almond or coconut milk + 1 tsp lemon juice for buttermilk; vegan cream cheese; coconut cream (whipped) for heavy cream; plant butter for butter; dairy-free white chocolate.
- Gluten-free: swap flour with a 1:1 gluten-free baking blend (with xanthan gum).
- Egg-free: replace 2 eggs with 1/2 cup unsweetened applesauce or 2 flax eggs (2 tbsp ground flax + 6 tbsp water).
- Gelatin-free/vegetarian: use 1 tsp agar-agar powder bloomed in hot milk (simmer 1–2 minutes) instead of gelatin.
- Lower sugar: reduce granulated sugar to 1 1/2 cups; use 50–60% less powdered sugar in buttercream and add a pinch more salt; choose lower-sugar white chocolate.
- Budget/availability: sub buttermilk with milk + 1 tbsp vinegar or lemon juice; use neutral oil or melted butter; use natural cocoa or Dutch-process (add 1/2 tsp vinegar if using Dutch).
- Color alternatives: if avoiding food dye, use beet powder (2–3 tsp) or red puree (reduced beet juice), adjusting liquid slightly.
- Stabilizing dam alternatives: mascarpone + a little powdered sugar, or stabilized whipped cream (add 1 tsp gelatin/agar).
You Must Know
Doneness • If cake centers dome or sink slightly, press a warm, flat pan bottom over each layer for 10–15 seconds right after unmolding; this gently compresses steam pockets so layers cool level for cleaner stacking.
Troubleshoot • When the white chocolate/milk looks grainy or split, warm the bowl over barely steaming water and stir until glossy, then cool to 75–80°F; rescuing the emulsion prevents streaky mousse.
Avoid • To prevent mousse blowouts, don’t exceed a 1/2-inch filling height per layer and keep a 1/2-inch buttercream dam; chilling 30–45 minutes sets structure so layers don’t slide.
Flavor Boost • For deeper cocoa notes without muddying the color, bloom 1 teaspoon espresso powder in the hot milk before it hits the chocolate; you’ll get a “truffle” vibe without increasing bitterness.
Scale • For a tall 3-layer 9-inch cake, increase all ingredients by 50% and divide batter into three pans; adjust bake until a thermometer reads 200–205°F at center or a few moist crumbs cling to a tester.
Serving Tips
- Serve chilled slices with fresh raspberries and a dusting of powdered sugar.
- Add a drizzle of warm raspberry coulis or dark chocolate sauce on plates.
- Pair with cold milk, coffee, or a not-too-sweet sparkling rosé.
- Garnish with white chocolate curls and a few mint leaves for color.
- Plate with a small quenelle of vanilla-bean whipped cream.
Storage & Make-Ahead
Refrigerate assembled cake, covered, up to 3 days.
Slices stay moist and mousse holds best when chilled.
Bake layers 1–2 days ahead, wrap well, and chill.
Make mousse the day of assembly for freshest texture.
The finished cake freezes well up to 1 month.
Thaw overnight in the fridge.
Reheating
Reheat gently: microwave slices 10–15 seconds at 50% power.
Warm whole cake in 275°F oven, tented, 10–15 minutes.
For sauces, use stovetop low heat, stirring constantly to prevent splitting.
Juneteenth Potluck Favorite
After gently warming a slice, I carry it out to the porch and imagine this cake shining at a Juneteenth potluck—raspberry-red crumbs against velvety white mousse, like a small celebration on a plate.
I love how the cocoa-kissed layers cut cleanly, each swipe of the knife revealing white-chocolate clouds held in place by a soft buttercream dam. It travels well chilled, then loosens into tenderness in the summer shade.
I’d set it beside smoky ribs and cool salads, the tang of buttermilk and whisper of vanilla offering contrast. One bite—silky, faintly tangy, sweet with white chocolate—feels like a toast to resilience and joy.
I’d crown it with ripe berries, let condensation bead on the plate, and pass napkins as conversations bloom.
Final Thoughts
Ready to bake? Give this White Chocolate Mousse Red Velvet Cake a try as written, or tweak it with your favorite twists—like a hint of orange zest or a splash of espresso—for a dessert that’s uniquely yours.
Frequently Asked Questions
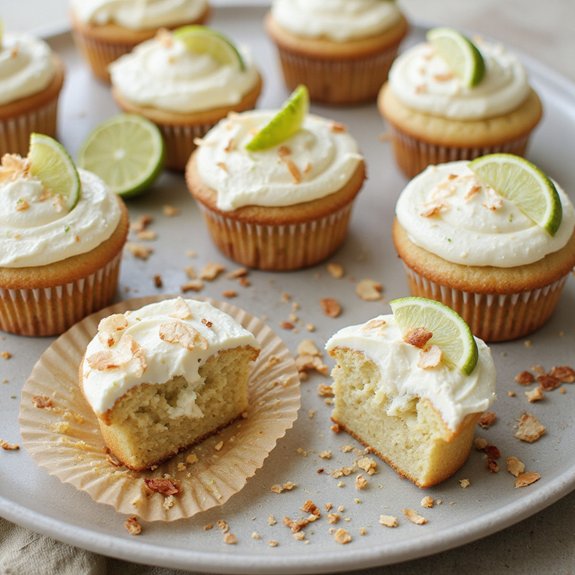
Can I Convert This Recipe Into Cupcakes or Mini Cakes?
Yes—you can. I’d bake batter in lined tins, 350°F, 18–22 minutes, tender domes. Cool, core softly, spoon in mousse, pipe a buttercream kiss. For minis, use 4-inch pans, 20–25 minutes. Chill assembled treats until dreamy.
How Do I Adjust for High-Altitude Baking?
At high altitude, I reduce leaveners slightly, add a bit more flour, increase liquid, and shorten rise. I bake hotter, shorter, then cool longer—letting tender crumbs settle like snow, mousse setting snug as mountain dusk.
Is This Safe to Freeze Fully Assembled With Mousse Layers?
Yes, it’s safe. I freeze it well-wrapped, chilled solid, with a buttercream crumb coat sealing edges. Thaw overnight in the fridge; the mousse stays velvety, layers snug, and slices clean like snowfall under a warm knife.
What’s the Best Way to Transport This Layered Cake?
Chill it overnight, box it snug, wedge nonslip mat beneath, and brace with dowels. I’ll cradle it on a flat seat, AC cool, gentle turns—like carrying a quiet moon—edges dammed, buttercream set, layers humming safely.
Which Wine or Beverage Pairs Best With This Dessert?
I’d pour chilled Moscato d’Asti; its peachy bubbles kiss sweetness without cloying. If you prefer nonalcoholic, I’d serve vanilla-bean milk or hibiscus tea—silky, fragrant sips that brighten creamy layers and leave a softly blooming finish.
White Chocolate Mousse Red Velvet Cake
Equipment
- 2 9-inch round cake pan
- 1 stand mixer or hand mixer
- 3 Mixing bowl
- 1 Medium saucepan
- 1 heatproof bowl
- 1 Whisk
- 1 Rubber spatula
- 1 Wire rack
- 1 offset spatula
- 1 parchment paper sheet
- 1 Fine mesh sieve
- 1 Serrated knife
- 1 Measuring cups set
- 1 Measuring spoons set
Ingredients
- 2 1/2 cup all-purpose flour sifted
- 2 cup granulated sugar
- 1 teaspoon baking soda
- 1 teaspoon fine salt
- 2 tablespoon natural cocoa powder
- 1 1/2 cup vegetable oil
- 1 cup buttermilk room temperature
- 2 large eggs room temperature
- 2 teaspoon vanilla extract
- 1 teaspoon white vinegar
- 1 tablespoon red gel food coloring
- 6 ounce white chocolate finely chopped
- 1 1/2 cup heavy cream cold
- 8 ounce cream cheese room temperature
- 1/3 cup powdered sugar sifted
- 1 teaspoon gelatin powdered
- 2 tablespoon water cold
- 1/2 cup whole milk
- 1/2 cup unsalted butter room temperature
- 1 1/2 cup powdered sugar sifted (for crumb coat and stability)
- 1/8 teaspoon fine salt for frosting
- 1 teaspoon vanilla extract for frosting
Instructions
- Preheat the oven to 350°F and line two 9-inch cake pans with parchment paper and grease the sides.
- In a large bowl whisk flour, granulated sugar, baking soda, salt, and cocoa powder until evenly combined.
- In another bowl whisk vegetable oil, buttermilk, eggs, vanilla, vinegar, and red food coloring until smooth.
- Pour wet ingredients into dry and whisk just until combined and no flour streaks remain.
- Divide batter evenly between pans and bake for 30 to 35 minutes until a toothpick comes out with a few moist crumbs.
- Cool cakes in pans 10 minutes, then invert onto a wire rack, peel parchment, and cool completely.
- Bloom gelatin by sprinkling it over cold water in a small bowl and let stand 5 minutes.
- Heat milk in a small saucepan until steaming, remove from heat, add bloomed gelatin, and stir until dissolved.
- Place chopped white chocolate in a heatproof bowl, pour hot milk mixture over it, let sit 2 minutes, then whisk until smooth and cool to room temperature.
- Beat cream cheese with 1/3 cup powdered sugar until creamy and smooth.
- In a chilled bowl whip heavy cream to soft peaks, then gently fold into the white chocolate mixture in two additions.
- Fold the cream cheese mixture into the mousse until fully combined and airy, then refrigerate 20 to 30 minutes to lightly thicken.
- Trim cake tops level with a serrated knife and place one layer on a serving board.
- Make a quick stability buttercream by beating butter with 1 1/2 cups powdered sugar, 1/8 teaspoon salt, and 1 teaspoon vanilla until fluffy.
- Pipe a 1/2-inch buttercream dam around the edge of the first cake layer to contain the mousse.
- Spread half of the white chocolate mousse evenly inside the dam and top with the second cake layer.
- Pipe another buttercream dam on top and spread the remaining mousse in an even layer.
- Chill the stacked cake 30 to 45 minutes to set the mousse and stabilize the layers.
- Use remaining buttercream to apply a thin crumb coat around the cake and chill 20 minutes to firm.
- Finish with a smooth outer coat of buttercream or leave semi-naked, then refrigerate at least 2 hours before slicing.
Notes

Cynthia Weatherford is a seasoned chef and culinary enthusiast who serves as the Recipe creator of Somonday. With decades of experience in the kitchen and a passion for exploring diverse cuisines, Cynthia brings a blend of creativity and technique to every dish. Known for transforming simple ingredients into show-stopping meals, Cynthia believes that cooking is an art form anyone can master. Dedicated to inspiring home cooks, Cynthia shares approachable recipes, pro tips, and culinary wisdom to make every meal memorable.