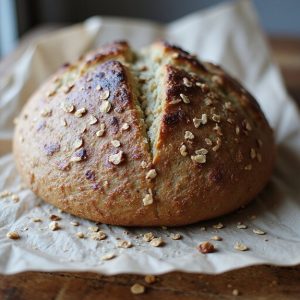
Buckwheat Sourdough Bread
Equipment
- 1 large mixing bowl
- 1 medium mixing bowl
- 1 digital kitchen scale
- 1 measuring jug
- 1 Dough scraper
- 1 Dutch oven with lid or baking stone
- 1 banneton or medium bowl lined with cloth
- 1 clean kitchen towel
- 1 lame or sharp knife
- 1 Cooling rack
Ingredients
- 150 gram active sourdough starter 100% hydration
- 300 gram water room temperature
- 200 gram buckwheat flour
- 200 gram bread flour
- 40 gram whole wheat flour
- 9 gram fine sea salt
- 10 gram honey optional
- 10 gram olive oil optional
- 30 gram extra water for bassinage optional
- 20 gram buckwheat groats toasted optional; for crunch
- 10 gram rice flour for dusting banneton
Instructions
- In the large mixing bowl, whisk together the active sourdough starter and 300 g water until the starter is mostly dissolved.
- Add the buckwheat flour, bread flour, and whole wheat flour to the bowl and mix with your hand or a dough scraper until no dry bits remain, then cover and rest for 45–60 minutes (autolyse).
- Sprinkle the salt over the dough, add the honey and olive oil if using, and squeeze and fold the dough until the salt and extras are fully incorporated.
- If the dough feels very stiff, gradually add up to 30 g extra water, working it in with pinching motions until evenly hydrated but still manageable.
- Over the next 2 hours, perform 3–4 sets of stretch and folds every 30 minutes, lifting and folding the dough from each side to build strength, then cover between sets.
- If using toasted buckwheat groats, gently fold them into the dough during the second or third set of stretch and folds.
- After the final fold, let the dough ferment at room temperature until puffed, slightly domed, and showing bubbles at the edges, about 2–4 hours depending on temperature.
- Lightly flour your work surface, gently turn out the dough, and shape it into a tight round or oval by folding the edges toward the center and tensioning against the counter.
- Dust the banneton or cloth-lined bowl generously with rice flour, then place the shaped dough seam side up into it.
- Cover the banneton and refrigerate for 8–12 hours for a cold proof until the dough has slowly risen and feels aerated.
- About 45 minutes before baking, place the Dutch oven (with lid on) in the oven and preheat to 240°C (465°F).
- When ready to bake, remove the hot Dutch oven, carefully invert the dough onto a piece of parchment so it is seam side down, and score the top with a lame or sharp knife.
- Transfer the dough with the parchment into the Dutch oven, cover with the lid, and bake for 25 minutes.
- Remove the lid, reduce the temperature to 220°C (430°F), and bake for another 18–20 minutes until the crust is deep brown and the loaf sounds hollow when tapped.
- Transfer the bread to a cooling rack and let it cool completely for at least 1–2 hours before slicing.
Notes
For best results, ensure your starter is very active before mixing, as buckwheat is heavy and benefits from strong leavening. The dough will feel softer and a bit stickier than a standard wheat loaf due to the gluten-free buckwheat, so use a dough scraper and slightly damp hands instead of adding extra flour. A long cold proof helps develop flavor and makes the loaf easier to score, and baking in a preheated Dutch oven traps steam for a better rise and crust. Adjust water slightly based on your flours’ absorption, and remember that fully cooling the bread before slicing is crucial for the crumb to set and not turn gummy.
Tried this recipe?Let us know how it was!