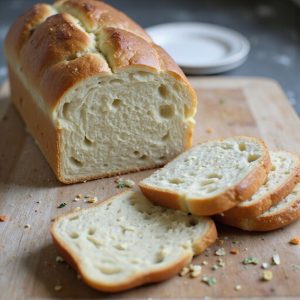
Fluffy Sourdough Sandwich Bread
Equipment
- 1 digital kitchen scale
- 2 medium mixing bowls
- 1 large mixing bowl
- 1 Dough scraper
- 1 wooden spoon or silicone spatula
- 1 9x5-inch loaf pan
- 1 plastic wrap or reusable cover
- 1 clean kitchen towel
- 1 wire cooling rack
Ingredients
- 120 gram active sourdough starter 100% hydration
- 280 gram warm water about 80°F 27°C
- 30 gram honey or sugar
- 40 gram unsalted butter melted and cooled
- 450 gram bread flour
- 8 gram fine sea salt
- 30 gram whole milk room temperature
- 10 gram neutral oil for greasing pan
Instructions
- In a medium bowl whisk together active sourdough starter, warm water, and honey until mostly dissolved.
- Stir in melted butter until the mixture is smooth and well combined.
- In a large mixing bowl whisk together bread flour and salt.
- Pour the wet mixture into the dry ingredients and stir with a spoon until a rough shaggy dough forms and no dry flour remains.
- Cover the bowl and let the dough rest for 30 minutes at room temperature to hydrate (autolyse).
- After resting drizzle in the whole milk and squeeze and fold the dough with your hand until milk is fully absorbed and dough is cohesive.
- Perform 1 set of stretch-and-folds by pulling up one side of the dough and folding it over the center 4–6 times around the bowl.
- Cover the bowl and let the dough rest 30 minutes at room temperature.
- Repeat the stretch-and-fold process 2 more times at 30-minute intervals for a total of 3 sets.
- After the final set of folds cover the bowl and allow the dough to bulk ferment at room temperature 3–4 hours until slightly puffy and risen by about 50%.
- Lightly oil your loaf pan and set it aside.
- Turn the dough out onto a lightly floured surface and gently pat it into a rectangle roughly the length of your loaf pan.
- Tightly roll the rectangle from the short end into a log pinching the seam and ends closed to create surface tension.
- Place the dough log seam side down into the prepared loaf pan and gently even out the shape.
- Cover the pan loosely with plastic wrap or a towel and let the dough proof at room temperature 1–2 hours until it has risen about 1 inch over the rim of the pan.
- For an overnight proof alternative place the covered pan in the refrigerator 8–12 hours until well risen and domed.
- When ready to bake preheat the oven to 375°F (190°C) with a rack in the center position.
- Optionally brush the top of the loaf with a little milk for a soft golden crust.
- Bake the bread for 30–35 minutes until deep golden brown and an instant-read thermometer inserted in the center reads about 195–200°F (90–93°C).
- Remove the pan from the oven and let the loaf cool in the pan for 10 minutes.
- Carefully turn the loaf out onto a wire rack and cool completely at least 1 hour before slicing.
Notes
For extra success ensure your starter is bubbly and recently fed so the dough rises well and stays fluffy, and resist adding too much extra flour during mixing so the crumb remains soft rather than dense; adjust proofing times based on your kitchen temperature (cool rooms need longer, warm rooms shorter), and always prioritize the dough’s appearance—puffy, domed, and jiggly—over the clock; if the crust darkens too fast tent loosely with foil for the last 10 minutes, slice only when fully cool to avoid gumminess, and store the loaf wrapped at room temperature for up to 3 days or slice and freeze for longer keeping.
Tried this recipe?Let us know how it was!