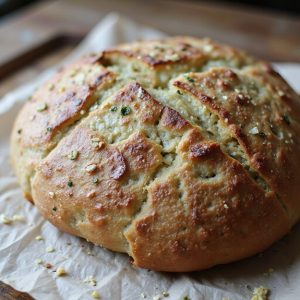
Garlic Parmesan Sourdough Bread
Equipment
- 1 large mixing bowl
- 1 medium mixing bowl
- 1 Small saucepan
- 1 Dough scraper
- 1 digital kitchen scale
- 1 measuring spoon set
- 1 Wooden spoon or spatula
- 1 banneton or medium bowl lined with a clean towel
- 1 Dutch oven with lid (4–5 quart)
- 1 wire cooling rack
- 1 sharp knife or lame
Ingredients
- 150 gram active sourdough starter 100% hydration
- 325 gram water lukewarm
- 450 gram bread flour unbleached
- 50 gram whole wheat flour
- 10 gram fine sea salt
- 30 gram olive oil extra virgin
- 40 gram unsalted butter melted and cooled slightly
- 5 clove garlic finely minced
- 60 gram Parmesan cheese finely grated
- 5 gram dried Italian herbs optional
- 10 gram honey or sugar optional to balance flavor
Instructions
- In a large mixing bowl whisk together the active sourdough starter and lukewarm water until mostly dissolved.
- Add the bread flour and whole wheat flour to the bowl and mix with a wooden spoon until no dry flour remains and a shaggy dough forms.
- Cover the bowl and let the dough rest (autolyse) at room temperature for 30–45 minutes.
- Sprinkle the fine sea salt and honey or sugar over the dough, then drizzle in the olive oil and gently squeeze and fold the dough until everything is incorporated.
- In a small saucepan melt the butter over low heat, add the minced garlic, and cook 1–2 minutes just until fragrant, then let cool to lukewarm.
- Pour the cooled garlic butter and half of the grated Parmesan over the dough and gently fold it in with stretching and folding motions until roughly distributed.
- Cover the dough and let it bulk ferment at room temperature for 3–5 hours, performing 3–4 sets of stretch-and-folds every 30–45 minutes during the first 2 hours, then leaving it undisturbed until puffy and about 50% risen.
- When the dough has risen and feels airy, lightly flour your work surface and gently turn the dough out, trying not to deflate it completely.
- Pre-shape the dough into a loose round by folding the edges toward the center and then flipping it seam-side down, tightening into a ball with a bench scraper.
- Let the pre-shaped dough rest uncovered for 15–20 minutes to relax.
- After resting, shape the dough into a tight boule or batard, creating good surface tension without tearing the dough.
- Sprinkle the banneton or towel-lined bowl with flour and the remaining grated Parmesan, then place the dough seam-side up into the basket.
- Cover and let the dough proof at room temperature for 30–60 minutes, then transfer to the refrigerator to cold-proof for 8–12 hours.
- About 45 minutes before baking, place the Dutch oven with its lid into your oven and preheat to 475°F (245°C).
- Carefully remove the hot Dutch oven from the oven, take the dough from the refrigerator, and gently invert it onto a piece of parchment paper so it is seam-side down.
- If using, sprinkle dried Italian herbs over the top of the dough and lightly press them in.
- Score the top of the dough with a sharp knife or lame to allow for controlled expansion.
- Using the parchment as a sling, lower the dough into the hot Dutch oven, cover with the lid, and place it back into the oven.
- Bake covered for 20 minutes at 475°F (245°C), then remove the lid, reduce the temperature to 450°F (230°C), and bake for another 12–15 minutes until deep golden brown.
- Carefully remove the bread from the Dutch oven and transfer it to a wire rack, then cool completely for at least 1 hour before slicing.
Notes
For best results, use a well-fed, bubbly starter that has doubled and is at its peak—weak starter will give a dense loaf and muted flavor. Be gentle when incorporating the garlic butter and cheese so you don’t tear the gluten network; a few uneven pockets of cheese are fine and taste great. If your kitchen is warm, shorten bulk fermentation or use cooler water to avoid over-proofing, and always trust how the dough looks and feels (puffy, airy, jiggly) more than the clock. Chilling the dough overnight not only improves flavor but also makes scoring easier and gives a better oven spring. Finally, resist cutting the bread while hot; letting it cool fully sets the crumb and keeps the loaf from becoming gummy, and store leftovers wrapped in a towel or paper bag to preserve the crust.
Tried this recipe?Let us know how it was!