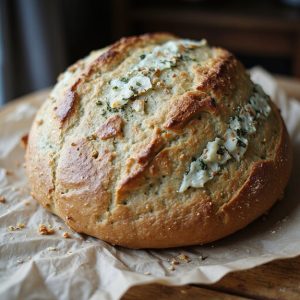
Italian Herb And Cheese Sourdough Bread
Equipment
- 1 Kitchen scale
- 2 large mixing bowls
- 1 Dough scraper
- 1 wooden spoon or silicone spatula
- 1 banneton or medium bowl with towel
- 1 Dutch oven with lid (4–6 qt) or baking stone and tray for steam
- 1 sharp lame or serrated knife
- 1 wire cooling rack
- 1 pastry brush (optional
Ingredients
- 100 gram active sourdough starter 100% hydration
- 350 gram water room temperature
- 500 gram bread flour unbleached
- 10 gram fine sea salt
- 20 gram extra-virgin olive oil
- 4 gram dried oregano
- 4 gram dried basil
- 3 gram dried thyme
- 3 gram dried rosemary crushed
- 80 gram shredded mozzarella cheese low moisture
- 40 gram grated Parmesan cheese
- 10 gram minced garlic fresh or 3 g garlic powder
- 10 gram semolina flour or cornmeal for dusting
Instructions
- In a large mixing bowl, whisk together the active sourdough starter and water until mostly dissolved.
- Add the bread flour and mix with a spoon or spatula until no dry spots remain and a shaggy dough forms.
- Cover the bowl and let the dough rest (autolyse) for 30 minutes at room temperature.
- Sprinkle the salt and olive oil over the dough and pinch and fold until fully incorporated.
- Add the dried oregano, basil, thyme, rosemary, and minced garlic (or garlic powder) and gently knead or fold to distribute evenly.
- Cover the bowl and begin bulk fermentation at room temperature (about 21–24°C), letting the dough rise for 3–4 hours.
- During the first 1.5 hours of bulk fermentation, perform 3–4 sets of stretch-and-folds every 30 minutes, lifting and folding each side of the dough toward the center.
- After the last set of folds, gently sprinkle the mozzarella and Parmesan over the dough and perform a few gentle folds to incorporate the cheese without tearing the gluten too much.
- Allow the dough to finish bulk fermenting until it has risen by about 50% and looks airy with small bubbles along the sides.
- Lightly flour the work surface and gently turn the dough out, taking care not to deflate it completely.
- Pre-shape the dough into a loose round by folding the edges toward the center and flipping it seam-side down, then let it rest uncovered for 15–20 minutes.
- Final-shape the dough into a tight round or oval loaf by gently stretching and tucking to build surface tension, keeping most of the gas inside.
- Dust the banneton or towel-lined bowl with semolina flour or cornmeal and a little bread flour to prevent sticking.
- Place the shaped dough seam-side up into the prepared banneton or bowl.
- Cover and refrigerate the dough for 8–12 hours for a cold retard and deeper flavor development.
- About 45 minutes before baking, place the Dutch oven and its lid into the oven and preheat to 250°C (480°F).
- When ready to bake, carefully remove the hot Dutch oven from the oven and remove the lid.
- Turn the chilled dough out from the banneton onto a piece of parchment paper so it is seam-side down.
- Score the top of the loaf with a sharp lame or serrated knife in one long slash or a pattern of your choice to control the expansion.
- Using the parchment as a sling, carefully lower the dough into the hot Dutch oven and cover with the lid.
- Bake covered at 250°C (480°F) for 20 minutes to create steam and oven spring.
- After 20 minutes, remove the lid, reduce the temperature to 220°C (430°F), and bake for another 15–20 minutes until deep golden brown and the internal temperature reaches about 96°C (205°F).
- Carefully remove the loaf from the Dutch oven and place it on a wire rack to cool completely for at least 1 hour before slicing.
- Slice with a serrated knife and serve plain, toasted, or alongside soups, salads, or pasta dishes.
Notes
For best results, use a ripe, bubbly starter that has at least doubled after feeding, as underactive starter will give poor rise and dense texture; adjust hydration slightly if your flour is very strong or very weak, adding a tablespoon of water or flour at a time to reach a soft but not runny dough; avoid adding the cheese too early in the process or it may break the gluten network and leak oil into the dough; if your kitchen is cool, extend bulk fermentation rather than over-handling the dough, and rely more on dough appearance (volume increase, bubbles, softness) than exact times; finally, allow full cooling before cutting to prevent a gummy crumb, and store the loaf cut-side down on a board or in a paper bag to preserve the crisp crust.
Tried this recipe?Let us know how it was!