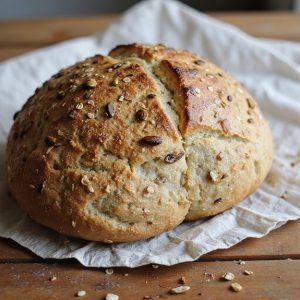
Multigrain Sourdough Bread
Equipment
- 1 digital kitchen scale
- 2 medium mixing bowls
- 1 large mixing bowl
- 1 Dough scraper
- 1 bench scraper
- 1 kitchen towel or plastic wrap
- 1 proofing basket or 1 medium bowl
- 1 Dutch oven with lid (4–5 qt) or baking stone
- 1 spray bottle with water (optional)
- 1 sharp razor or bread lame
- 1 wire cooling rack
Ingredients
- 100 gram active 100% hydration sourdough starter
- 350 gram water room temperature divided
- 350 gram bread flour
- 100 gram whole wheat flour
- 50 gram rye flour
- 40 gram rolled oats
- 20 gram sunflower seeds
- 20 gram pumpkin seeds
- 10 gram flaxseeds
- 10 gram sesame seeds
- 10 gram honey or maple syrup
- 10 gram fine sea salt
- 10 gram extra water for salt incorporation
Instructions
- In a medium bowl, combine the rolled oats, sunflower seeds, pumpkin seeds, flaxseeds, and sesame seeds with 100 g of the water, stir, and let soak for 30 minutes.
- In a large bowl, mix the sourdough starter with the remaining 250 g water until mostly dissolved.
- Add the bread flour, whole wheat flour, and rye flour to the starter mixture and mix with your hand or a spatula until no dry bits remain.
- Cover the bowl and let the dough rest (autolyse) for 45–60 minutes at room temperature.
- Sprinkle the salt and honey over the dough, add the extra 10 g water, and pinch and fold the dough until the salt is fully incorporated.
- Add the soaked seed and oat mixture to the dough and gently fold until evenly distributed.
- Cover the bowl and begin bulk fermentation at room temperature (around 75°F/24°C).
- During the first 2 hours of bulk fermentation, perform 3–4 sets of stretch-and-folds every 30 minutes, keeping the dough covered between sets.
- After the last set of folds, let the dough rest undisturbed until it has risen about 50% and shows bubbles around the edges (total bulk time 4–6 hours, depending on temperature).
- Lightly flour your work surface, gently turn the dough out, and pre-shape it into a loose round using a bench scraper.
- Let the dough rest uncovered for 15–20 minutes to relax.
- Shape the dough into a tight boule or batard by gently stretching and folding to create surface tension without deflating it.
- Generously flour your proofing basket or line a bowl with a floured kitchen towel, then place the shaped dough seam-side up in the basket.
- Cover and proof at room temperature for 1–2 hours, or place in the refrigerator for 10–14 hours for a cold retard.
- About 45 minutes before baking, place your Dutch oven (with lid) into the oven and preheat to 475°F (245°C).
- When ready to bake, carefully remove the hot Dutch oven from the oven and take off the lid.
- Turn the dough out of the basket onto a piece of parchment or directly into the hot Dutch oven so it is seam-side down.
- Score the top of the loaf with a sharp razor or lame in one or more slashes about 1/4 inch deep.
- Cover with the lid and bake for 20 minutes at 475°F (245°C).
- Reduce the oven temperature to 450°F (230°C), remove the lid, and bake for an additional 20–25 minutes until deep golden brown and well risen.
- Check that the internal temperature of the bread is around 205–210°F (96–99°C) or that the loaf sounds hollow when tapped on the bottom.
- Transfer the bread to a wire rack and let it cool completely for at least 1–2 hours before slicing.
Notes
For best results, use an active, recently fed starter that has at least doubled in size and is bubbly before mixing the dough, as sluggish starter will lengthen fermentation and may lead to dense bread. Room temperature dramatically affects rise times, so rely more on dough appearance (smooth, airy, jiggly, with visible bubbles) than the clock. Hydrating the grains and seeds beforehand keeps them from stealing water from the dough and helps maintain a soft crumb. If the dough feels very sticky, lightly wet your hands instead of over-flouring, which can make the loaf dense. Finally, a long, cold overnight proof deepens flavor, improves digestibility, and makes the dough easier to score, so use the refrigerator proof option whenever possible.
Tried this recipe?Let us know how it was!