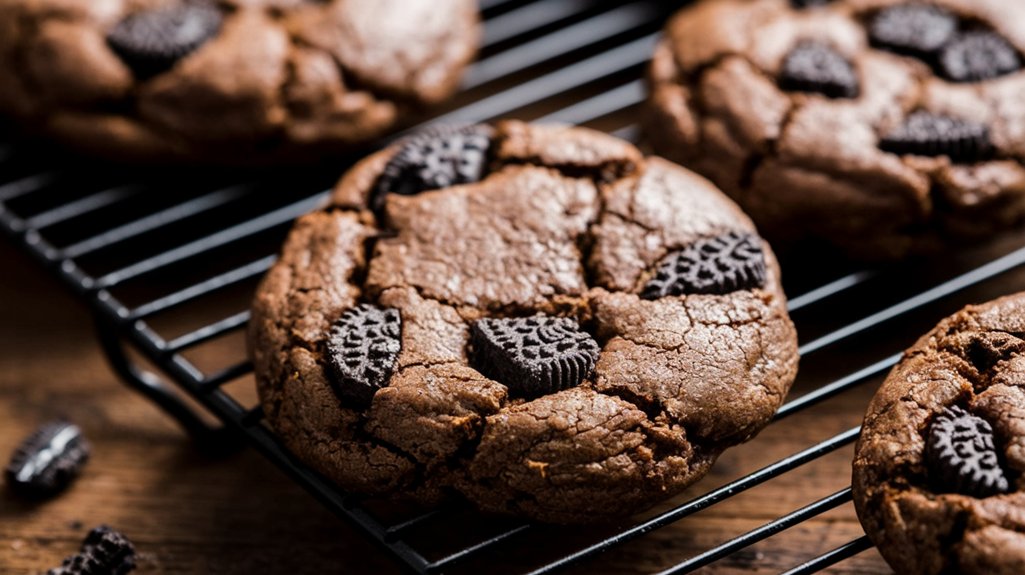
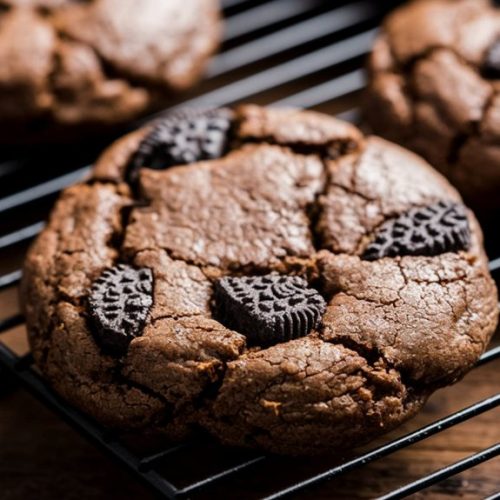
Imagine creating bakery-style Oreo cookies that blend the nostalgic flavors of Oreos with a homemade touch.
These cookies offer a soft yet slightly crispy texture, thanks to a precise mix of unsalted butter, sugars, and crushed Oreos.
Semi-sweet chocolate chips add an extra layer of indulgence, making them perfect for sharing.
Whether paired with milk or enjoyed on their own, these cookies promise a delightful experience.
Curious about the process?
Kitchen Tools Required
- 1 Baking sheet
- 1 Mixing bowl
- 1 Electric mixer
- 1 Rubber spatula
- 1 Cooling rack
Ingredients
- 1 cup Unsalted butter, softened
- 1 cup Granulated sugar
- 1 cup Brown sugar, packed
- 2 teaspoons Vanilla extract
- 2 Large eggs
- 2 3/4 cups All-purpose flour
- 1 teaspoon Baking soda
- 1/2 teaspoon Salt
- 2 cups Oreos, crushed
- 1 cup Semi-sweet chocolate chips
Cook & Prep Time
To efficiently manage your time while preparing and baking Bakery Style Oreo Cookies, you can follow this timeline:
Timeline for Bakery Style Oreo Cookies
- Preparation and Preheating (0 to 15 minutes):
- Preheat the oven to 350°F (175°C).
- Gather all the ingredients and equipment: baking sheet, mixing bowl, electric mixer, rubber spatula, and cooling rack.
- Line the baking sheet with parchment paper.
- Soften the unsalted butter if it isn’t already.
- Mixing the Ingredients (15 to 30 minutes):
- In a mixing bowl, cream together the softened butter, granulated sugar, and brown sugar using an electric mixer until light and fluffy.
- Add the vanilla extract and eggs, mixing until well combined.
- In a separate bowl, whisk together the all-purpose flour, baking soda, and salt.
- Gradually incorporate the dry ingredients into the wet mixture, mixing until just combined.
- Fold in the crushed Oreos and chocolate chips with a rubber spatula.
- Shaping the Cookies (30 to 35 minutes):
- Scoop tablespoon-sized dough onto the prepared baking sheet, spacing them about 2 inches apart.
- Baking the Cookies (35 to 47 minutes):
- Bake the cookies in the preheated oven for 10-12 minutes, until the edges are golden brown.
- Cooling Time (47 to 57 minutes):
- Remove the cookies from the oven and let them cool on the baking sheet for 5 minutes.
- Transfer the cookies to a cooling rack and allow them to rest for an additional 5 minutes before serving.
Total Time:
- Prep Time: 15 minutes
- Cook Time: 12 minutes
- Resting Time: 10 minutes
This timeline guarantees that your baking process is streamlined and that you can efficiently manage your time from preparation to serving.
Adjust the baking time slightly if you prefer softer or crispier cookies.
Enjoy your delicious Bakery Style Oreo Cookies!
Recipe
Indulge in the delightful fusion of classic cookies and America’s favorite sandwich cookie with these Bakery Style Oreo Cookies.
These cookies are a perfect treat for dessert lovers who enjoy a soft yet slightly crispy texture, offering a rich combination of flavors in every bite.
The recipe is simple and straightforward, making it an excellent choice for both novice bakers and seasoned ones alike.
The combination of crushed Oreos and semi-sweet chocolate chips guarantees each cookie is packed with chocolatey goodness, while the soft texture is achieved by carefully creaming the butter and sugars.
This cookie recipe delivers 24 delicious cookies, making it ideal for sharing at gatherings or enjoying as a family treat.
The preparation and cooking process is efficient, taking about 37 minutes in total, including preparation, baking, and cooling time.
With a few common ingredients and basic kitchen equipment, you can easily create these mouthwatering cookies in the comfort of your own home.
Begin by preheating your oven to 350°F (175°C) and prepare a baking sheet with parchment paper.
Using an electric mixer, cream the softened butter with both the granulated and brown sugars until the mixture is light and fluffy.
Incorporate the vanilla extract and eggs, mixing until the ingredients are well blended.
In a separate bowl, whisk together the flour, baking soda, and salt, then gradually add this dry mixture to the wet ingredients, mixing until just combined.
Gently fold in the crushed Oreos and chocolate chips with a rubber spatula.
Scoop tablespoon-sized portions of the dough onto the prepared baking sheet, ensuring they’re spaced about 2 inches apart.
Bake for 10-12 minutes until the edges are golden brown.
Once baked, let the cookies cool on the baking sheet for 5 minutes before transferring them to a cooling rack to rest for an additional 5 minutes before serving.
For the best results, verify that the butter is softened to make the creaming process easier, which contributes to the cookies’ ideal texture.
Be cautious not to over-mix the dough to maintain their tenderness.
If you prefer a softer cookie, reduce the baking time slightly, or extend it for a crispier finish.
Balancing the crushed Oreos with chocolate chips adds a delightful crunch, guaranteeing a flavor-packed experience in every bite.
Cooking Steps
You’ll start by preheating your oven to 350°F (175°C) and lining a baking sheet with parchment paper.
Next, cream the softened butter with both sugars using an electric mixer until the mixture is light and fluffy.
Incorporate the vanilla extract and eggs, mixing until they’re fully combined.
Then separately whisk together the flour, baking soda, and salt before gradually adding them to the wet mixture.
Step 1. Oven Preparation and Lining
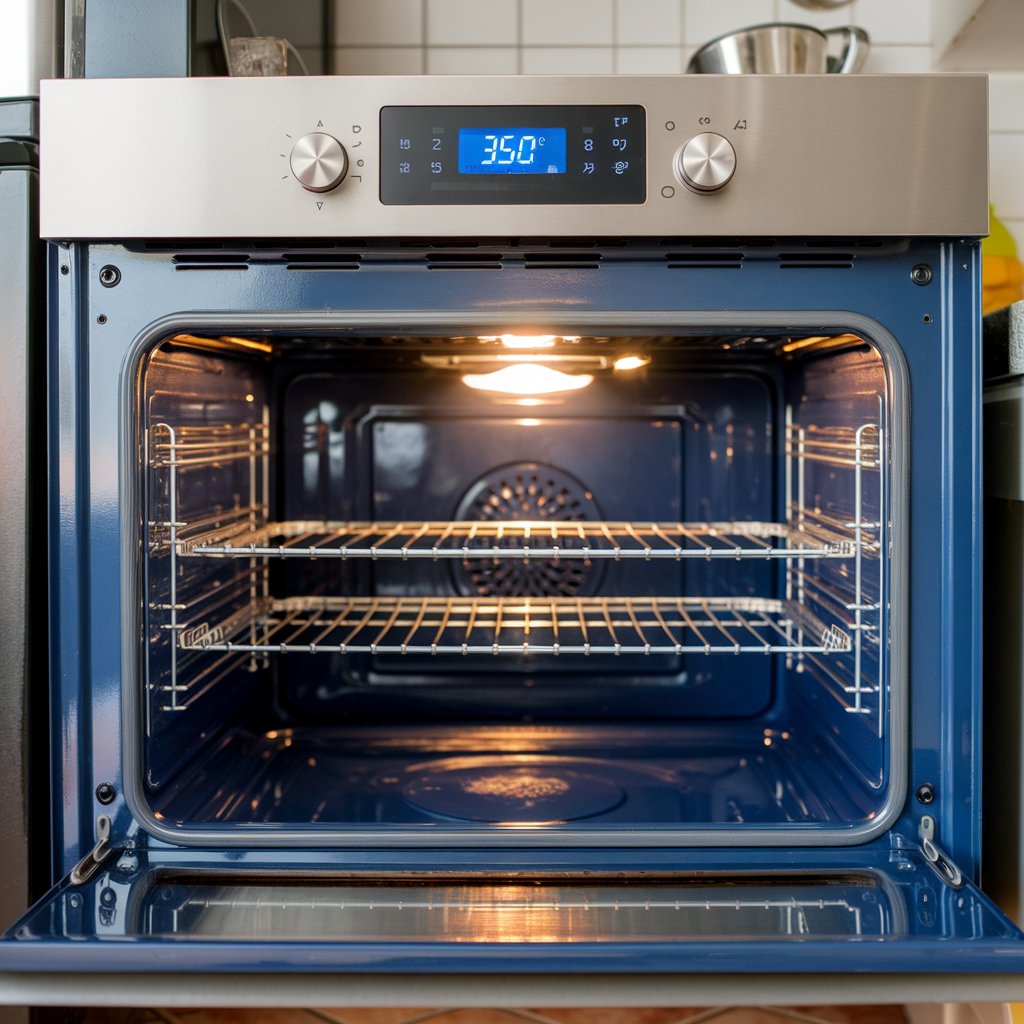
Before diving into the cookie-making process, verify your oven is ready by preheating it to 350°F (175°C).
This guarantees an even bake and ideal texture for your cookies.
Next, prepare your baking sheet by lining it with parchment paper.
This step is essential for several reasons:
- Even Heat Distribution: Parchment aids in uniform heat dispersion, preventing uneven baking.
- Non-stick Surface: It creates a non-stick surface, guaranteeing easy cookie removal.
- Easy Cleanup: Simplifies post-bake cleanup, saving you time and effort.
- Reduced Browning: Helps prevent excessive browning on the cookie bottom.
Confirm the baking sheet is adequately sized to allow proper airflow around the cookies.
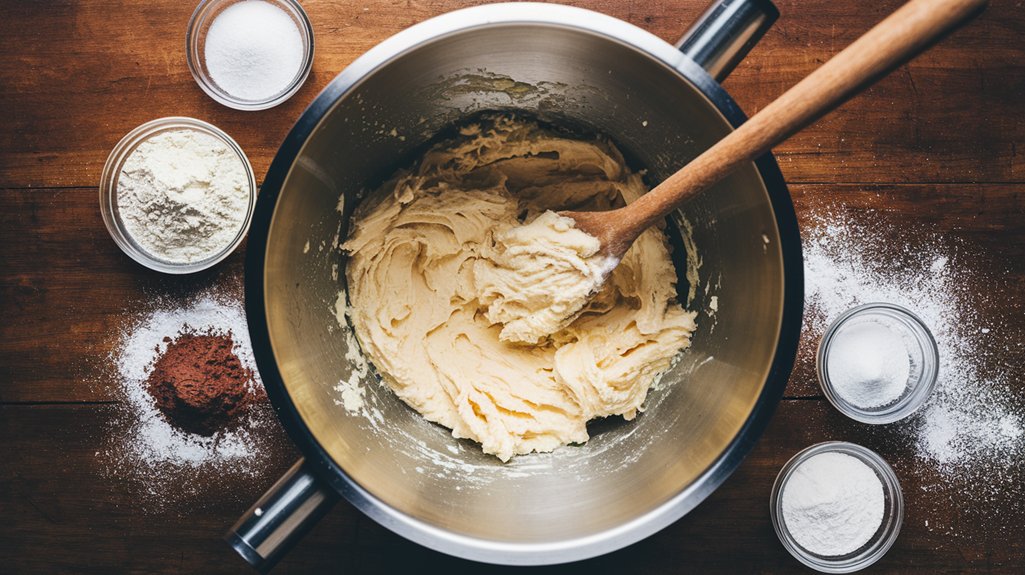
Step 2. Cream Butter and Sugars Together
Begin by creaming the butter, granulated sugar, and brown sugar together in a mixing bowl until the mixture is light and fluffy, a process that typically takes about 3-5 minutes with an electric mixer.
Use the medium speed setting to guarantee even mixing and avoid over-beating.
The softened butter should integrate smoothly with the sugars, forming a pale yellow, creamy texture.
| Task | Time Required |
|---|---|
| Creaming Butter | 1 minute |
| Adding Granulated Sugar | 2 minutes |
| Incorporating Brown Sugar | 2 minutes |
Confirm the butter is at room temperature to facilitate thorough creaming.
The goal is a homogeneous mixture without any lumps.
Pay attention to the color and consistency as indicators of readiness.
This step is vital for achieving the desired texture in your cookies.
Step 3. Incorporate Vanilla and Eggs
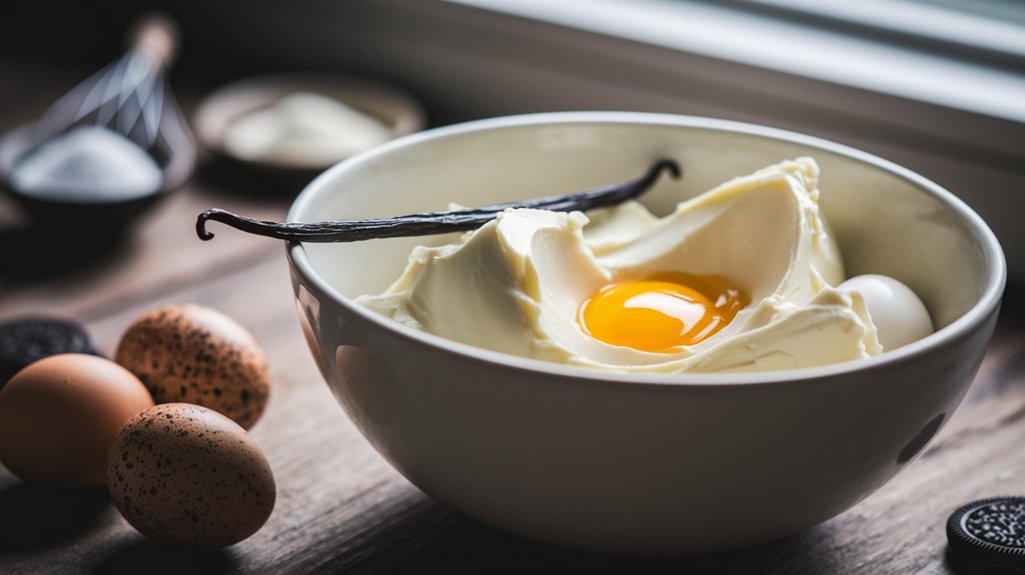
Once your butter and sugar mixture is perfectly creamed, it’s time to introduce the vanilla extract and eggs.
Add the vanilla extract first, allowing it to blend thoroughly, enhancing the aroma and flavor profile of your cookies.
Crack the eggs one at a time, ensuring each is fully incorporated before adding the next.
This step is essential for achieving a smooth, homogenous mixture that will contribute to the cookie’s structure and moisture content.
- Ensure vanilla fully integrates: This prevents any uneven flavor distribution.
- Add eggs gradually: This aids in emulsifying the batter, creating a uniform texture.
- Mix until just combined: Over-mixing can result in dense cookies.
- Monitor consistency carefully: The mixture should be smooth and slightly thick, ready for the dry ingredients.
Step 4. Combine Dry Ingredients Separately
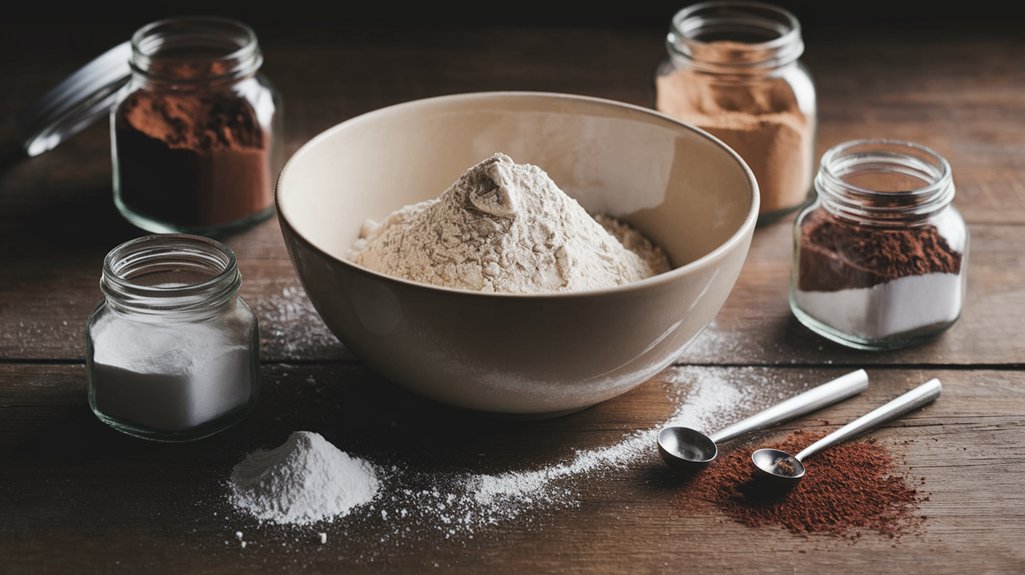
With the vanilla and eggs seamlessly blended into your creamed mixture, focus on preparing the dry ingredients.
In a separate bowl, whisk together the flour, baking soda, and salt.
Make certain the ingredients are evenly distributed to maintain uniformity in your cookie dough.
This step is essential in preventing clumps and promoting even spreading during baking.
| Ingredient | Measurement | Purpose |
|---|---|---|
| All-purpose flour | 2 3/4 cups | Structure and texture |
| Baking soda | 1 teaspoon | Leavening agent |
| Salt | 1/2 teaspoon | Flavor enhancement |
Accurate measurements are crucial. Use a scale for precision if available.
Mix these dry components thoroughly with a whisk, making certain no pockets of unmixed flour remain.
Proper preparation here guarantees your cookies bake evenly and achieve the desired consistency.
Step 5. Mixing Wet and Dry Ingredients
As you prepare to combine the ingredients, confirm the wet mixture is ready to incorporate the dry components seamlessly.
Begin by confirming the butter, sugars, vanilla extract, and eggs are well-blended until smooth.
This uniform consistency helps in evenly distributing the dry ingredients.
Gradually add the flour mixture, baking soda, and salt to the wet mixture.
Use a low-speed setting on your mixer to prevent over-mixing, which can lead to dense cookies.
The goal is to achieve a homogeneous dough without streaks of flour.
- Tip: Mix until just combined for tender cookies.
- Technique: Use a spatula for final mixing to prevent overworking.
- Efficiency: Gradually incorporate to avoid flour dust clouds.
- Precision: Scrape the bowl’s sides to confirm uniform ingredient distribution.
Serving Tips
- With a Glass of Cold Milk: The classic pairing enhances the rich chocolatey flavor of the cookies.
- With a Scoop of Vanilla Ice Cream: Transform your cookies into a decadent dessert by serving them a la mode.
- Crumbled Over Yogurt: Add a sweet and crunchy topping to your morning yogurt for a delightful treat.
- Paired with Coffee or Hot Chocolate: Enjoy your cookies with a warm beverage for a cozy afternoon snack.
- As a Base for Ice Cream Sandwiches: Use two cookies to sandwich your favorite ice cream for a fun, homemade treat.
Storage/Freezing/Reheating
Storage: Store the cookies in an airtight container at room temperature for up to one week to maintain freshness and prevent them from becoming stale.
Freezing: Freeze the cookies in a single layer on a baking sheet, then transfer to a freezer-safe bag or container. They can be frozen for up to three months.
Reheating: To reheat, place the cookies in a preheated oven at 300°F (150°C) for 5 minutes or microwave them for 10-15 seconds for a freshly baked taste.
Final Thoughts
When you indulge in these Bakery Style Oreo Cookies, you’ll experience a delightful balance of flavors and textures.
The combination of crushed Oreos and semi-sweet chocolate chips creates a unique taste profile that’s both familiar and exciting.
Every bite offers a satisfying crunch followed by a smooth, buttery finish. Here’s a quick summary of what you can expect:
| Aspect | Description |
|---|---|
| Flavor | Rich and chocolatey with Oreo notes |
| Texture | Crunchy edges, soft center |
| Prep & Cook Time | 37 minutes total (15 prep, 12 cook) |
| Serving Size | 24 cookies |
These cookies are an impressive dessert that you can easily make at home.
Their deliciousness is matched only by the simplicity of the process. Enjoy baking and savoring these delightful treats!
Frequently Asked Questions
Can I Substitute Regular Oreos With Double-Stuffed Oreos in the Recipe?
Yes, you can substitute regular Oreos with double-stuffed Oreos. Just remember to crush them well for even distribution in the dough. The increased cream filling could slightly alter the texture, making cookies softer. Adjust baking time if needed.
Are There Any Gluten-Free Options for This Cookie Recipe?
You can make this recipe gluten-free by substituting all-purpose flour with a gluten-free flour blend and using gluten-free Oreos. Guarantee the blend includes xanthan gum for structure. Check all ingredient labels to confirm gluten-free status.
What Type of Chocolate Chips Work Best for This Recipe?
You should use semi-sweet chocolate chips for this recipe. They balance the sweetness and add depth to the cookies. Make certain they’re evenly distributed in the dough for consistent flavor throughout each bite. Don’t substitute with milk chocolate.
How Can I Make These Cookies Vegan-Friendly?
Use plant-based butter, replace eggs with flax eggs (1 tablespoon flaxseed meal + 2.5 tablespoons water per egg), and guarantee Oreos are vegan. Substitute semi-sweet chocolate chips with dairy-free versions. Confirm all ingredient labels meet vegan standards.
Can I Use Margarine Instead of Butter for These Cookies?
You can substitute margarine for butter in these cookies. Make certain the margarine is softened for effective creaming. Check if margarine contains salt; if so, adjust the recipe’s salt content to maintain flavor balance.
Bakery Style Oreo Cookies
Equipment
- 1 Baking sheet
- 1 Mixing bowl
- 1 Electric mixer
- 1 Rubber spatula
- 1 Cooling rack
Ingredients
- 1 cup Unsalted butter softened
- 1 cup Granulated sugar
- 1 cup Brown sugar packed
- 2 teaspoons Vanilla extract
- 2 Large eggs
- 2 3/4 cups All-purpose flour
- 1 teaspoon Baking soda
- 1/2 teaspoon Salt
- 2 cups Oreos crushed
- 1 cup Semi-sweet chocolate chips
Instructions
- Preheat the oven to 350°F (175°C) and line a baking sheet with parchment paper.
- In a mixing bowl, cream together the butter, granulated sugar, and brown sugar until light and fluffy using an electric mixer.
- Add the vanilla extract and eggs to the butter mixture, and mix until well combined.
- In a separate bowl, whisk together the flour, baking soda, and salt.
- Gradually add the dry ingredients to the wet mixture, mixing until just combined.
- Fold in the crushed Oreos and chocolate chips using a rubber spatula.
- Scoop tablespoon-sized dough onto the prepared baking sheet, spacing them about 2 inches apart.
- Bake in the preheated oven for 10-12 minutes until the edges are golden brown.
- Remove from the oven and let the cookies cool on the baking sheet for 5 minutes.
- Transfer the cookies to a cooling rack and let them rest for an additional 5 minutes before serving.
Notes

Cynthia Weatherford is a seasoned chef and culinary enthusiast who serves as the Recipe creator of Somonday. With decades of experience in the kitchen and a passion for exploring diverse cuisines, Cynthia brings a blend of creativity and technique to every dish. Known for transforming simple ingredients into show-stopping meals, Cynthia believes that cooking is an art form anyone can master. Dedicated to inspiring home cooks, Cynthia shares approachable recipes, pro tips, and culinary wisdom to make every meal memorable.


