There’s something about tearing into a slab of warm, olive‑oil‑kissed focaccia that instantly feels like home.
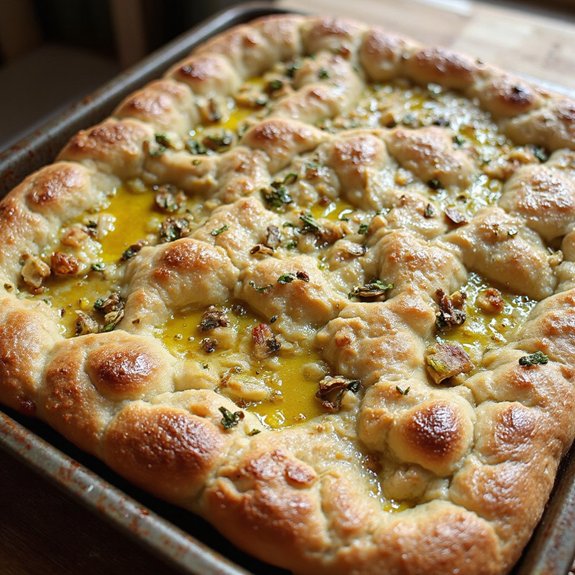
Picture a golden, dimpled crust freckled with fresh herbs and slow-roasted garlic, the aroma filling your kitchen before you’ve even set the table.
This garlic and herb sourdough focaccia is a cozy, shareable bread that turns simple meals—like soup, salad, or a quick skillet dinner—into something special, with most of the work happening hands-off as the dough slowly rises.
It’s ideal for comfort seekers, sourdough beginners, and anyone who loves to host without fuss.
I first leaned on this recipe during a hectic week when friends dropped by unannounced; I pulled a pan from the oven, sliced it into squares, and suddenly our thrown‑together snacks felt like a planned gathering.
It shines at Sunday suppers, potlucks, or when you need an impressive but easy centerpiece.
Ready to bring this bread to life?
Why You’ll Love It
- Delivers bold, fragrant garlic and herb flavor in every bite
- Creates an airy, chewy crumb with irresistibly crisp, golden edges
- Relies on natural sourdough leavening for deep, complex, tangy taste
- Preps ahead effortlessly with an overnight cold ferment in the fridge
- Pairs beautifully with pastas, soups, salads, or simple olive oil dipping
Ingredients
- 500 g bread flour — high-protein bread flour builds a chewy, airy crumb
- 375 g water, lukewarm — gently warm to help the starter dissolve and activate
- 100 g active sourdough starter (100% hydration), bubbly — use at peak rise for best lift
- 12 g fine sea salt — fine grains dissolve evenly and season the dough throughout
- 40 g extra virgin olive oil — choose fruity, good-quality oil for rich flavor
- extra virgin olive oil, for pan and topping — a generous coat prevents sticking and crisps edges
- 3 cloves garlic, finely minced — fresh cloves give the most aromatic garlic oil
- 2 tbsp fresh rosemary leaves, finely chopped — woody stems removed for tender texture
- 1 tbsp fresh thyme leaves, finely chopped — strip leaves from stems before chopping
- 1 tsp dried oregano — dried oregano holds strong flavor through baking
- 1 tsp flaky sea salt, for topping — adds crunch and bursts of salinity on the crust
Step-by-Step Method
Mix Starter and Water
Whisk the active sourdough starter and lukewarm water in a large bowl until mostly dissolved.
Break up any thick bits with your whisk or fingers.
Aim for an even, milky mixture with no big clumps of starter.
This helps the wild yeast distribute evenly, leading to more consistent fermentation and better rise.
Hydrate the Flour
Add the bread flour to the bowl all at once.
Mix with a dough scraper or your hand until no dry flour remains. Scrape the sides and bottom to combine thoroughly.
The dough will look shaggy and rough at this stage, which is exactly right.
Make certain every bit of flour is moistened.
Autolyse the Dough
Cover the bowl with plastic wrap or a reusable cover.
Let the dough rest at room temperature for about 30 minutes. Don’t add salt yet.
During this time, the flour hydrates fully and gluten begins developing on its own.
The dough will feel smoother and more cohesive after this rest.
Incorporate the Salt
Sprinkle the fine sea salt evenly over the surface of the dough.
Gently pinch sections of dough between your fingers to work the salt in.
Fold the dough over itself several times as you go.
Continue pinching and folding until the salt grains are no longer visible and the dough feels more elastic.
Perform Stretch-and-Folds
Every 30 minutes for 1.5–2 hours, perform a set of stretch-and-folds.
With damp or oiled hands, grab one edge of the dough, stretch it up, and fold it over the center.
Rotate the bowl and repeat 3–4 times per set. Keep the dough covered between sets. This strengthens gluten without kneading.
Bulk Ferment Until Puffy
After the final stretch-and-fold, cover the bowl tightly.
Let the dough bulk ferment at room temperature for 4–6 hours. Watch the dough, not the clock.
It should become puffy, aerated, and roughly doubled in volume.
When you jiggle the bowl, the dough should wobble softly and show visible bubbles.
Oil the Baking Pan Generously
Pour a generous amount of olive oil into your 9×13 inch baking pan.
Use your hands or a pastry brush to coat the bottom and sides thoroughly.
Make certain there are no dry spots; focaccia needs plenty of oil for its characteristic crisp edges and tender crumb.
Set the prepared pan aside.
Transfer and Coat the Dough
Gently scrape the dough from the bowl into the oiled pan using a dough scraper.
Avoid deflating it aggressively. Turn the dough over once or twice so its entire surface is coated with oil.
This prevents sticking and protects the dough as it proofs.
Let it relax in the pan for 20–30 minutes.
Stretch Toward the Corners
With well-oiled fingers, gently press and stretch the dough toward the corners of the pan.
Work slowly to avoid tearing. If the dough springs back, let it rest a few minutes, then continue.
You don’t need to reach the corners perfectly yet; some gradual stretching during proofing is normal.
Proof at Room Temperature or Chill
Cover the pan tightly. For maximum flavor and flexibility, refrigerate the dough for 8–12 hours.
Alternatively, leave it at room temperature for 1–2 hours. In either case, let it rise until very puffy and bubbly.
A well-proofed dough will jiggle and show visible surface bubbles when gently shaken.
Infuse the Garlic and Herbs
In a small saucepan, combine the olive oil, minced garlic, chopped rosemary, thyme, and dried oregano.
Warm gently over low heat for 2–3 minutes, just until fragrant.
Don’t let the garlic brown.
Remove from heat and cool to room temperature.
This step infuses the oil and softens the garlic.
Bring Chilled Dough to Temperature
If you refrigerated the dough, remove the pan from the fridge 30–45 minutes before baking.
Let it sit at room temperature until the surface looks very bubbly and active.
This short warm-up period helps the yeast wake up. It promotes better oven spring and a lighter, more open crumb.
Preheat the Oven Thoroughly
Set your oven to 425°F (220°C) with a rack in the middle position. Allow plenty of time for the oven to heat fully and stabilize.
A properly preheated oven ensures good initial rise and even browning.
Avoid opening the door frequently, as heat loss can reduce oven spring and color.
Dimple the Dough Deeply
Coat your fingertips in olive oil. Press straight down into the dough all over, creating deep dimples that reach the bottom of the pan.
Don’t drag your fingers, which can tear the dough.
Keep some bubbles intact; you want an airy crumb, not a flattened one. Cover the entire surface with dimples.
Spoon on the Garlic-Herb Oil
Drizzle or brush the cooled garlic and herb oil evenly over the dimpled surface.
Let the oil pool in the dimples; these pockets add flavor and moisture. Spread the herbs and garlic bits so they’re well distributed.
If needed, use a pastry brush or spoon to nudge aromatics into bare spots.
Sprinkle with Flaky Salt
Scatter flaky sea salt over the top of the dough. Aim for even coverage without over-salting any single area.
The salt will amplify the herbal flavors and provide a pleasant crunch after baking.
If you like extra toppings, such as cherry tomatoes or olives, add them now, nestling into dimples.
Bake Until Deep Golden
Place the pan on the middle rack and bake for 20–25 minutes.
Watch the color during the last few minutes. The focaccia should be deep golden brown on top and crisp at the edges.
If it browns too quickly, tent loosely with foil. The bottom should also be nicely colored and firm.
Cool Briefly in the Pan
Remove the pan from the oven and set it on a wire rack. Let the focaccia cool in the pan for about 10 minutes.
This resting period allows the crumb to set slightly and steam to escape.
It also helps the focaccia release more easily from the pan without tearing or compressing.
Transfer and Finish Cooling
Carefully lift the focaccia from the pan using a spatula or by tipping it onto your hand and then the rack.
Place it directly on a wire rack to cool at least 20 minutes before slicing. This prevents gumminess and keeps the crust crisp.
Once cooled slightly, cut into squares and serve.
Ingredient Swaps
- Use up to 50% all-purpose flour if you don’t have bread flour (crumb will be slightly softer), or swap in 10–20% whole wheat or rye for a heartier flavor—add a splash more water if the dough feels stiff.
- No sourdough starter? Replace the 100 g starter with 2 tsp instant yeast, add 50 g extra water and 50 g extra flour, and shorten bulk fermentation to 1–2 hours or until doubled.
- Substitute other fresh herbs for what you have: sage, basil, or parsley work well; if using only dried herbs, use about 1–1½ tsp total.
- For dairy-free/vegan, the recipe is already suitable; for gluten-free, use a high‑quality gluten‑free bread flour blend and be prepared for a softer, more batter-like dough.
- Garlic-sensitive? Infuse whole smashed cloves in the warm oil, then discard them for a milder flavor.
You Must Know
– Flavor Boost • For deeper garlic-herb aroma without harshness: Let the infused oil sit at least 20–30 minutes off heat (or overnight in the fridge) before using; this mellows the garlic and pulls more flavor from the herbs for a more fragrant top.
Serving Tips
- Serve warm with a small dish of extra virgin olive oil and balsamic.
- Slice into squares and pair with minestrone, tomato soup, or rustic stews.
- Use as a base for open-faced sandwiches topped with mozzarella, tomatoes, and arugula.
- Cut into strips and serve as dippers with hummus or whipped feta.
- Cube leftovers for herby sourdough croutons on salads or roasted vegetable bowls.
Storage & Make-Ahead
Focaccia keeps in the fridge for 3–4 days, wrapped or in an airtight container.
Rewarm at 350°F (175°C) for 8–10 minutes to refresh.
It’s very make-ahead friendly: bake, cool completely, then freeze up to 2 months, well wrapped.
Reheat from frozen until hot and crisp.
Reheating
Reheat gently to keep focaccia soft.
In a 300°F oven, wrapped loosely in foil.
Briefly in a covered skillet over low heat.
Or in the microwave under a damp towel.
Focaccia in Italian Feasts
Even before the main dishes reach the table, the scent of warm focaccia threaded with garlic and herbs tells everyone a feast’s about to begin.
In Italian homes, that first torn piece is a quiet invitation: relax, talk, linger. I love how a pan of this sourdough focaccia lands in the center like a shared plate of possibility.
You might dip it into peppery olive oil, swipe it through a glossy pool of tomato sauce, or tuck it beside ribbons of prosciutto and sharp cheese.
It soaks up braising juices, cradles grilled vegetables, and turns simple salads into something celebratory. At a long, noisy table, passing focaccia from hand to hand feels like passing generosity itself.
Final Thoughts
Give this garlic and herb sourdough focaccia a try and see just how simple and satisfying homemade bread can be.
Don’t hesitate to tweak the herbs or toppings to make it your own—every batch is a chance to create your perfect pan of focaccia.
Frequently Asked Questions
Can I Freeze the Unbaked Focaccia Dough for Later Use?
Yes, you can freeze it, but I wouldn’t. Freezing dulls fermentation’s magic—those airy bubbles and lively flavor. I’d chill the dough overnight instead, then bake fresh so you smell, hear, and taste its full crackling glory.
How Do I Adapt This Recipe for a Sourdough Discard Version?
Use discard by adding 2–3 grams instant yeast, then keep 100 grams discard for flavor. I’d shorten bulk fermentation, watch for a soft, jiggly rise, and still drown everything in fragrant, sizzling herb oil.
What Adjustments Are Needed for Baking Focaccia at High Altitudes?
You’ll want less yeast activity, more structure, and extra moisture: I’d shorten fermentation, increase salt slightly, add 5–10% more water, and bake a bit hotter, watching for faster browning in that thin, bright air.
Can I Bake This Focaccia in a Cast Iron Skillet Instead?
Yes, you can, and I’d love that crispy edge. I’d oil the skillet generously, press the dough gently to the sides, watch for faster browning, and maybe shorten bake time a few minutes.
How Do I Scale the Recipe for a Crowd or Catering Events?
You can scale it linearly: I simply multiply every ingredient by pans needed, keeping dough depth similar. I mix separate batches, proof in oiled trays, then stagger baking so warm, fragrant slabs roll out continuously.

Garlic And Herb Sourdough Focaccia Bread
Equipment
- 1 large mixing bowl
- 1 medium mixing bowl
- 1 9×13 inch baking pan or sheet pan
- 1 digital kitchen scale
- 1 measuring cup
- 1 set measuring spoons
- 1 dough scraper or spatula
- 1 plastic wrap or reusable cover
- 1 clean kitchen towel
- 1 Small saucepan
- 1 pastry brush (optional
Ingredients
- 500 gram bread flour
- 375 gram water lukewarm
- 100 gram active sourdough starter 100% hydration bubbly
- 12 gram fine sea salt
- 40 gram extra virgin olive oil plus extra for pan and topping
- 3 clove garlic finely minced
- 2 tablespoon fresh rosemary leaves finely chopped
- 1 tablespoon fresh thyme leaves finely chopped
- 1 teaspoon dried oregano
- 1 teaspoon flaky sea salt for topping
Instructions
- In a large mixing bowl, whisk together the active sourdough starter and lukewarm water until the starter is mostly dissolved.
- Add the bread flour to the bowl and mix with a dough scraper or your hand until no dry flour remains and a shaggy dough forms.
- Cover the bowl with plastic wrap or a reusable cover and let the dough rest (autolyse) for 30 minutes at room temperature.
- Sprinkle the fine sea salt over the dough, then gently pinch and fold the dough several times to incorporate the salt evenly.
- Perform 3–4 sets of stretch-and-folds every 30 minutes over 1.5–2 hours, keeping the dough covered between sets.
- After the final stretch-and-fold, cover the bowl tightly and let the dough bulk ferment at room temperature for 4–6 hours, or until puffy and roughly doubled.
- Coat the baking pan generously with olive oil, making sure the bottom and sides are well covered.
- Gently scrape the dough into the oiled pan and turn it over once or twice to coat the surface with oil.
- Let the dough rest in the pan for 20–30 minutes, then with oiled fingers gently stretch and press it toward the corners of the pan without tearing.
- Cover the pan and place it in the refrigerator for 8–12 hours for a cold retard, or leave it at room temperature for 1–2 hours until very puffy.
- In a small saucepan, gently warm the extra virgin olive oil with the minced garlic, chopped rosemary, thyme, and dried oregano over low heat for 2–3 minutes, then cool to room temperature.
- When ready to bake, remove the dough from the fridge (if chilled) and let it sit at room temperature 30–45 minutes until very bubbly on top.
- Preheat the oven to 425°F (220°C) with a rack in the middle position.
- Using oiled fingertips, dimple the surface of the dough by pressing straight down to the bottom of the pan all over.
- Spoon or brush the cooled garlic and herb oil evenly over the top of the dough, letting it pool in the dimples.
- Sprinkle flaky sea salt evenly over the top.
- Bake for 20–25 minutes, or until the focaccia is deep golden brown on top and crisp around the edges.
- Remove the pan from the oven and let the focaccia cool in the pan for 10 minutes.
- Carefully transfer the focaccia to a wire rack and cool at least 20 minutes before slicing.
Notes

Cynthia Weatherford is a seasoned chef and culinary enthusiast who serves as the Recipe creator of Somonday. With decades of experience in the kitchen and a passion for exploring diverse cuisines, Cynthia brings a blend of creativity and technique to every dish. Known for transforming simple ingredients into show-stopping meals, Cynthia believes that cooking is an art form anyone can master. Dedicated to inspiring home cooks, Cynthia shares approachable recipes, pro tips, and culinary wisdom to make every meal memorable.


