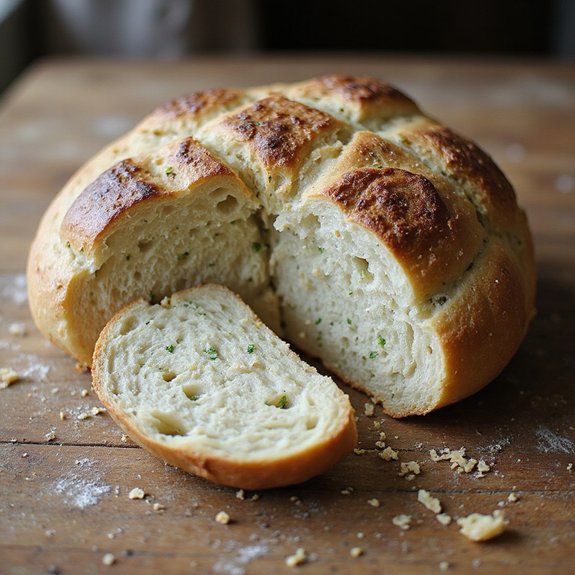
There’s something about pulling a crackling loaf of herb sourdough from the oven that makes the whole kitchen feel like home.
The crust is deep golden and blistered, the inside tender and airy, laced with flecks of rosemary, thyme, or whatever fresh herbs you love.
This is slow, cozy food—the kind of bread that turns a simple soup, hearty stew, or quick weeknight pasta into a meal that feels special.
Herb sourdough is perfect for comfort seekers, curious beginners ready to try sourdough, and anyone who loves meal-prepping for the week ahead.
I remember one rainy Sunday when a loaf like this turned a bare pantry dinner into a linger-at-the-table evening, with thick slices dipped into olive oil and scattered with flaky salt.
It shines at relaxed Sunday suppers, casual gatherings, and easy entertaining.
Ready to bring this loaf to life in your own kitchen?
Why You’ll Love It
- Delivers bold flavor from fragrant rosemary, thyme, parsley, and garlic.
- Elevates any meal, from simple soups to special-occasion dinners.
- Uses basic sourdough technique with step-by-step, beginner-friendly instructions.
- Bakes into a crisp crust with a soft, chewy, tender crumb.
- Adapts easily with different herbs or dried seasonings you have.
Ingredients
- 100 g active sourdough starter, 100% hydration — make sure it’s recently fed and bubbly
- 350 g water, room temperature — cooler side of warm helps gluten develop evenly
- 500 g bread flour — higher protein flour gives better structure and chew
- 10 g fine sea salt — evenly seasons the dough and strengthens gluten
- 2 tbsp extra-virgin olive oil — adds tenderness and a rich, fruity aroma
- 2 tbsp fresh rosemary, finely chopped — strip leaves from stems before chopping
- 2 tbsp fresh thyme leaves, finely chopped — avoid woody stems, use only leaves
- 1 tbsp fresh parsley, finely chopped — flat-leaf has brighter flavor than curly
- 1 tsp garlic powder — disperses garlic flavor without extra moisture
- 1 tbsp olive oil, for greasing bowl — lightly coat so dough releases cleanly
- 10 g rice flour, for dusting banneton (optional) — helps prevent sticking better than wheat flour
Step-by-Step Method
Mix the Starter and Water
Whisk the active sourdough starter with room-temperature water in a large mixing bowl. Stir until the starter is mostly dissolved and the liquid looks milky and slightly frothy.
This helps distribute the natural yeasts evenly so fermentation starts strong.
Scrape down the sides of the bowl so everything is combined.
Combine the Flour and Form a Shaggy Dough
Add the bread flour to the starter mixture all at once. Mix with a wooden spoon or silicone spatula until no dry flour remains.
Expect a rough, shaggy dough that looks uneven and slightly sticky. Avoid adding extra water or flour. Just make certain every bit of flour is hydrated and incorporated.
Autolyse the Dough
Cover the bowl with a towel or plastic wrap and let the dough rest for 30–45 minutes. Leave it at room temperature.
During this autolyse, the flour hydrates and gluten begins to develop naturally. The dough will feel smoother and more elastic afterward. This step improves flavor and makes later handling easier.
Add Salt, Oil, and Herbs
Sprinkle the fine sea salt, olive oil, rosemary, thyme, parsley, and garlic powder evenly over the dough’s surface. Distribute them so no large pockets of herbs or salt remain in one area.
This makes for balanced seasoning and flavor throughout the loaf. The oil adds tenderness and enhances the herb aroma.
Pinch and Fold to Incorporate Add-Ins
Use your hand to pinch and squeeze the dough repeatedly, then fold it over itself. Rotate the bowl as you work.
Continue until the herbs, oil, and salt are fully incorporated and evenly speckled throughout. Stop once the dough feels cohesive and slightly smoother, without visible streaks of unseasoned dough.
Begin Bulk Fermentation
Cover the bowl and let the dough ferment at room temperature for 3–4 hours. Aim for a warm but not hot environment to encourage steady rise.
Watch the dough rather than the clock. It should increase in volume, look slightly domed, and show small bubbles along the sides and surface as fermentation progresses.
Perform Stretch-and-Folds Regularly
For the first 2 hours of bulk fermentation, perform stretch-and-folds every 30 minutes. With wet hands, grab one edge of the dough, stretch it upward, and fold it over the center.
Rotate the bowl and repeat 3–4 times. This gently strengthens the gluten network without kneading, helping the loaf hold its shape.
Turn the Dough Out to the Work Surface
After bulk fermentation, lightly flour your work surface. Gently loosen the dough from the bowl’s sides with a dough scraper.
Tip the bowl and let the dough ease out onto the counter in one piece. Avoid deflating it aggressively. Preserve as many air bubbles as possible for an open, airy crumb.
Pre-Shape the Dough
Lightly flour your hands if needed. Fold the dough’s edges toward the center to create surface tension.
Flip the dough seam-side down and gently rotate it, using your hands or a scraper to tuck the sides under. Form a loose, round shape. Don’t tighten it too much at this stage. Keep movements gentle and controlled.
Let the Dough Bench Rest
Leave the pre-shaped dough uncovered on the counter for 20–30 minutes. Allow it to relax and spread slightly.
This rest lets the gluten unwind, making the final shaping smoother and preventing tearing. The dough should feel softer and more pliable afterward, yet still hold some structure when handled again.
Shape into a Tight Loaf
Using your hands or a scraper, gently tighten the dough into a firm round or oval. Stretch the surface by pulling the dough toward you on the counter, tucking the edges underneath.
Rotate and repeat to build tension on the outer skin. Aim for a smooth top and a neatly sealed seam on the bottom.
Prepare the Banneton or Bowl
Dust your banneton or a medium bowl lined with a clean kitchen towel with rice flour or regular flour. Coat it generously, especially along the sides, to prevent sticking.
Rice flour works particularly well for releasing sticky sourdoughs. Shake out any excess flour so it doesn’t clump on the dough surface.
Place Dough Seam-Side Up
Lift the shaped loaf gently and place it seam-side up into the prepared banneton or bowl. Center it so it proofs evenly.
The seam will eventually become the bottom of the baked loaf. Adjust the dough slightly if needed to maintain the shape. Avoid pressing it down or popping built-up air pockets.
Cold Proof in the Refrigerator
Cover the banneton or bowl loosely with a towel or plastic wrap. Transfer it to the refrigerator for 8–12 hours.
This cold proof slows fermentation, deepens flavor, and makes scoring easier. The dough will rise more slowly and firm up. Use this overnight rest to fit baking conveniently into your schedule.
Preheat the Dutch Oven
About 45 minutes before baking, place the Dutch oven with its lid into your oven. Preheat to 475°F (245°C).
Let the pot heat thoroughly so it mimics a professional bread oven. The hot surface helps the loaf spring up quickly. Always handle the pot carefully with thick oven mitts during this step.
Invert the Loaf onto Parchment
Remove the proofed dough from the refrigerator. Lay a sheet of parchment paper over the banneton.
Place your hand or a flat board over the parchment and invert the entire setup. Gently lift off the banneton or towel. The dough should now sit seam-side down on the parchment, ready for scoring and baking.
Score the Dough
Using a sharp knife or bread lame, make one or more deliberate cuts on the top of the loaf. Angle the blade slightly to create an ear if desired. Score about ¼ inch deep.
This controlled cut allows the bread to expand properly in the oven, preventing random ruptures and giving an attractive finished look.
Load the Dough into the Hot Dutch Oven
Carefully slide or lift the parchment with the dough into the preheated Dutch oven. Center the loaf so it bakes evenly.
Replace the lid promptly to trap steam, which helps create a glossy, well-developed crust. Work quickly but safely, keeping your hands clear of hot surfaces and rising steam.
Bake Covered, Then Uncovered
Bake the loaf covered at 475°F (245°C) for 20 minutes. Then remove the lid, reduce the oven temperature to 450°F (230°C), and continue baking for another 18–22 minutes.
Watch for a deep golden-brown crust and strong oven spring. The uncovered time helps the crust crisp and color fully.
Cool Completely Before Slicing
Use the parchment to lift the finished bread out of the Dutch oven. Transfer it to a cooling rack.
Let it cool for at least 1 hour to set the crumb and finish interior cooking. Resist slicing while hot, which can compress the structure. Once fully cooled, slice and enjoy the herb-scented sourdough.
Ingredient Swaps
- Use up to 50% whole wheat or rye flour in place of bread flour; add 10–20 g more water if the dough feels stiff.
- Substitute 2–3 tsp dried mixed herbs for the fresh rosemary, thyme, and parsley if fresh isn’t available.
- For vegan diets, the recipe is already compliant; for oil-free, omit the olive oil and expect a slightly chewier crust.
- If you don’t have rice flour for dusting, use all-purpose flour or a 50/50 mix of flour and fine semolina to prevent sticking.
You Must Know
- Doneness • If you’re unsure the loaf is fully cooked, use an instant-read thermometer and pull it at 205–210°F (96–99°C) in the center, or listen for a hollow sound when you knock the bottom; a dense, muffled thud means it needs 5–10 more minutes.
- Troubleshoot • If the dough feels very slack and spreads like a pancake after shaping, add an extra 10–20 g flour next time and/or shorten the warm rise so bulk ends when it’s about 60–75% larger with a gently domed top; this keeps the gluten from over-relaxing and losing structure.
- Flavor Boost • For a more pronounced herb aroma, increase the rosemary and thyme to 3 tbsp each and add them after the first 20–30 minutes of gluten development (during an early fold), so the essential oils stay brighter instead of dulling in the full contact with salt and starter.
- Scale • To get two loaves, double everything (1,000 g flour total) but divide the dough in half right after bulk fermentation; each piece should be ~600–650 g, which fits comfortably in standard 4–5 qt Dutch ovens and proofs more evenly.
- Make-Ahead • For schedule flexibility and tangier flavor, extend the cold proof up to 18 hours at 37–40°F (3–4°C); if the dough looks very puffy and wobbly when it comes out, move quickly to score and load it so it doesn’t collapse from overproofing.
Serving Tips
- Serve warm slices with salted butter and a drizzle of good olive oil.
- Pair with creamy soups like tomato, mushroom, or potato-leek for dipping.
- Use as a base for open-faced sandwiches with goat cheese and roasted vegetables.
- Toast and top with bruschetta-style tomatoes, basil, and a splash of balsamic.
- Serve alongside roast chicken or grilled fish to soak up pan juices.
Storage & Make-Ahead
Herb sourdough bread keeps in the fridge 4–5 days, wrapped in a towel or paper, then slipped into a loose bag.
For make-ahead, bake, cool completely, slice, and freeze up to 2 months.
Reheat slices straight from frozen in a toaster or a 350°F (175°C) oven.
Reheating
To reheat herb sourdough gently, warm slices in a 300°F (150°C) oven for 5–10 minutes.
Lightly toast on a dry skillet, or briefly microwave wrapped in a damp towel.
Herbed Sourdough in Culture
Fragrance ties herbed sourdough to a long line of bread traditions that stretch from rustic European kitchens to today’s home ovens.
When I pull a loaf from the Dutch oven and that rosemary–garlic steam rushes out, I feel linked to bakers who tucked garden herbs into dough centuries ago, stretching simple flour and water into something celebratory.
I think of Italian focaccia perfumed with olive oil and thyme, French boules speckled with parsley, and market stalls where warm, crackling loaves draw people in from the street.
When you slice into your own herbed sourdough, you’re not just making toast; you’re joining that shared story—passing a plate, tearing pieces by hand, and letting the table go quiet for a moment while everyone tastes.
Final Thoughts
Give this herb sourdough bread a try and enjoy how the fresh rosemary, thyme, and parsley transform a simple loaf into something special.
Once you’ve made it, feel free to tweak the herbs and garlic to make the flavors your own.
Frequently Asked Questions
Can I Make This Herb Sourdough Completely by Hand Without Stretch-And-Folds?
Yes, you can. I’d knead it by hand 8–10 minutes until smooth and springy, then let it rise once, shape it, proof it cold, and bake—feeling that soft, fragrant dough change under your palms.
How Do Altitude Changes Affect Fermentation Time and Baking Temperature for This Bread?
Altitude speeds fermentation and lowers boiling point, so I’d watch the dough, not the clock, and often reduce yeast activity with cooler temps, then bake slightly hotter, listening for that hollow, singing crust when you tap it.
Is This Herb Sourdough Suitable for People With Mild Yeast Sensitivities?
Yes, it often is, but it really depends on your body. I feel the slow, tangy fermentation, airy crumb, and deeply toasted crust usually make the yeast gentler—yet I’d urge you to test a small slice first.
Can I Freeze the Shaped Dough Before the Cold Proof for Later Baking?
Yes, you can, but I wouldn’t. Freezing now shocks the wild yeasts, so later the dough can feel sluggish, spread wide, and bake dense instead of springing into that fragrant, crackling loaf you’re craving.
How Do I Convert This Recipe for a Bread Machine or Stand Mixer?
You can use either: for a stand mixer, I’d mix, knead 5–8 minutes low, then follow the same rises. For a bread machine, I’d use “dough” cycle only, then shape, proof, and bake separately.

Herb Sourdough Bread
Equipment
- 1 digital kitchen scale
- 2 medium mixing bowls
- 1 large mixing bowl
- 1 Dough scraper
- 1 wooden spoon or silicone spatula
- 1 banneton basket or medium bowl
- 1 clean kitchen towel
- 1 Dutch oven with lid (4–5 qt)
- 1 parchment paper sheet
- 1 sharp knife or bread lame
- 1 Cooling rack
Ingredients
- 100 gram active sourdough starter 100% hydration
- 350 gram water room temperature
- 500 gram bread flour
- 10 gram fine sea salt
- 2 tablespoon extra-virgin olive oil
- 2 tablespoon fresh rosemary finely chopped
- 2 tablespoon fresh thyme leaves finely chopped
- 1 tablespoon fresh parsley finely chopped
- 1 teaspoon garlic powder
- 1 tablespoon olive oil for greasing bowl
- 10 gram rice flour optional; for dusting banneton
Instructions
- In a large mixing bowl, whisk together the active sourdough starter and water until mostly dissolved.
- Add the bread flour to the bowl and mix with a spoon or spatula until no dry flour remains and a shaggy dough forms.
- Cover the bowl and let the dough rest for 30–45 minutes to autolyse.
- Sprinkle the salt, olive oil, rosemary, thyme, parsley, and garlic powder over the dough.
- Pinch and fold the dough repeatedly with your hand until the herbs and salt are evenly incorporated.
- Cover the bowl and let the dough bulk ferment at room temperature for 3–4 hours, performing stretch-and-folds every 30 minutes for the first 2 hours.
- After bulk fermentation, lightly flour your work surface and gently turn the dough out onto it.
- Pre-shape the dough into a loose round by folding the edges toward the center and flipping it seam-side down.
- Let the dough rest uncovered for 20–30 minutes to relax.
- Shape the dough into a tight round or oval loaf by gently stretching the surface and tucking the seams underneath.
- Dust the banneton or a medium bowl lined with a towel with rice flour or regular flour.
- Place the shaped dough seam-side up into the prepared banneton or bowl.
- Cover and refrigerate the dough for 8–12 hours for a cold proof.
- About 45 minutes before baking, place the Dutch oven with its lid into the oven and preheat to 475°F (245°C).
- Remove the dough from the fridge, place a sheet of parchment over the banneton, and invert the loaf onto the parchment.
- Score the top of the dough with a sharp knife or lame to allow controlled expansion.
- Carefully transfer the dough on the parchment into the preheated Dutch oven and cover with the lid.
- Bake covered for 20 minutes at 475°F (245°C).
- Remove the lid, reduce the temperature to 450°F (230°C), and bake for another 18–22 minutes until deep golden brown.
- Lift the bread out of the Dutch oven and cool completely on a cooling rack for at least 1 hour before slicing.
Notes

Cynthia Weatherford is a seasoned chef and culinary enthusiast who serves as the Recipe creator of Somonday. With decades of experience in the kitchen and a passion for exploring diverse cuisines, Cynthia brings a blend of creativity and technique to every dish. Known for transforming simple ingredients into show-stopping meals, Cynthia believes that cooking is an art form anyone can master. Dedicated to inspiring home cooks, Cynthia shares approachable recipes, pro tips, and culinary wisdom to make every meal memorable.


