
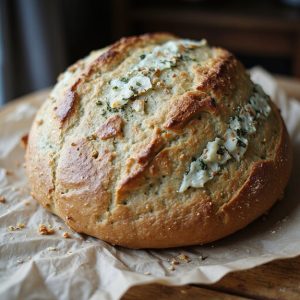
There’s something about the golden, blistered crust of Italian herb and cheese sourdough that makes the whole kitchen feel like a cozy bakery.
Picture a warm loaf coming out of the oven, its surface freckled with melted cheese and flecks of oregano, basil, and rosemary.
This is a rustic, comforting bread—perfect alongside a hearty stew or simple pasta—and most of the time is hands-off proofing, making it surprisingly manageable for busy home bakers and curious beginners.
I remember one chilly Sunday when guests arrived early and dinner wasn’t close to ready.
I sliced into a fresh loaf of this sourdough, still warm, and set out olive oil and a small dish of salt.
Conversation instantly relaxed around that bread; no one minded the wait.
This loaf shines at Sunday suppers, casual gatherings, or anytime you need easy, impressive comfort.
Ready to bring this bread to life?
Why You’ll Love It
- Delivers bold, savory Italian herb flavor in every slice.
- Fills your kitchen with an incredible garlicky, cheesy aroma.
- Balances chewy sourdough crumb with gooey cheese pockets throughout.
- Ferments slowly overnight for deeper flavor and better digestibility.
- Pairs effortlessly with soups, salads, and all your favorite pastas.
Ingredients
- 100 g active sourdough starter 100% hydration — use ripe, bubbly starter just after peak.
- 350 g water room temperature — cooler side helps with easy handling.
- 500 g bread flour unbleached — 11–13% protein for best structure.
- 10 g fine sea salt — enhances both gluten and flavor.
- 20 g extra-virgin olive oil — adds tenderness and Italian aroma.
- 4 g dried oregano — choose a fragrant, recently opened jar.
- 4 g dried basil — sweeter profile pairs well with cheese.
- 3 g dried thyme — a little goes a long way for earthiness.
- 3 g dried rosemary crushed — crush between fingers to release oils.
- 80 g shredded mozzarella cheese low moisture — pre-shred for even pockets.
- 40 g grated Parmesan cheese — Parmigiano Reggiano if possible for depth.
- 10 g minced garlic fresh or 3 g garlic powder — fresh gives stronger punch.
- 10 g semolina flour or cornmeal — for dusting banneton and adding crunch.
Step-by-Step Method
Mix Starter and Water
Whisk the active sourdough starter with room-temperature water in a large bowl.
Break up any thick bits so the mixture looks milky and mostly smooth. This helps distribute the wild yeast evenly.
Scrape the sides of the bowl so everything is incorporated before adding the flour for the dough.
Combine Flour and Autolyse
Add the bread flour to the starter mixture.
Stir with a spoon or spatula until no dry bits remain and a shaggy dough forms.
Don’t knead yet.
Cover the bowl and let it rest for 30 minutes.
This autolyse hydrates the flour and begins gluten development with minimal effort.
Add Salt and Olive Oil
Sprinkle the salt evenly over the dough.
Drizzle in the olive oil.
Pinch and squeeze the dough between your fingers, then fold it over itself repeatedly.
Continue until the salt and oil disappear into the dough.
The dough will feel smoother and more cohesive once everything is properly incorporated.
Mix in Herbs and Garlic
Add the dried oregano, basil, thyme, rosemary, and minced garlic or garlic powder.
Gently knead or fold the dough to distribute the seasonings.
Rotate the bowl as you fold to guarantee even mixing.
Avoid tearing the dough.
Stop once the herbs and garlic appear evenly speckled throughout the surface.
Begin Bulk Fermentation
Cover the bowl and let the dough rise at room temperature, about 21–24°C.
Plan for 3–4 hours total.
Watch the dough more than the clock.
It should gradually feel lighter and show tiny bubbles along the sides.
Keep it covered to prevent drying while fermentation builds strength and flavor.
Perform Stretch-and-Folds
During the first 1.5 hours, perform 3–4 sets of stretch-and-folds every 30 minutes.
With wet hands, lift one side of the dough, stretch it up, and fold it over the center.
Rotate the bowl and repeat on all sides.
This gently strengthens the gluten without heavy kneading and helps build structure.
Incorporate the Cheeses
After the final stretch-and-fold, sprinkle mozzarella and Parmesan evenly over the dough.
Perform a few gentle folds to enclose the cheese layers.
Avoid aggressive kneading that might tear the gluten or squeeze out oil.
Stop as soon as the cheese seems fairly distributed but the dough still feels airy and intact.
Finish Bulk Fermentation
Let the dough continue rising until it has increased by about 50% in volume.
Look for a domed top, visible bubbles along the sides, and a soft, pillowy feel.
This may take longer in a cool kitchen.
Don’t wait for a full doubling, or the dough could over-ferment and weaken.
Pre-Shape the Dough
Lightly flour the work surface.
Gently turn the dough out, trying not to deflate it completely.
Fold the edges of the dough toward the center to form a loose round.
Flip it seam-side down.
Let it rest uncovered for 15–20 minutes.
This relaxes the gluten and prepares it for final shaping.
Final-Shape the Loaf
After the bench rest, lightly flour your hands.
Gently stretch and tuck the dough to create a tight round or oval.
Build surface tension by pulling the dough toward you against the counter.
Keep most of the gas inside.
Aim for a smooth top and a neat, sealed seam on the underside.
Prepare the Banneton or Bowl
Dust a banneton or towel-lined medium bowl with semolina or cornmeal.
Add a light layer of bread flour on top.
Shake or tap to coat evenly.
This combination helps prevent sticking during the cold retard.
Make certain the sides are well covered, especially if your dough is on the wetter side.
Proof in the Refrigerator
Place the shaped dough seam-side up into the prepared banneton or bowl.
Cover it well to prevent drying.
Refrigerate for 8–12 hours.
This cold retard slows fermentation, deepens flavor, and improves crust.
The dough will firm up, making it easier to score and transfer to the hot Dutch oven.
Preheat the Oven and Dutch Oven
About 45 minutes before baking, place your Dutch oven with its lid into the oven.
Preheat to 250°C (480°F).
Allow the pot to get thoroughly hot.
This trapped heat and steam will give strong oven spring.
Prepare a piece of parchment large enough to hold and lift the loaf safely.
Turn Out and Score the Dough
Remove the dough from the refrigerator.
Turn it out gently onto the parchment so it’s seam-side down.
Use a lame or sharp serrated knife to score the top in one long slash or a simple pattern.
Cut decisively and about 0.5–1 cm deep.
Proper scoring controls expansion and prevents random bursting.
Bake Covered for Oven Spring
Carefully remove the preheated Dutch oven and take off the lid.
Use the parchment as a sling to lower the dough into the pot.
Cover with the lid.
Bake at 250°C (480°F) for 20 minutes.
The enclosed steam helps the loaf rise dramatically and sets up a shiny, blistered crust.
Finish Baking Uncovered
After 20 minutes, remove the lid and reduce the oven temperature to 220°C (430°F).
Continue baking for 15–20 minutes.
Watch for a deep golden-brown crust.
Check that the internal temperature reaches about 96°C (205°F).
This guarantees the crumb is fully baked and not gummy inside.
Cool Completely Before Slicing
Carefully lift the loaf from the Dutch oven and place it on a wire rack.
Let it cool for at least 1 hour.
Resist cutting early, as steam must escape to set the crumb.
Once cool, slice with a serrated knife.
Serve plain, toasted, or alongside soups, salads, and pasta dishes.
Ingredient Swaps
- Use strong all-purpose flour if you don’t have bread flour; you may need 1–2 tablespoons less water.
- Swap dried herbs for 2–3× the amount of fresh, finely chopped; use what you have (e.g., Italian seasoning blend).
- Replace mozzarella with provolone, fontina, or a mild cheddar; Parmesan can be swapped for Grana Padano or Pecorino (slightly saltier).
- For dairy-free, omit the cheese or use a meltable vegan cheese and reduce salt slightly.
- If you’re out of fresh garlic, use 3 g garlic powder or granules; onion powder can add extra savoriness.
You Must Know
– Scale – When doubling or halving the recipe: Change all ingredients, including salt (2% of flour = 10 g per 500 g) and herbs/garlic, in the same proportion, but keep oven temperature and total bake time nearly the same, adding only 5–10 extra minutes for very large loaves (check internal temp and crust color as your guide).
Serving Tips
- Serve warm slices with olive oil and balsamic for dipping.
- Pair with tomato-basil soup or minestrone for a cozy meal.
- Use for grilled cheese or panini with extra mozzarella and tomato.
- Plate alongside antipasto: cured meats, olives, marinated peppers, and cheeses.
- Toast slices, rub with garlic, and top with bruschetta mix.
Storage & Make-Ahead
This bread keeps 2–3 days at room temperature, cut-side down or in a paper bag.
For longer storage, slice and refrigerate up to 5 days, reheating before serving.
It also freezes very well, tightly wrapped, for up to 2 months; toast slices straight from frozen.
Reheating
Reheat slices gently: wrap in foil and warm in a 160°C/325°F oven.
Or toast in a covered skillet on low.
Use a microwave briefly with a damp towel to prevent drying.
Italian Bakery Traditions
Although Italian bakeries vary from region to region, they all orbit the same comforting ritual: the scent of warm bread spilling onto the street at dawn.
When I think of Italian bakery traditions, I picture metal trays sliding from the oven, loaves crackling as their crusts set, and bakers moving with quiet choreography.
In many towns, bread still anchors the day.
People stop in early, asking for their usual, paper bags turning translucent where olive oil from focaccia seeps through.
You’ll see filoni, round pagnotte, slender stirati, each with its own crust, chew, and purpose at the table.
Herbs, garlic, and cheese perfume the air, hinting at lunch to come and inspiring breads like this Italian herb and cheese sourdough.
Final Thoughts
Give this Italian Herb and Cheese Sourdough a try and enjoy how the fresh herbs, garlic, and melty cheese transform a simple loaf into something special.
Feel free to tweak the herbs or cheese to match your taste and make the recipe your own.
Frequently Asked Questions
Can I Make This Italian Herb Sourdough Completely Without a Dutch Oven?
Yes, you can. I’d preheat a baking stone or inverted sheet, add a tray of hot water for steam, and shield your loaf with foil early on so the crust blisters, crackles, and bronzes beautifully.
How Do Altitude or Very Dry Climates Affect This Sourdough Recipe?
They make dough thirstier and fermentation faster. I’d add a splash more water, watch the dough not the clock, shorten proofing slightly, and keep it covered so it doesn’t dry into a leathery skin.
Is This Bread Suitable for People With Lactose Intolerance or Dairy Sensitivity?
It’s not ideal for lactose intolerance, since mozzarella and Parmesan still carry some lactose and milk proteins. If you’re sensitive, I’d suggest you enjoy the tangy, crackling crumb without cheese or use lactose‑free substitutes.
Can I Freeze the Shaped, Unbaked Dough for Later Baking?
Yes, you can, but I don’t recommend it; freezing shaped sourdough dulls its rise and flavor. Instead, I’d chill it overnight in the fridge, then bake fresh when you’re ready, savoring maximum oven spring.
How Do I Adapt the Recipe for a Bread Machine or Stand Mixer?
You can, but I wouldn’t. A bread machine and stand mixer suit quick yeasted loaves, not slow, wild-yeast dough. You’d lose nuance, texture, and that tender, fragrant crumb that comes from your hands guiding fermentation.
Italian Herb And Cheese Sourdough Bread
Equipment
- 1 Kitchen scale
- 2 large mixing bowls
- 1 Dough scraper
- 1 wooden spoon or silicone spatula
- 1 banneton or medium bowl with towel
- 1 Dutch oven with lid (4–6 qt) or baking stone and tray for steam
- 1 sharp lame or serrated knife
- 1 wire cooling rack
- 1 pastry brush (optional
Ingredients
- 100 gram active sourdough starter 100% hydration
- 350 gram water room temperature
- 500 gram bread flour unbleached
- 10 gram fine sea salt
- 20 gram extra-virgin olive oil
- 4 gram dried oregano
- 4 gram dried basil
- 3 gram dried thyme
- 3 gram dried rosemary crushed
- 80 gram shredded mozzarella cheese low moisture
- 40 gram grated Parmesan cheese
- 10 gram minced garlic fresh or 3 g garlic powder
- 10 gram semolina flour or cornmeal for dusting
Instructions
- In a large mixing bowl, whisk together the active sourdough starter and water until mostly dissolved.
- Add the bread flour and mix with a spoon or spatula until no dry spots remain and a shaggy dough forms.
- Cover the bowl and let the dough rest (autolyse) for 30 minutes at room temperature.
- Sprinkle the salt and olive oil over the dough and pinch and fold until fully incorporated.
- Add the dried oregano, basil, thyme, rosemary, and minced garlic (or garlic powder) and gently knead or fold to distribute evenly.
- Cover the bowl and begin bulk fermentation at room temperature (about 21–24°C), letting the dough rise for 3–4 hours.
- During the first 1.5 hours of bulk fermentation, perform 3–4 sets of stretch-and-folds every 30 minutes, lifting and folding each side of the dough toward the center.
- After the last set of folds, gently sprinkle the mozzarella and Parmesan over the dough and perform a few gentle folds to incorporate the cheese without tearing the gluten too much.
- Allow the dough to finish bulk fermenting until it has risen by about 50% and looks airy with small bubbles along the sides.
- Lightly flour the work surface and gently turn the dough out, taking care not to deflate it completely.
- Pre-shape the dough into a loose round by folding the edges toward the center and flipping it seam-side down, then let it rest uncovered for 15–20 minutes.
- Final-shape the dough into a tight round or oval loaf by gently stretching and tucking to build surface tension, keeping most of the gas inside.
- Dust the banneton or towel-lined bowl with semolina flour or cornmeal and a little bread flour to prevent sticking.
- Place the shaped dough seam-side up into the prepared banneton or bowl.
- Cover and refrigerate the dough for 8–12 hours for a cold retard and deeper flavor development.
- About 45 minutes before baking, place the Dutch oven and its lid into the oven and preheat to 250°C (480°F).
- When ready to bake, carefully remove the hot Dutch oven from the oven and remove the lid.
- Turn the chilled dough out from the banneton onto a piece of parchment paper so it is seam-side down.
- Score the top of the loaf with a sharp lame or serrated knife in one long slash or a pattern of your choice to control the expansion.
- Using the parchment as a sling, carefully lower the dough into the hot Dutch oven and cover with the lid.
- Bake covered at 250°C (480°F) for 20 minutes to create steam and oven spring.
- After 20 minutes, remove the lid, reduce the temperature to 220°C (430°F), and bake for another 15–20 minutes until deep golden brown and the internal temperature reaches about 96°C (205°F).
- Carefully remove the loaf from the Dutch oven and place it on a wire rack to cool completely for at least 1 hour before slicing.
- Slice with a serrated knife and serve plain, toasted, or alongside soups, salads, or pasta dishes.
Notes

Cynthia Weatherford is a seasoned chef and culinary enthusiast who serves as the Recipe creator of Somonday. With decades of experience in the kitchen and a passion for exploring diverse cuisines, Cynthia brings a blend of creativity and technique to every dish. Known for transforming simple ingredients into show-stopping meals, Cynthia believes that cooking is an art form anyone can master. Dedicated to inspiring home cooks, Cynthia shares approachable recipes, pro tips, and culinary wisdom to make every meal memorable.


