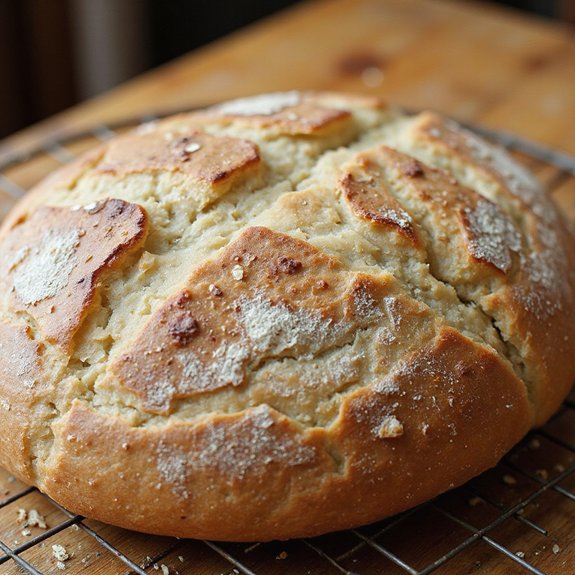
There’s something about the crackle of a golden crust and the tangy aroma of freshly baked sourdough that feels like home.
Now imagine that same rustic loaf—chewy, slightly nutty, beautifully risen—but crafted to be low in carbs.
This is cozy comfort food in bread form, perfect for everyday meals: toasted at breakfast, piled with toppings for quick lunches, or torn into pieces beside a hearty stew.
It’s ideal for low-carb eaters, sourdough lovers, and anyone who misses “real bread” on busy weeknights or during intentional meal prep. I still remember the first time I served this at a family Sunday supper: one guest happily reached for a second slice, then blinked in disbelief when I said it was low carb.
That moment sold me on keeping this loaf in my rotation for gatherings and last-minute cravings alike.
Ready to bring this bread to life?
Why You’ll Love It
- Delivers classic sourdough tang with a fraction of the carbs
- Supports blood sugar balance using fiber-rich, low-glycemic ingredients
- Slices cleanly for sandwiches thanks to psyllium-boosted structure
- Fits gluten-light lifestyles while still using real sourdough culture
- Toasts beautifully for crunchy, bakery-style breakfasts at home
Ingredients
- 120 g active sourdough starter, 100% hydration — use bubbly, recently fed starter
- 240 g warm water — about 80–85°F for gentle fermentation
- 60 g plain Greek yogurt, full-fat — adds tenderness and mild tang
- 160 g almond flour, finely ground, blanched — avoid coarse “almond meal”
- 80 g oat fiber — not oat bran, for bulk without carbs
- 40 g essential wheat gluten — provides structure and chew
- 20 g ground golden flaxseed — choose fresh, not rancid-smelling
- 10 g psyllium husk powder, finely ground — key for binding and bread-like crumb
- 8 g fine sea salt — enhances flavor and gluten strength
- 8 g extra-virgin olive oil — adds moisture and softness
- 6 g granular low-carb sweetener (optional) — helps fermentation and browning
Step-by-Step Method
Feed & Activate Starter
Refresh your sourdough starter 4–8 hours before mixing. Use equal parts flour and water by weight. Keep it in a warm spot (around 75°F/24°C) until bubbly, domed, and at least doubled.
A spoonful should float in water. Only use it once it smells pleasantly tangy and shows plenty of bubbles.
Combine Dry Ingredients
Measure all dry ingredients with a digital scale for accuracy. In a large mixing bowl, whisk together almond flour, oat fiber, essential wheat gluten, ground flaxseed, psyllium husk powder, and salt.
Mix thoroughly so no streaks remain. This even distribution helps the dough hydrate consistently and supports better structure.
Mix Wet Ingredients
In a separate medium bowl, combine warm water, Greek yogurt, olive oil, low‑carb sweetener (if using), and active sourdough starter. Whisk until the mixture looks mostly smooth and uniform.
Make certain the water is warm, not hot, to avoid harming the starter. Set aside briefly while you prepare to combine with the dry mix.
Form the Dough
Pour the wet mixture into the bowl of dry ingredients. Stir with a dough whisk or sturdy spoon until everything is fully incorporated.
Scrape down the sides and bottom to capture all dry spots. Expect a thick, sticky dough rather than a classic stretchy wheat dough. Don’t add extra water unless it’s crumbly.
Rest & Hydrate
Let the dough rest in the mixing bowl for 10–15 minutes. Don’t skip this step.
Psyllium husk and flaxseed need time to absorb moisture and gel. As they hydrate, the dough will firm up and become easier to handle. This brief pause improves structure and prevents a gummy or overly fragile crumb later.
Stretch & Fold Gently
Lightly oil your hands to prevent sticking. Perform several stretch‑and‑folds directly in the bowl. Gently pull sections of dough from the edge toward the center, rotating the bowl as you go.
Aim for 8–10 folds. This motion builds strength without overworking the delicate, low‑carb structure of the dough.
Shape into a Tight Loaf
Turn the dough onto a lightly oiled surface if needed. Use your hands and a bench scraper to tuck the edges underneath and form a tight round or oval. Handle it gently to avoid tearing.
Create surface tension by dragging the loaf toward you slightly. A smooth, taut surface supports better oven rise.
Prepare Proofing Basket
Lightly oil your proofing basket or a medium bowl. Dust with oat fiber if you prefer a drier surface.
Place the shaped dough seam‑side up into the basket. This orientation lets the seam naturally open on the bottom while the top remains smooth for scoring. Cover loosely with a towel or plastic wrap.
Proof Until Slightly Puffed
Let the dough proof at room temperature for 60–90 minutes. Watch the dough, not just the clock. It should look slightly puffy and about 30–50% larger, not doubled.
Because low‑carb dough is heavier, rise will be modest. Avoid over‑proofing, which can weaken structure and cause collapse during baking.
Preheat Oven & Dutch Oven
About 30 minutes before baking, place your Dutch oven with its lid into the oven. Preheat to 450°F (230°C).
This high heat and preheated vessel create strong initial oven spring. If you don’t have a Dutch oven, preheat a baking stone and an oven‑safe pan to generate steam when baking.
Invert & Score Dough
Cut a piece of parchment paper large enough to hold the loaf. Carefully invert the proofed dough onto the parchment so it’s seam‑side down.
Use a sharp knife or lame to score the top with one or more cuts. Make decisive, quick slashes. Proper scoring directs expansion and prevents random cracking.
Load into Dutch Oven
Using the parchment as a sling, lift the dough and lower it into the preheated Dutch oven. Be cautious of hot surfaces and steam.
Arrange the parchment so it doesn’t touch the lid excessively. Cover immediately with the lid to trap steam, which helps the crust expand and remain tender at first.
Bake Covered for Initial Rise
Bake the loaf covered at 450°F (230°C) for 25 minutes. During this time, steam builds inside the Dutch oven and encourages maximum rise.
Don’t open the lid early, as you’ll lose essential steam and heat. The bread will begin to set its structure while staying protected from over‑browning.
Finish Baking Uncovered
Remove the lid carefully, then reduce the oven temperature to 425°F (220°C). Continue baking uncovered for about 15 minutes.
Watch for a deep golden‑brown crust and a firm feel when gently pressed. The uncovered time dries and crisps the crust while finishing the interior bake thoroughly.
Cool Completely Before Slicing
Lift the loaf from the Dutch oven using the parchment and transfer it to a wire rack. Allow it to cool for at least 1–2 hours.
This resting period is critical for low‑carb breads; the crumb firms as psyllium and flax set. Slicing too early may cause a gummy texture, so be patient before cutting.
Ingredient Swaps
- Almond flour: Use finely ground sunflower seed flour for a nut‑free option (note it may slightly darken the crumb).
- Oat fiber: Don’t use oat bran; if you can’t find oat fiber, combine 50% finely ground psyllium husk powder and 50% wheat bran, then add extra water 5–10 g as needed.
- Essential wheat gluten: This is crucial for structure; for gluten‑free, you can replace it with additional almond flour + psyllium, but the loaf will be denser and more fragile.
- Greek yogurt: Swap with full‑fat plain yogurt, kefir, or unsweetened coconut yogurt for dairy‑free (you may need 10–20 g less water if using thinner dairy).
- Sweetener: Any granular low‑carb sweetener (erythritol, allulose, monk fruit blends) works; you can omit it, but fermentation may be slightly slower.
You Must Know
– Doneness • If the loaf looks done but feels soft
Press the center and bottom: it should feel firm with a hollow sound, and an instant-read thermometer should read 200–205°F (93–96°C).
If it’s below 195°F or feels squishy, give it 5–10 more minutes uncovered to avoid a gummy crumb.
– Troubleshoot • When the dough spreads sideways instead of holding shape
Tighten your shaping and extend the bench rest by 5–10 minutes so psyllium and flax can gel more; the dough should feel slightly bouncy, not batter-like.
This prevents a flat, pancake-style loaf once it hits 450°F heat.
– Flavor Boost • For more tangy, complex sourdough flavor
Chill the shaped dough covered in the fridge for 8–16 hours and bake it cold.
The cool, long fermentation lets the starter acidify the nut- and fiber-rich dough, giving a sharper sour and darker crust without extra yeast.
– Scale • To change loaf size without ruining structure
Multiply every ingredient (including salt, starter, and water) by the same factor—e.g., ×1.5 for ~18 slices or ×0.5 for a small test loaf—and keep the temperatures the same.
A larger loaf may need 5–10 extra minutes uncovered for full internal doneness.
– Avoid • If the crumb turns purple or very rubbery
Next batch, cut the psyllium husk powder to 8 g and make sure it’s finely ground.
Too much or coarse psyllium with high moisture can cause a purple tint and bouncy, rubber-like texture after the 1–2 hour cooling period.
Serving Tips
- Serve thinly sliced, toasted, with salted butter and a sprinkle of flaky salt.
- Top with smashed avocado, chili flakes, and a squeeze of lemon for breakfast.
- Pair with cheese, olives, and cured meats for a low-carb appetizer board.
- Use as a base for open-faced tuna or chicken salad sandwiches.
- Grill slices with garlic butter and herbs to serve alongside soups or salads.
Storage & Make-Ahead
Store cooled low carb sourdough tightly wrapped in the fridge for up to 5 days.
It slices and toasts best cold.
For make-ahead, slice the loaf, then freeze slices in a single layer before bagging; they keep well for 2–3 months and can be toasted straight from frozen.
Reheating
Reheat slices gently: in a low oven (300°F) for 5–10 minutes.
Briefly reheat in a microwave at 50% power.
Or warm on a covered stovetop skillet over low heat to avoid drying.
Low-Carb Sourdough in Culture
When I pull a reheated slice from the toaster and feel that crisp edge give way to a tender, tangy crumb, I’m not just tasting a recipe—I’m tasting a small shift in how we think about bread itself. Low‑carb sourdough feels like a quiet rebellion against the idea that comfort and restraint can’t share the same plate.
In my kitchen, it bridges worlds: the old sourdough crock on the counter, the digital scale glowing softly, the scent of toasted almonds instead of wheat. When you bite in, you’re part of a newer story—one where blood sugar, gluten, and food culture all meet in a single, steamy slice. It’s tradition, lightly rewritten, still warm in your hands.
Final Thoughts
Give this low carb sourdough bread a try and see how it fits into your routine—whether you’re cutting carbs, eating gluten conscious, or just love to experiment with new bakes.
Don’t be afraid to tweak it with different proofing times or add-ins to make the loaf completely your own.
Frequently Asked Questions
Can I Use This Low-Carb Sourdough for Long-Term Blood Sugar Management Plans?
Yes, you can, but I’d treat it as a gentle tool, not a cure. I’d pair small, toasted slices with protein, watch your meter’s quiet glow, and let your numbers guide long-term trust in each bite.
How Do I Accurately Calculate Net Carbs per Slice of This Bread?
You’ll total each ingredient’s carbs and fiber, subtract fiber for net carbs, divide by loaf weight in grams, then multiply by an average slice’s weight—like weighing a warm, crusty heel in your palm.
Is This Recipe Suitable for Gluten-Sensitive Individuals or Only Low-Carb Diets?
It isn’t suitable for gluten‑sensitive eaters, since essential wheat gluten anchors its structure. As you slice the chewy, nutty loaf, you’d feel that elastic tug—that’s gluten working, comforting for low‑carb, risky for sensitivities.
What Troubleshooting Steps Help if My Loaf Collapses or Bakes up Gummy?
If your loaf collapses or turns gummy, I’d shorten proofing, bake longer, and let it cool fully. I’d also refresh your starter, weigh ingredients carefully, and reduce water slightly until the crumb feels springy, not damp.
How Can I Adapt This Recipe for a Bread Machine or Stand Mixer?
You can let a stand mixer knead on low 5–7 minutes, then follow hand steps. For a bread machine, use “dough” cycle only, shape by hand, then bake in the oven for best crust.

Low Carb Sourdough Bread
Equipment
- 1 digital kitchen scale
- 2 medium mixing bowls
- 1 large mixing bowl
- 1 dough whisk or sturdy spoon
- 1 bench scraper or spatula
- 1 proofing basket or 1 medium bowl lined with a floured towel
- 1 Dutch oven with lid (4–5 qt) or 1 baking stone plus 1 oven-safe pan for steam
- 1 piece parchment paper
- 1 sharp knife or lame for scoring
- 1 wire cooling rack
Ingredients
- 120 gram active sourdough starter 100% hydration
- 240 gram warm water about 80–85°F
- 60 gram plain Greek yogurt full-fat
- 160 gram almond flour finely ground blanched
- 80 gram oat fiber not oat bran
- 40 gram vital wheat gluten
- 20 gram ground golden flaxseed
- 10 gram psyllium husk powder finely ground
- 8 gram fine sea salt
- 8 gram extra-virgin olive oil
- 6 gram granular low-carb sweetener optional for better fermentation
Instructions
- Feed your sourdough starter 4–8 hours before baking so it becomes bubbly, active, and at least doubled in volume.
- In a large bowl whisk together almond flour, oat fiber, vital wheat gluten, ground flaxseed, psyllium husk powder, and salt until evenly combined.
- In a separate bowl mix warm water, Greek yogurt, olive oil, sweetener, and active sourdough starter until smooth.
- Pour the wet mixture into the dry ingredients and stir with a dough whisk or sturdy spoon until a thick, sticky dough forms.
- Let the dough rest in the bowl for 10–15 minutes to allow psyllium and flax to hydrate and firm up the mixture.
- Lightly oil your hands and perform several stretch-and-folds in the bowl, pulling the dough from the edge toward the center 8–10 times to build structure.
- Shape the dough into a tight round or oval by tucking the edges underneath, using a bench scraper if needed.
- Place the shaped dough seam-side up in a lightly oiled or oat-fiber-dusted proofing basket or lined bowl.
- Cover loosely and allow to proof at room temperature for 60–90 minutes, or until slightly puffy and about 30–50% larger.
- About 30 minutes before baking, place a Dutch oven with its lid into the oven and preheat to 450°F (230°C).
- Carefully turn the proofed dough onto a piece of parchment paper so it is seam-side down.
- Score the top of the dough with a sharp knife or lame to control expansion during baking.
- Using the parchment as a sling, carefully lower the dough into the preheated Dutch oven and cover with the lid.
- Bake covered for 25 minutes to allow the bread to rise and develop steam.
- Remove the lid, reduce the oven temperature to 425°F (220°C), and bake for an additional 15 minutes or until deep golden brown and firm.
- Lift the bread out of the Dutch oven using the parchment and place it on a wire rack.
- Allow the loaf to cool completely for at least 1–2 hours before slicing to let the crumb set and moisture redistribute.
Notes

Cynthia Weatherford is a seasoned chef and culinary enthusiast who serves as the Recipe creator of Somonday. With decades of experience in the kitchen and a passion for exploring diverse cuisines, Cynthia brings a blend of creativity and technique to every dish. Known for transforming simple ingredients into show-stopping meals, Cynthia believes that cooking is an art form anyone can master. Dedicated to inspiring home cooks, Cynthia shares approachable recipes, pro tips, and culinary wisdom to make every meal memorable.


