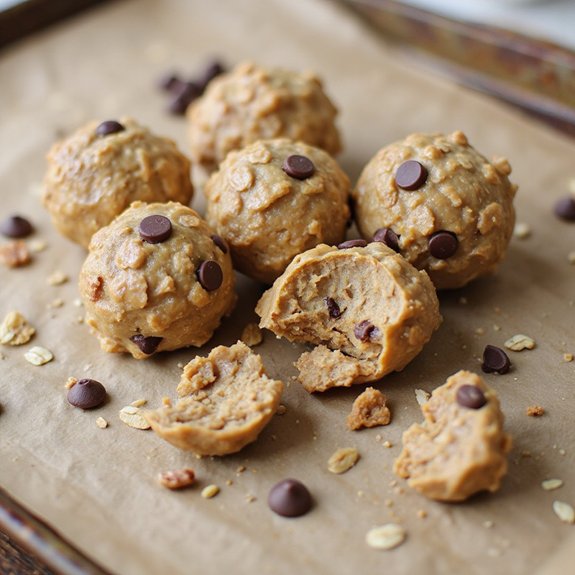
There’s something about opening the fridge to see a bright container of monster cookie protein balls—speckled with colorful chocolate candies, dotted with dark chocolate chips, creamy peanut butter holding everything together—that feels instantly comforting.
These no‑bake bites are a quick, grab‑and‑go snack, ready in about 15 minutes, with a soft, chewy texture and a sweet, toasty aroma that reminds you of fresh cookies without turning on the oven.
They’re perfect for busy weekdays, kids’ lunchboxes, post‑workout snacks, and anyone who craves a sweet treat with a protein boost.
I started making them during a particularly hectic week when breakfast kept getting skipped; rolling a batch on Sunday meant I could grab two on my way out the door and feel human again.
These shine during after‑school chaos, late‑night cravings, and easy entertaining when you need a no‑fuss “something sweet.” Ready to bring this tasty little pick‑me‑up to life?
Why You’ll Love It
- Delivers nostalgic monster cookie flavor in a quick, no-bake bite
- Packs protein, fiber, and healthy fats for satisfying energy
- Uses simple pantry staples and one bowl for easy cleanup
- Customizes effortlessly with different nut butters and mix-ins
- Stores well in fridge or freezer for grab-and-go snacking
Ingredients
- 1 ½ cups rolled oats — use old-fashioned oats for best texture
- 1 cup natural peanut butter, creamy — stir well so oil is fully incorporated
- ½ cup honey — adjust slightly to taste for sweetness
- ½ cup vanilla protein powder — choose a brand you enjoy the flavor of
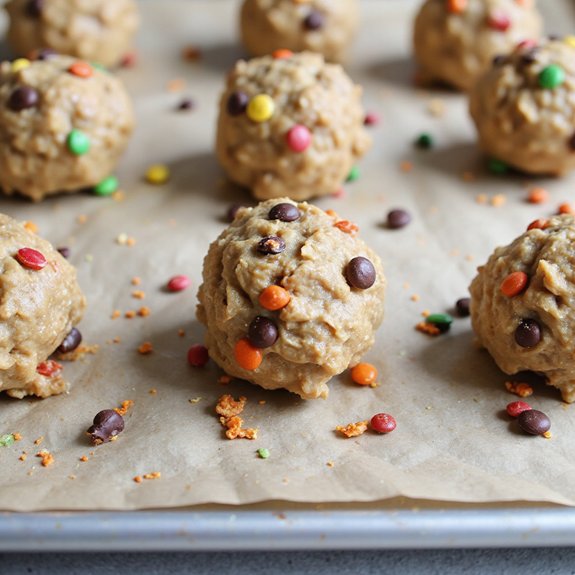
- ⅓ cup mini chocolate chips — semi-sweet holds up well in the fridge
- ⅓ cup mini candy-coated chocolates — mini M&M-style candies work well
- ¼ cup ground flaxseed — finely ground for better binding and nutrition
- 1 teaspoon vanilla extract — pure vanilla gives better flavor
- ¼ teaspoon fine sea salt — balances the sweetness and peanut flavor
Step-by-Step Method
Line the tray
Prepare the base for chilling. Line a baking sheet or flat tray with parchment paper, making sure it lies flat without wrinkles.
Set it aside within easy reach of your work area. This keeps the protein balls from sticking and makes transferring them simple once they’re shaped and ready to chill.
Mix the wet ingredients
Combine the creamy peanut butter, honey, and vanilla extract in a large mixing bowl.
Stir steadily with a wooden spoon or spatula until the mixture is completely smooth and unified.
Scrape down the sides as you go. Make certain there are no streaks of honey or thick clumps of peanut butter remaining.
Add the dry ingredients
Add rolled oats, vanilla protein powder, ground flaxseed, fine sea salt, mini chocolate chips, and mini candy-coated chocolates to the bowl.
Sprinkle them evenly over the wet mixture. Gently fold everything together at first, then stir more firmly.
Aim to distribute the mix-ins so each bite has a balanced texture and flavor.
Form a cohesive dough
Stir until a thick, sticky dough forms and all dry ingredients are coated.
If it seems dry or crumbly, add a small spoonful of peanut butter or honey and mix again.
If it feels too sticky, sprinkle in a small handful of oats. Adjust gradually until the mixture holds together when pressed.
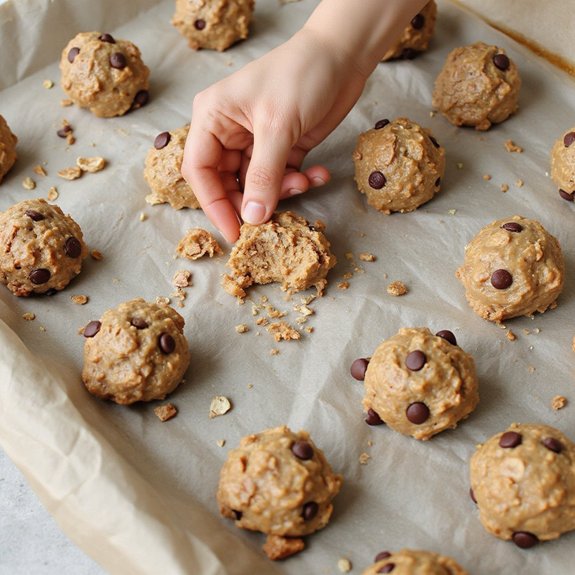
Roll into balls
Scoop out portions of the dough using about 1 tablespoon per ball for even sizing.
Lightly dampen your hands to prevent sticking. Roll each portion between your palms until smooth and round.
Place each finished ball onto the parchment-lined tray, leaving a little space between them as you work.
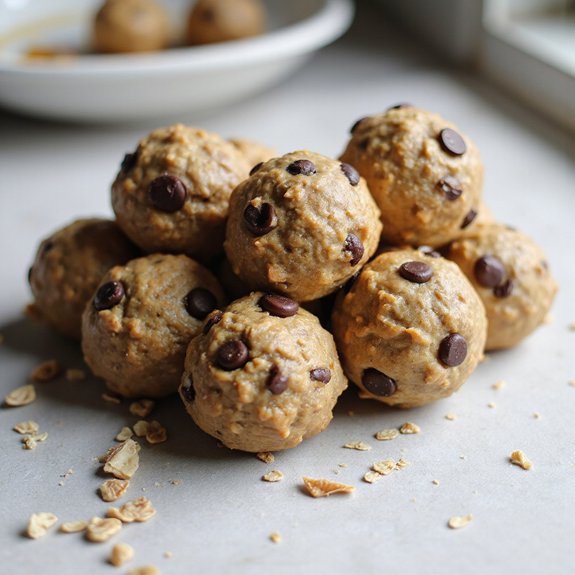
Chill to set
Transfer the tray of rolled protein balls to the refrigerator. Let them chill for at least 30 minutes, or until they feel firm to the touch.
This helps them hold their shape and improves the texture.
Once set, move the balls to an airtight container. Store them in the fridge or freezer as desired.
Ingredient Swaps
- Use almond, cashew, or sunflower seed butter instead of peanut butter (sunflower for nut-free).
- Swap honey with maple syrup or brown rice syrup for vegan or different flavor.
- Replace whey protein with a plant-based protein powder; choose vanilla or unflavored to keep the taste similar.
- Use dairy-free chocolate chips and candy pieces for a fully dairy-free version.
- Rolled oats can be replaced with quick oats for a softer texture or certified gluten-free oats for gluten-sensitive eaters.
You Must Know
– Troubleshoot • If the dough crumbles when you squeeze it
Add 1–2 teaspoons peanut butter or honey at a time and knead with the spoon until a small handful holds together when pressed and leaves a faint sheen on your fingers. This tight, slightly glossy feel means the balls will hold after 30 minutes in the fridge.
– Troubleshoot • If the balls flatten or feel greasy after chilling
Sprinkle in 1–2 tablespoons rolled oats or 1 tablespoon protein powder and work it in until a test ball keeps a round shape after 10 minutes at room temp. Extra dry ingredients absorb excess oil so they don’t slump in the container.
– Flavor Boost • For a stronger “monster cookie” vibe
Add a pinch more salt (up to ⅜ teaspoon total) and 1–2 additional teaspoons vanilla; taste a pea-sized bit right away. The flavor should taste slightly salty-sweet before chilling, since cold dulls sweetness and aroma.
– Make-Ahead • For longer storage and best texture from frozen
Freeze the balls spread out on a tray until firm, about 1–2 hours, then move to a container. Thaw only what you need in the fridge for 30–45 minutes; they should be cool but not rock-hard in the center when gently pressed.
– Scale • To double or halve without losing balance
Keep the ratio of oats : peanut butter : honey close to 3 : 2 : 1 (by volume). For example, for a half batch use about ¾ cup oats, ½ cup peanut butter, ¼ cup honey. This ratio keeps them chewy, not dry or syrupy.
Serving Tips
- Serve chilled on a snack platter with fresh berries and sliced bananas.
- Pack in small containers with apple slices for an easy grab‑and‑go snack.
- Crumble over Greek yogurt with extra chocolate chips for a dessert‑like parfait.
- Pair with a latte or protein shake for a post‑workout mini meal.
- Skewer a few balls on a toothpick and drizzle lightly with melted chocolate.
Storage & Make-Ahead
Monster Cookie Protein Balls keep well in the fridge for up to 1 week in an airtight container.
They’re perfect for making ahead—prep a batch on Sunday for grab-and-go snacks all week.
They also freeze well for up to 1 month; thaw in the fridge before eating.
Reheating
Enjoy these chilled, but for a softer texture, briefly warm.
Microwave 5–10 seconds, or set on a low oven or stovetop-warmed plate—just enough to slightly soften, not melt.
Monster Cookie Trend Origins
Colorful speckles of candy and chocolate always take me back to church basement bake sales, where some clever home baker first mashed “everything but the kitchen sink” into one giant, peanut‑buttery cookie.
That’s where the “monster cookie” idea really lived for me—oversized, craggy, crowded with oats, chips, and candies, like a kid’s dream trapped in golden dough.
As those bake‑sale legends spread, monster cookies slipped into potlucks, county fairs, and eventually food blogs.
You and I started seeing them everywhere: lunchbox treats, college care packages, late‑night study fuel.
The charm was always the same—no fussy rules, just maximal mix‑ins and big, bold bites.
It’s that playful, slightly chaotic spirit I wanted to bottle up in these protein balls.
Final Thoughts
Give these Monster Cookie Protein Balls a try the next time you need a quick, satisfying snack—you might find yourself making them every week.
Don’t hesitate to tweak the nut butter, mix-ins, or sweetness to make them perfectly your own.
Frequently Asked Questions
Can I Make These Protein Balls Nut-Free for School-Safe Snacks?
Yes, you can. I swap peanut butter for sunflower seed or soy butter, then use nut‑free chocolate. I’ve packed these in my kid’s lunchbox; they hold together beautifully and taste like bite‑size cookie dough.
How Do I Calculate Exact Nutrition and Macros per Protein Ball?
You’ll plug each ingredient into a tracker (I love Cronometer), total the recipe’s calories and macros, then divide by 16. I always double‑check labels—brands vary wildly, like shadows shifting at sunset.
Can Kids Safely Help Make These, and What Steps Should They Handle?
Yes, kids can safely help. I’d let them dump ingredients, stir the thick dough, and roll little “treasure” balls while I handle measuring sticky honey, managing sharp edges, and supervising fridge time together.
How Can I Turn This Recipe Into Pre-Workout or Post-Workout Bars?
You’ll turn them into bars by pressing the mixture into a parchment‑lined pan instead of rolling balls, then chilling and slicing. I like adding extra oats and protein powder so each square feels solid, gym‑ready fuel.

Monster Cookie Protein Balls
Equipment
- 1 large mixing bowl
- 1 Wooden spoon or spatula
- 1 Measuring cups set
- 1 Measuring spoons set
- 1 baking sheet or tray
- 1 sheet parchment paper
Ingredients
- 1 1/2 cup rolled oats
- 1 cup natural peanut butter creamy
- 1/2 cup honey
- 1/2 cup vanilla protein powder
- 1/3 cup mini chocolate chips
- 1/3 cup mini candy-coated chocolates such as mini M&M’s
- 1/4 cup ground flaxseed
- 1 teaspoon vanilla extract
- 1/4 teaspoon fine sea salt
Instructions
- Line a baking sheet or tray with parchment paper and set aside.
- In a large mixing bowl, combine the peanut butter, honey, and vanilla extract and stir until smooth.
- Add the rolled oats, protein powder, ground flaxseed, sea salt, mini chocolate chips, and mini candy-coated chocolates to the bowl.
- Stir the mixture thoroughly with a spoon or spatula until all the dry ingredients are evenly coated and a thick dough forms.
- If the mixture seems too dry and crumbly, add a small spoonful of peanut butter or honey; if too sticky, add a small handful of oats until it holds together when pressed.
- Scoop out portions of the dough, about 1 tablespoon each, and roll between your palms to form smooth balls.
- Place each ball on the prepared parchment-lined tray, spacing them slightly apart.
- Refrigerate the tray for at least 30 minutes to allow the protein balls to firm up.
- Once firm, transfer the protein balls to an airtight container and store in the refrigerator.
Notes

Cynthia Weatherford is a seasoned chef and culinary enthusiast who serves as the Recipe creator of Somonday. With decades of experience in the kitchen and a passion for exploring diverse cuisines, Cynthia brings a blend of creativity and technique to every dish. Known for transforming simple ingredients into show-stopping meals, Cynthia believes that cooking is an art form anyone can master. Dedicated to inspiring home cooks, Cynthia shares approachable recipes, pro tips, and culinary wisdom to make every meal memorable.