Crafting a no-bake banana cream pie invites you to explore a delicate balance of flavors and textures.
Picture a harmonious blend of ripe bananas and silky pudding nestled in a crisp graham cracker crust.
The process is straightforward: minimal preparation time, but chilling is essential to enrich taste.
Topped with whipped cream, this pie promises a sensory delight. Yet, there’s more to uncover about perfecting this dessert masterpiece.
Kitchen Tools Required
Crafting a delicious Banana Cream Pie requires not only the right ingredients but also the proper kitchen tools to guarantee a seamless preparation.
To start, a sturdy pie pan is essential; it cradles your creation.
A mixing bowl and whisk dance together, turning ingredients into a creamy masterpiece.
Precision matters, so use a measuring cup to confirm exact quantities.
A rubber spatula becomes your paintbrush, spreading and smoothing with grace.
| Tool | Purpose | Emotion Evoked |
|---|---|---|
| Pie pan | Holds the pie structure | Security |
| Mixing bowl | Combines ingredients | Harmony |
| Whisk | Whips cream to perfection | Elegance |
| Measuring cup | Confirms accuracy | Precision |
Master these tools with precision, and your Banana Cream Pie will be a symphony of flavors and textures.
Recipe
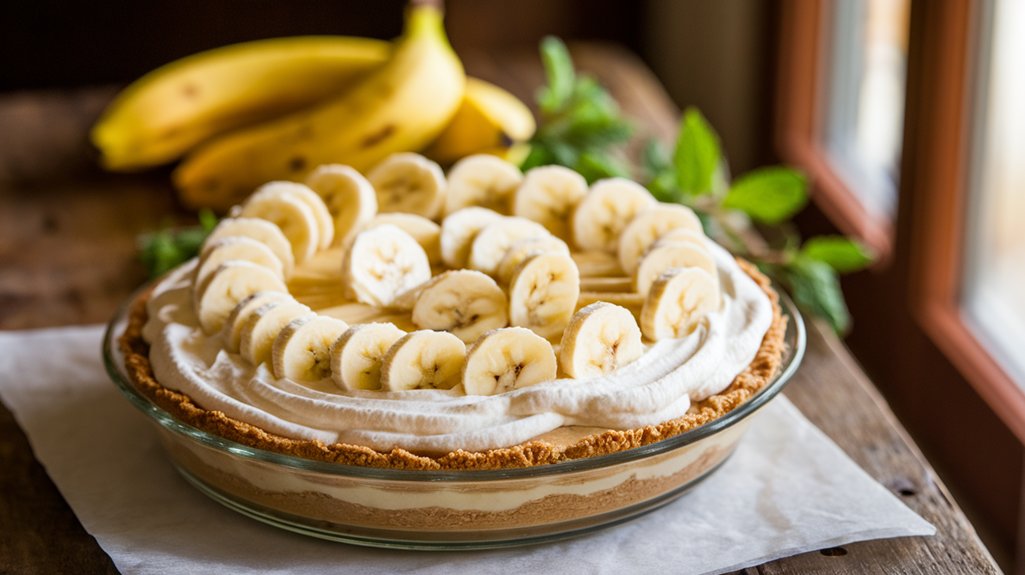
No-Bake Banana Cream Pie is a delightful and easy-to-make dessert that requires no oven time, making it perfect for warm days or when you want a quick treat.
This pie combines the classic flavors of bananas, creamy pudding, and a crunchy graham cracker crust for a satisfying and nostalgic dessert experience.
With its smooth and creamy texture, this pie is sure to be a hit at any gathering or as a sweet family treat.
The preparation involves creating a simple graham cracker crust, layering it with fresh bananas, and topping it with a delectable banana pudding mixture.
The pie is then chilled to allow the flavors to meld and the texture to firm up.
The result is a rich, creamy dessert that’s both visually appealing and deliciously satisfying.
Ingredients:
- 1 1/2 cups Graham cracker crumbs
- 1/3 cup Granulated sugar
- 6 tablespoons Unsalted butter, melted
- 2 cups Heavy cream
- 1/4 cup Powdered sugar
- 1 teaspoon Vanilla extract
- 1 package (3.4 ounces) Instant banana pudding mix
- 1 3/4 cups Cold milk
- 3 Bananas, sliced
- 1 cup Whipped topping
To make the No-Bake Banana Cream Pie, start by mixing the graham cracker crumbs, granulated sugar, and melted butter in a bowl until well combined.
Press this mixture into the bottom and up the sides of a pie pan to form the crust.
Place the crust in the refrigerator for 10 minutes to set.
In a separate bowl, whisk together the heavy cream, powdered sugar, and vanilla extract until stiff peaks form, reserving 1 cup for later.
In another bowl, prepare the banana pudding by whisking together the pudding mix and cold milk until thick.
Gently fold the remaining whipped cream into the pudding mixture.
Layer the bottom of the prepared crust with sliced bananas, then pour the pudding mixture over the bananas, spreading it evenly.
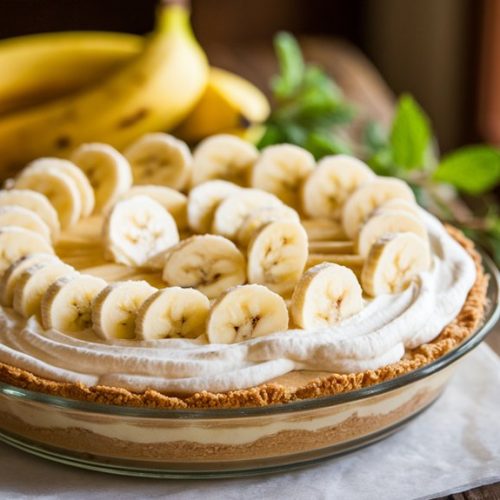
Top with the reserved whipped cream. Chill the pie in the refrigerator for at least 2 hours before serving.
You can garnish with additional banana slices or whipped topping before serving if desired.
For the best results, make certain the heavy cream is very cold before whipping to achieve the ideal texture.
Letting the pie chill for longer than the minimum 2 hours can improve the flavor and help the pie slices hold their shape better.
Additionally, using ripe bananas will enhance the natural sweetness and flavor of the pie.
Enjoy this simple yet decadent dessert with family and friends!
Cook & Prep Time
Creating the perfect Banana Cream Pie demands meticulous attention to its preparation timeline.
In just 15 minutes, you’ll seamlessly orchestrate the ingredients for this American dessert masterpiece.
The magic lies in the absence of cooking time, making this a no-bake delight.
However, patience is key; allow the pie a restful interlude of at least two hours in the refrigerator.
This resting period isn’t merely for structural integrity—it nurtures the fusion of flavors, enhancing each creamy, banana-infused bite.
Equipped with essential tools like a pie pan and whisk, your preparation becomes an elegant dance of efficiency.
Craft this dessert for a gathering of eight, and watch as its simplicity and refined taste captivate your guests, leaving them yearning for more.
Cooking Steps
Begin your no-bake masterpiece by meticulously mixing the graham cracker crumbs, granulated sugar, and melted butter in a symphony of textures until they form a cohesive blend.
Press this fragrant mixture firmly into your pie pan, ensuring an even, sculpted crust that will be the foundation of your dessert, then allow it to chill and set for ten minutes.
While the crust solidifies, whip the heavy cream, powdered sugar, and vanilla into a billowy cloud with stiff peaks, reserving a portion to crown your completed pie with an elegant flourish.
Step 1. Mix Crust Ingredients Thoroughly
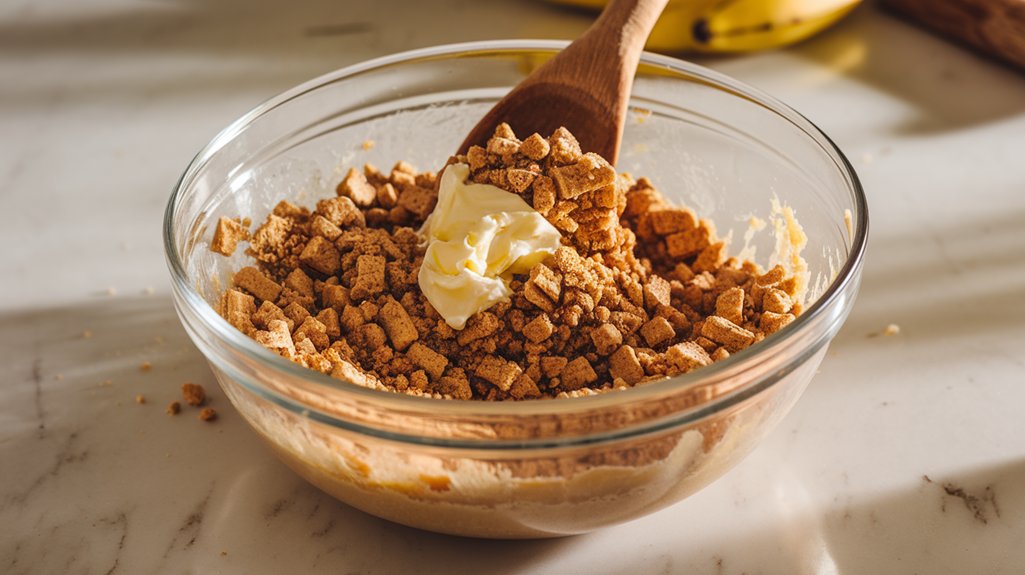
Immerse yourself in the alchemy of flavors as you thoroughly mix the crust ingredients, transforming simple elements into a delectable foundation for your no-bake banana cream pie.
Begin by measuring 1 1/2 cups of graham cracker crumbs into your mixing bowl.
Add 1/3 cup of granulated sugar, allowing it to mingle with the crumbs. Pour in 6 tablespoons of melted butter, letting it envelop the dry ingredients.
Use a rubber spatula to blend these components, ensuring every crumb is coated in buttery sweetness.
Stir with thoughtful precision, watching as the mixture takes on a cohesive, moist texture—indicative of a perfect crust.
Your goal is uniformity; the mixture should clump gently when pressed, signaling it’s ready for the next step.
Step 2. Press Crust Into Pie Pan
Nestle the pie pan onto a stable surface, ready to receive its graham cracker crust.
Gather the prepared mixture of crumbs, sugar, and melted butter.
Using your fingers or the back of a spoon, begin pressing the mixture evenly across the bottom and up the sides of the pan.
Verify the crust is compact and uniform, creating a sturdy base for the creamy filling to come.
Here are the key points to visualize:
- Even Thickness: Aim for a consistent layer, about 1/8 inch thick.
- Firm Edges: Press firmly along the pan’s edge to prevent crumbling.
- Smooth Surface: Use a flat-bottomed cup for an even finish.
- Seamless Shift: Blend the bottom and sides smoothly.
- Gentle Pressure: Avoid cracking by applying gentle, even pressure.
Each step is a delicate dance, crafting a perfect shell.
Step 3. Chill Crust for Ten Minutes

Once your pie crust is perfectly pressed and smoothed, it’s time to let it chill.
Slide the pie pan into the refrigerator, allowing the cool air to transform the buttery graham cracker mixture into a firm foundation.
This brief ten-minute interlude is essential; it solidifies the crust, creating a stable base that will cradle the creamy layers to come.
As the butter cools, it binds the crumbs with a delicate cohesion, a quiet symphony of elements melding together.
This simple act guarantees your crust maintains its integrity, preventing crumbling when it’s time to slice the pie.
While you wait, prepare your next ingredients, letting anticipation build.
The chill time is short, but its impact resonates through every bite of your no-bake masterpiece.
Step 4. Whip Cream Until Stiff Peaks

Begin by ensuring your heavy cream is as cold as possible to achieve ideal results.
Pour it into your mixing bowl, adding powdered sugar and vanilla.
With a whisk in hand, employ swift, rhythmic motions to transform the liquid into airy clouds.
As you work, feel the gradual resistance building beneath your tool, signaling the cream’s journey toward perfection.
- The cream’s surface will start to ripple beneath the whisk’s path.
- Peaks will rise and fall, soft at first, then holding their shape.
- Each fold of the cream gleams with a luscious sheen.
- A subtle fragrance of vanilla weaves through the air.
- Stiff peaks form when the cream retains sharp, firm tips without collapsing.
You’re now ready to incorporate this ethereal creation into your pie.
Step 5. Reserve Whipped Cream Topping

With your whipped cream now exhibiting perfect peaks, it’s time to set aside the portion reserved for the topping.
Using a rubber spatula, gently scoop out one cup of the airy, luscious cream.
Place it in a clean bowl, making sure it’s free from any residual pudding or mixture.
This reserved topping will crown your pie with elegance, so handle it with care to maintain its voluminous texture.
In artistic strokes, envision how the reserved cream will later cascade atop your pie, adding a final flourish.
As you set it aside, cover the bowl with plastic wrap to preserve its freshness.
Keep it chilled in the refrigerator, allowing it to hold its form until you’re ready to reveal your masterpiece.
This step guarantees your pie’s crowning glory remains pristine.
Final Thoughts
Although assembling a no-bake banana cream pie may seem straightforward, the devil is in the details.
Each component demands precision and a touch of artistry.
Start by making sure your crust is firmly pressed, providing a robust foundation for the creamy layers.
Whip the cream to stiff peaks, achieving a luxurious texture that complements the banana pudding.
Use ripe bananas for maximum sweetness, harmonizing with the other flavors.
Consider these final touches:
- Chill for at least 2 hours: Allows flavors to meld and stabilizes the pie.
- Use a sharp knife: Guarantees clean cuts when serving.
- Opt for a glass pie pan: Provides a visual treat from all angles.
- Consider garnishing creatively: Adds visual appeal.
- Store leftovers properly: Maintain freshness and taste.
Master these elements, and your pie will captivate every palate.
Frequently Asked Questions
Can I Use a Different Crust Instead of Graham Cracker Crumbs?
Absolutely, you can substitute the graham cracker crust with options like crushed vanilla wafers or Oreo cookies. Pulse them into fine crumbs, mix with melted butter, and press firmly into the pan for a delightful base.
How Long Can the Pie Be Stored in the Refrigerator?
You can store the pie in the refrigerator for up to three days. Make certain it’s covered with plastic wrap or an airtight container to preserve its freshness and prevent the whipped topping from absorbing any unwanted refrigerator odors.
Can I Substitute the Instant Banana Pudding Mix With Homemade Pudding?
You can substitute instant banana pudding mix with homemade pudding. Just guarantee it’s thick enough to hold its shape. Use ripe bananas and chill it thoroughly. This gives a rich, authentic flavor, enhancing the pie’s artistry.
Is It Possible to Use a Dairy-Free Alternative for the Heavy Cream?
You can absolutely swap heavy cream for a dairy-free alternative like coconut cream. Whip it until it’s thick and creamy. This subtle change adds a delightful tropical twist, maintaining the pie’s texture and artistic presentation.
Can This Recipe Be Made Gluten-Free?
You can make this recipe gluten-free by using gluten-free graham crackers for the crust. Replace them in equal measure and guarantee all other ingredients are certified gluten-free to maintain the pie’s delightful texture and flavor.
No-Bake Banana Cream Pie
Equipment
- 1 Pie pan
- 1 Mixing bowl
- 1 Whisk
- 1 measuring cup
- 1 Rubber spatula
Ingredients
- 1 1/2 cups Graham cracker crumbs
- 1/3 cup Granulated sugar
- 6 tablespoons Unsalted butter melted
- 2 cups Heavy cream
- 1/4 cup Powdered sugar
- 1 teaspoon Vanilla extract
- 1 package 3.4 ounces Instant banana pudding mix
- 1 3/4 cups Cold milk
- 3 Bananas sliced
- 1 cup Whipped topping
Instructions
- Combine graham cracker crumbs, sugar, and melted butter in a mixing bowl and stir until well mixed.
- Press the mixture into the bottom and sides of the pie pan to form a crust.
- Refrigerate the crust for 10 minutes to set.
- In a mixing bowl, whisk the heavy cream, powdered sugar, and vanilla extract until stiff peaks form.
- Set aside one cup of the whipped cream for topping.
- In another bowl, whisk together the banana pudding mix and cold milk until thick.
- Fold the remaining whipped cream into the banana pudding mixture until well combined.
- Arrange a layer of sliced bananas on the bottom of the graham cracker crust.
- Pour the banana pudding mixture over the layer of bananas and spread evenly.
- Top the pie with the reserved whipped cream and spread it smoothly.
- Chill the pie in the refrigerator for at least 2 hours before serving.
- Garnish with additional banana slices or whipped topping before serving if desired.
Notes

Cynthia Weatherford is a seasoned chef and culinary enthusiast who serves as the Recipe creator of Somonday. With decades of experience in the kitchen and a passion for exploring diverse cuisines, Cynthia brings a blend of creativity and technique to every dish. Known for transforming simple ingredients into show-stopping meals, Cynthia believes that cooking is an art form anyone can master. Dedicated to inspiring home cooks, Cynthia shares approachable recipes, pro tips, and culinary wisdom to make every meal memorable.


