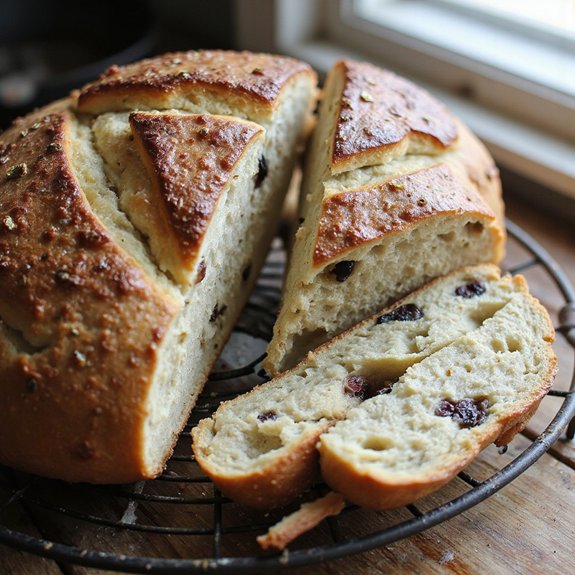
There’s something about pulling a crackling loaf of olive sourdough from the oven that makes the whole kitchen feel softer, calmer.
The crust is deep golden and blistered, the inside marbled with briny green and black olives, pockets of airy crumb still steaming.
This is a cozy, slow-crafted bread—perfect alongside a hearty stew, a simple salad, or a rustic cheese board—yet the hands-on time is surprisingly manageable, even on a busy day.
It’s ideal for beginners who want a forgiving sourdough project, as well as for entertainers and meal-preppers who love having something special on hand.
I still remember a rainy Sunday when unexpected guests dropped by; that loaf of olive sourdough, a bowl of olives, and some good olive oil turned what could’ve been an awkward visit into an easy, laughter-filled supper.
It’s just as at home at relaxed Sunday gatherings as it’s for quick weekday lunches.
Ready to bring this loaf to life?
Why You’ll Love It
- Delivers bold, savory flavor with briny olives and rich olive oil
- Creates a chewy, open crumb and shatteringly crisp golden crust
- Builds reliable structure with beginner-friendly stretch-and-fold sourdough method
- Adapts easily to different olives, herbs, or add-ins you love
- Elevates simple meals, from cheese boards to hearty soup dinners
Ingredients
- 400 g bread flour — strong white bread flour develops good gluten
- 100 g whole wheat flour — adds flavor and extra nutrition
- 100 g active 100% hydration sourdough starter — use at peak activity
- 350 g water, room temperature — adjust a little if dough feels too stiff
- 10 g fine sea salt — balances flavor and strengthens gluten
- 120 g pitted olives, roughly chopped — use well-drained green, black, or mixed
- 15 g extra-virgin olive oil — choose a fruity, good-quality oil
- 10 g coarse cornmeal or semolina — for dusting the Dutch oven base
- 20 g rice flour — for dusting the proofing basket to prevent sticking
Step-by-Step Method
Mix the Dough
Combine the bread flour and whole wheat flour in a large bowl. Add the active sourdough starter and water. Mix with your hand or a spatula until no dry flour remains and a shaggy dough forms.
Scrape down the sides of the bowl, cover, and let the dough rest to begin hydrating the flour.
Autolyse the Mixture
Cover the bowl and let the dough sit for 45–60 minutes at room temperature. Allow the flour to fully hydrate and gluten to start developing. Don’t add salt yet. Avoid disturbing the dough during this time.
Use this rest to prepare your olives and equipment for later steps.
Incorporate Salt Thoroughly
Sprinkle the fine sea salt evenly over the rested dough. Pinch and squeeze the dough between your fingers to dissolve the salt. Fold the dough over itself several times.
Continue until the texture feels smoother and slightly more elastic. Cover the bowl again to prevent the surface from drying out.
Fold in Olives and Oil
Add the chopped olives and olive oil on top of the dough. Gently fold the dough over itself, rotating the bowl as you go. Distribute the olives without shredding the dough.
Stop folding once they appear evenly spread. Cover the bowl and prepare to start the bulk fermentation phase.
Start Bulk Fermentation
Let the dough rest at room temperature for 3–4 hours, depending on the warmth of your kitchen. Keep the bowl covered between handling. Aim for an increase in volume of about 50% by the end.
Watch for small bubbles forming along the sides as signs of healthy fermentation.
Perform Stretch-and-Folds
During the first 90 minutes, complete 3–4 sets of stretch-and-folds every 30 minutes. Wet your hand, then lift one side of the dough up and fold it over the center. Rotate the bowl and repeat on all sides.
Strengthen the gluten structure without kneading aggressively. Re-cover the bowl after each set.
Finish Bulk Fermentation
After the final stretch-and-fold, leave the dough undisturbed. Let it continue fermenting until it looks airy and jiggly. Check that it has risen by about half and shows bubbles.
Avoid letting it double, which can weaken structure. Prepare your work surface with a light dusting of flour before turning it out.
Pre-Shape the Dough
Gently ease the dough from the bowl onto the floured surface using a dough scraper. Dust your hands lightly with flour. Use a bench scraper to fold the edges toward the center, forming a loose round.
Flip it seam side down. Tighten slightly by rotating it against the counter.
Rest the Pre-Shaped Dough
Cover the pre-shaped round with a towel and let it relax for 20–30 minutes. Allow the gluten to loosen enough for final shaping. Watch that the dough spreads slightly but doesn’t flatten completely.
Use this time to ready your proofing basket or lined bowl with flour.
Shape into a Tight Loaf
Lightly flour the top of the dough, then flip it so the floured side is down. Fold the bottom up, then the sides toward the center. Roll or tuck the dough to create surface tension.
Form either a round boule or an oval batard. Seal the seam well to hold its structure.
Prepare the Proofing Basket
Generously dust your proofing basket with a mix of rice flour and wheat flour. Make certain the sides and bottom are well coated to prevent sticking. Alternatively, line a medium bowl with a clean, heavily floured towel.
Shake out any excess flour and keep the basket nearby for quick transfer.
Transfer and Proof the Dough
Place the shaped dough seam side up in the prepared basket. Cover with a towel or plastic. Let it proof at room temperature for 1–2 hours until slightly puffy.
Optionally, move it to the refrigerator for 8–12 hours for a cold retard. Use this overnight rest for deeper flavor and easier scoring.
Preheat the Dutch Oven
About 45 minutes before baking, place your Dutch oven with lid into the oven. Preheat to 250°C (480°F). Allow the pot to become thoroughly hot, which helps create steam and strong oven spring.
Don’t skip this long preheat, as it directly affects crust and loaf volume.
Invert the Loaf onto Parchment
Cut a piece of parchment larger than your loaf. Lay it over the proofed dough. Quickly invert the basket so the dough releases onto the parchment, now seam side down.
Adjust the loaf gently to center it. Smooth the parchment edges for easy lifting into the hot pot.
Score the Dough Confidently
Use a sharp lame or serrated knife to score the top of the dough. Make one long, decisive slash or several smaller cuts to control expansion. Cut at a slight angle about 0.5–1 cm deep.
Avoid hesitating, which drags the blade and tears the dough surface.
Load and Bake Covered
Carefully remove the hot Dutch oven from the oven and set it on a heatproof surface. Lift the dough by the parchment and lower it into the pot. Cover with the lid and return to the oven.
Bake for 20 minutes at 250°C (480°F) to trap steam and encourage oven spring.
Finish Baking Uncovered
After 20 minutes, reduce the oven temperature to 230°C (450°F). Remove the lid to allow the crust to brown and crisp. Continue baking for 20–25 minutes until the loaf is a deep golden brown and sounds hollow when tapped on the bottom.
Adjust time slightly for your oven.
Cool Completely Before Slicing
Use the parchment to lift the loaf from the Dutch oven. Transfer it to a wire cooling rack. Let it cool for at least 1–2 hours so the crumb can set.
Resist cutting while warm, which compresses the interior. Slice once fully cooled for clean cuts and a moist, open crumb.
Ingredient Swaps
- Use up to 50% whole wheat flour or swap in spelt or einkorn for a nuttier, denser loaf; add 10–20 g more water if the dough feels stiff.
- Replace olives with sun-dried tomatoes, roasted peppers, or caramelized onions, keeping total add-ins around 100–150 g to avoid weighing the dough down.
- For a vegan loaf, the base recipe is already suitable; for lower-sodium bread, reduce salt to 7–8 g and choose low-salt or home-rinsed olives.
You Must Know
– Flavor Boost • For deeper olive and crust flavor: Use a mix of at least 2 types of olives (e.g., half kalamata, half green) and let the shaped dough chill for 12 hours instead of 8.
Longer cold time develops tang and lets olive flavor permeate the crumb.
Serving Tips
- Serve sliced with high-quality olive oil and flaky sea salt for dipping.
- Pair with soft cheeses, cured meats, and pickles for a rustic appetizer board.
- Toast slices and top with smashed avocado, cherry tomatoes, and a squeeze of lemon.
- Accompany hearty soups or stews, especially tomato, lentil, or minestrone varieties.
- Make open-faced sandwiches with roasted vegetables, hummus, or tapenade for a Mediterranean lunch.
Storage & Make-Ahead
Olive sourdough keeps in the fridge for up to 5–7 days, wrapped in paper then loosely in plastic or a bread bag.
For make-ahead, freeze the fully cooled loaf or sliced pieces, well-wrapped, for up to 2 months.
Thaw at room temperature and refresh in a warm oven.
Reheating
Reheat olive sourdough gently.
In a 160°C (325°F) oven wrapped in foil.
Briefly in a microwave with a damp towel.
Or on a covered skillet over low heat to avoid drying.
Mediterranean Olive Bread Traditions
When I tear into a slice of this olive sourdough, I’m tapping into a long, sun‑soaked tradition that stretches across the Mediterranean coast.
I imagine stone villages where bread ovens once glowed before dawn, and olives, just crushed, perfumed the air.
In Greece, bakers tuck briny Kalamatas into tender crumb; in Italy, rustic pagnotte cradle oil‑cured fruit; along the Provençal coast, loaves share space with rosemary, orange zest, and sea salt.
I bake my version with those scenes in mind, inviting you to taste that lineage in every bite.
- Warm twilight, a table outside, crust shattering softly
- Fingers glossy with olive oil, pinching the last crumbs
- Laughter echoing against sun‑faded walls
- The quiet, contented sigh after one perfect slice
Final Thoughts
Give this olive sourdough a try and see how the briny olives and tangy crumb transform your bread game.
Once you’ve baked it once, have fun tweaking the olives, flours, or hydration to make a signature loaf that’s all your own.
Frequently Asked Questions
Can I Make This Olive Sourdough Completely Gluten-Free?
You can’t simply swap flours here; gluten-free dough behaves differently. I’d guide you to a dedicated gluten-free sourdough recipe, then fold in olives and oil, savoring the same briny aroma and crackling crust.
How Do Altitude or Climate Changes Affect Fermentation Times?
Altitude and climate quietly stretch or shorten fermentation; at higher, cooler places, I wait longer, while warm, humid kitchens rush the rise. I watch your dough’s softness, bubbles, and gentle wobble, not the clock.
What’s the Best Way to Rescue Over-Proofed Olive Sourdough Dough?
You can gently degas, reshape into a snug boule, and give it a shorter proof. I’d bake it in a hot Dutch oven, savoring its rustic, slightly collapsed crumb and deeply fragrant, crackling crust.
Can I Mix Green and Black Olives Without Changing Hydration?
Yes, you can mix green and black olives without changing hydration. I’d pat them dry, then fold them in; you’ll taste briny brightness, earthy depth, and feel tender, salty jewels scattered through a warm, crackling crumb.
How Do I Scale This Recipe for a Bakery-Sized Batch?
You’ll scale all ingredients by weight: decide your total flour, keep percentages (starter 20%, water 70%, salt 2%, olives 24%, oil 3%). I’d mix in stages, folding gently, imagining warm, briny fragrance filling your bakery.

Olive Sourdough Bread
Equipment
- 1 digital kitchen scale
- 2 medium mixing bowls
- 1 large mixing bowl
- 1 Dough scraper
- 1 Wooden spoon or spatula
- 1 bench scraper
- 1 proofing basket (or medium bowl lined with a floured towel)
- 1 Dutch oven with lid (or heavy lidded oven-safe pot)
- 1 sharp lame or serrated knife
- 1 wire cooling rack
Ingredients
- 400 gram bread flour
- 100 gram whole wheat flour
- 100 gram active 100% hydration sourdough starter
- 350 gram water room temperature
- 10 gram fine sea salt
- 120 gram pitted olives roughly chopped
- 15 gram extra-virgin olive oil
- 10 gram coarse cornmeal or semolina for dusting
- 20 gram rice flour optional; for dusting proofing basket
Instructions
- In a large mixing bowl, whisk together the bread flour and whole wheat flour until evenly combined.
- Add the sourdough starter and water to the flour and mix with your hand or a spatula until no dry bits remain and a rough, shaggy dough forms.
- Cover the bowl and let the dough rest (autolyse) for 45–60 minutes at room temperature.
- Sprinkle the salt over the dough and mix by pinching and folding until the salt is fully incorporated and the dough feels smoother.
- Add the chopped olives and olive oil to the dough and gently fold until the olives are evenly distributed.
- Begin bulk fermentation by covering the bowl and letting the dough rest at room temperature for 3–4 hours, depending on warmth.
- During the first 90 minutes of bulk fermentation, perform 3–4 sets of stretch-and-folds every 30 minutes, pulling each side of the dough up and folding it over itself.
- After the final stretch-and-fold, let the dough rest undisturbed for the remainder of bulk fermentation until it has risen by about 50% and shows bubbles along the sides.
- Lightly flour your work surface and gently turn the dough out of the bowl.
- Using a bench scraper, pre-shape the dough into a loose round by folding the edges toward the center and flipping it seam side down.
- Let the pre-shaped dough rest on the counter, covered with a towel, for 20–30 minutes to relax.
- Lightly flour the top of the dough, flip it over, and shape it into a tight boule or batard by folding and rolling to create surface tension.
- Generously dust your proofing basket with a mixture of rice flour and wheat flour, or line a bowl with a well-floured towel.
- Place the shaped dough seam side up in the prepared basket or bowl.
- Cover the dough and let it proof at room temperature for 1–2 hours, or until slightly puffy, then refrigerate for 8–12 hours for cold retard (optional but recommended).
- About 45 minutes before baking, place the Dutch oven with its lid into the oven and preheat to 250°C (480°F).
- Cut a piece of parchment paper and place it over the proofed dough, then invert the basket to release the loaf onto the parchment, now seam side down.
- Score the top of the dough with a lame or sharp knife to allow for controlled expansion.
- Carefully remove the hot Dutch oven from the oven, lift the dough using the parchment, and place it inside the pot.
- Cover with the lid and bake for 20 minutes at 250°C (480°F).
- After 20 minutes, reduce the oven temperature to 230°C (450°F), remove the lid, and continue baking for 20–25 minutes until the crust is a deep golden brown.
- Remove the loaf from the Dutch oven and place it on a wire rack to cool completely for at least 1–2 hours before slicing.
Notes

Cynthia Weatherford is a seasoned chef and culinary enthusiast who serves as the Recipe creator of Somonday. With decades of experience in the kitchen and a passion for exploring diverse cuisines, Cynthia brings a blend of creativity and technique to every dish. Known for transforming simple ingredients into show-stopping meals, Cynthia believes that cooking is an art form anyone can master. Dedicated to inspiring home cooks, Cynthia shares approachable recipes, pro tips, and culinary wisdom to make every meal memorable.


