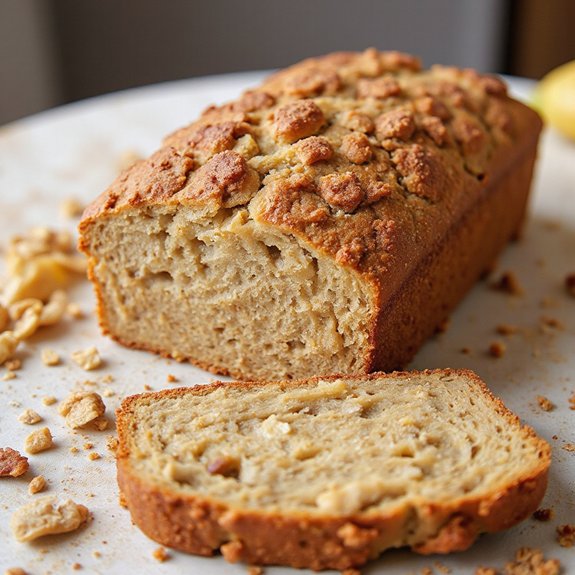
There’s something about pulling a pan of over proofed sourdough from the oven—the crust a deep, burnished bronze, the air filling with warm, tangy aroma—that feels like a small miracle after a near disaster.
This isn’t a dainty loaf; it’s a rustic, crackly, deeply flavored bread that turns a simple meal—like a hearty stew or quick skillet dinner—into something special, in under an hour of hands-on rescue time.
It’s perfect for busy home bakers, beginners learning the ropes, and comfort seekers who hate wasting dough.
I still remember the first time my dough ballooned and slumped while I was stuck in a meeting; by evening it looked ruined.
Salvaging it into chewy, golden loaves saved Sunday supper and my confidence.
Over proofed sourdough shines for last-minute gatherings, cozy weekend lunches, or when you need an easy, impressive bread to share.
Ready to bring this “rescued” loaf to life?
Why You’ll Love It
- Rescues over-proofed dough so you don’t waste a single loaf
- Delivers rich, complex sourdough flavor with minimal extra effort
- Uses basic tools and ingredients you already have on hand
- Produces a rustic, crackly crust and tender, moist interior
- Turns baking “mistakes” into perfect toast, crostini, or sandwiches
Ingredients
- 400 g over-proofed sourdough dough — use dough that has visibly puffed and begun to collapse
- 40 g bread flour — higher protein helps rebuild structure
- 10 g olive oil — for lightly greasing parchment and improving crust
- 5 g water — for brushing the surface to aid crust development
- 2 g fine sea salt — sprinkle on top for flavor boost and light crunch
Step-by-Step Method
Prepare the Work Surface
Lightly flour a clean counter or board with part of the bread flour. Spread it evenly so the dough won’t stick. Keep extra flour nearby for dusting as you work.
Avoid using too much, or the loaf can become dense. Have your bench scraper ready to help lift and turn the sticky dough.
Turn Out the Dough
Gently tip the over-proofed sourdough onto the floured surface using the scraper. Let gravity help instead of pulling or yanking the dough.
Dust the top lightly with more flour so your hands and tools don’t stick. Preserve as many air pockets as possible by handling the dough softly.
Fold Into a Loose Round
Use the bench scraper to fold the dough edges toward the center. Work around the dough, turning it gently to create a loose round or oval. Tighten the surface slightly without aggressively pushing out gas.
Aim for gentle tension, not a full reshaping. Stop once the dough looks roughly gathered and cohesive.
Rest the Dough Briefly
Let the shaped dough rest uncovered on the counter for 15 minutes. Allow the gluten to relax so it’s easier to shape later. Avoid covering tightly, which can trap too much moisture.
Use this time to prepare your pan and preheat equipment. Observe how the dough settles and spreads slightly.
Prepare the Baking Pan
Line a baking sheet or cast-iron skillet with parchment paper. Lightly grease the parchment with olive oil to prevent sticking and improve crust.
Use a smaller vessel if possible to encourage upward rise.
Smooth the parchment so there are no big folds. Set the prepared pan aside within easy reach.
Perform Final Gentle Shaping
After resting, gently reshape the dough. Tuck edges underneath to build surface tension and create a smooth top. Handle it delicately so you don’t deflate it completely.
Rotate the dough as you tuck to keep the shape even. Stop once the surface looks tighter and more domed.
Transfer to the Pan
Lift or slide the shaped dough onto the parchment-lined pan. Place it seam-side down so the smooth side faces up. Adjust its position so it sits in the center for even baking.
If it spreads slightly, nudge the sides inward with your hands. Keep movements delicate to maintain trapped gas.
Moisten and Cover the Dough
Lightly brush or dab the dough surface with a little water. Use a soft touch so you don’t tear the skin. This moisture helps crust formation in the hot oven.
Loosely drape a clean kitchen towel over the dough. Create a tent so it doesn’t stick to the surface as it proofs.
Proof Briefly at Room Temperature
Let the dough rest for 45–60 minutes at room temperature. Allow it to puff slightly but not collapse. Watch for gentle rising and a bit of softness when pressed.
Avoid over-proofing further. Use this time to tidy your space and prepare for baking. Don’t rush this stage; slow proofing improves texture.
Preheat the Oven Fully
About 30 minutes before baking, preheat your oven to 450°F (230°C). Place an oven rack in the middle. Make certain the oven reaches full temperature for proper oven spring.
Avoid frequent door openings during preheating. Use an oven thermometer if available to confirm accuracy. Stable high heat supports better structure.
Season and Score the Loaf
Just before baking, sprinkle fine sea salt over the surface if desired. Add a light, even layer so it enhances flavor without overpowering.
Score the top with a sharp knife or lame in one or two swift cuts. Make confident, quick slashes to control expansion. Avoid sawing motions that drag the dough.
Bake and Adjust Temperature
Place the pan with the dough onto the middle oven rack. Bake for 20 minutes at 450°F (230°C) to set the structure and crust. Then reduce the temperature to 425°F (220°C).
Continue baking 15–20 minutes until deep golden brown. Check through the oven window rather than opening frequently.
Protect and Finish the Crust
Monitor crust color during the final baking phase. If it browns too quickly, loosely tent the loaf with foil. Avoid pressing foil onto the dough.
Continue baking until the crust is firm and the loaf feels lighter when lifted. Aim for thorough baking to prevent a gummy crumb, especially with wetter doughs.
Cool Completely Before Slicing
Remove the loaf from the oven and transfer it carefully to a wire rack. Let it cool for at least 30 minutes so the crumb can set properly.
Resist cutting too early, which can compress the interior. Allow steam to escape and structure to stabilize. Slice only when the loaf feels just warm or fully cool.
Ingredient Swaps
- Use all-purpose flour in place of bread flour if needed; your loaf may spread a bit more, so shape tightly and bake in a smaller pan or skillet.
- Swap olive oil for any neutral oil or melted butter for a richer flavor.
- Sprinkle flaky salt, sesame seeds, or everything bagel seasoning on top instead of fine sea salt, or omit entirely for a low-sodium option.
You Must Know
- Troubleshoot • If the dough feels like a loose pancake when tipped out: Dust your hands and the surface, then add just 5–10 g of the extra flour with very light folds. This slightly stiffens structure so it doesn’t spread into a flat disc, while keeping enough hydration for an open crumb.
- Doneness • When checking if the loaf is fully cooked: Aim for a deep brown, matte crust and a hollow sound when you tap the bottom, or an internal temp of about 205–210°F (96–99°C). This prevents the gummy centers that over-proofed dough is prone to.
- Avoid • If the dough collapses after shaping: Skip any second aggressive tightening and go straight to the short proof on the pan. Over-handling knocks out fragile gas pockets in over-proofed dough, leading to a dense, squat loaf.
- Flavor Boost • For maximum tang and complexity: Use this method on dough that’s just slightly over-proofed (still domed, very bubbly, jiggles) rather than fully collapsed. That 30–60 extra minutes of fermentation boosts acidity and aroma without completely exhausting the gluten.
- Make-Ahead • When timing is tight: Once reshaped on the parchment-lined pan, chill the dough for 30–60 minutes in the fridge, then move directly to the hot oven. The cold dough scores more cleanly and the brief chill helps control spreading without changing flavor much.
Serving Tips
- Slice and toast, then top with ricotta, honey, and flaky salt.
- Grill slices in olive oil; serve as a base for bruschetta or crostini.
- Cube and pan-toast for hearty salad croutons or soup toppers.
- Serve warm with salted butter alongside eggs or a simple green salad.
- Make rustic open-faced sandwiches with cured meats, pickles, and sharp cheese.
Storage & Make-Ahead
Rustic Over-Proofed Sourdough Rescue Loaf keeps in the fridge, well wrapped, for up to 4 days.
Re-crisp slices in a toaster or low oven.
For make-ahead, freeze the fully cooled loaf or sliced pieces up to 2 months, tightly wrapped to prevent freezer burn and flavor loss.
Reheating
Reheat slices gently: in a 300°F (150°C) oven for 5–10 minutes.
Briefly in a covered skillet over low heat.
Or in the microwave at 50% power wrapped in a damp towel.
Sourdough in American Homebaking
In many American kitchens, sourdough has quietly become the heart of home baking, turning simple flour and water into something that feels both old‑world and entirely personal.
When I pull an over‑proofed dough from the bowl, I’m not looking at a mistake—I’m looking at a story in progress, a loaf that reflects my week, my patience, my curiosity.
I’ve learned that what keeps me returning to sourdough isn’t perfection, but feeling. I want you to feel it, too:
- The hush of a quiet kitchen before dawn
- The warm rush of opening the oven door
- The comfort of sharing thick, toasted slices
- The pride of rescuing “failed” dough into real bread
Final Thoughts
Ready to turn a “whoops” into something delicious? Grab that over-proofed dough, give this rescue loaf a try, and don’t be afraid to tweak the shaping, bake time, or toppings until it’s perfect for your kitchen.
Frequently Asked Questions
How Can I Tell Visually That My Sourdough Is Over-Proofed?
I look for dough that’s spread wide, soft as a waterbed, and barely springs back when poked. The surface often looks bubbly, fragile, slightly wrinkled, and my beautiful scoring lines blur instead of standing proud.
Can I Freeze Over-Proofed Dough to Bake Later Successfully?
Yes, you can, though I’d steer you toward reshaping and chilling instead. I’d tighten the dough gently, refrigerate or freeze quickly, then bake from cold, embracing a rustic, flatter loaf with deep, cozy flavor.
Does Over-Proofing Change the Nutritional Profile or Digestibility of Sourdough?
Yes, it does. I’ve found longer fermentation gently lowers gluten, breaks down some FODMAPs, and slightly boosts mineral availability, so your sourdough often feels lighter, easier to digest, and still warmly satisfying to eat.
How Does Room Temperature Versus Fridge Proofing Affect Over-Proofing Risk?
Room temperature proofing races fermentation and raises your over-proofing risk; the fridge slows everything down, giving you a wider, cozier timing window. I’d use cold proofing when you’re unsure of timing or distracted.
What Adjustments Should I Make for High-Altitude Sourdough Proofing?
At high altitude, I shorten bulk and final proof, lower hydration slightly, and keep dough cooler. I’ll strengthen gluten with extra folds, watch volume not time, and bake hotter for a tender, well-risen, cozy-crumb loaf.

Rustic Over-Proofed Sourdough Rescue Loaf
Equipment
- 1 large mixing bowl
- 1 bench scraper or dough scraper
- 1 baking sheet or cast-iron skillet
- 1 piece parchment paper
- 1 sharp knife or bread lame
- 1 Kitchen scale
- 1 clean kitchen towel
- 1 wire cooling rack
Ingredients
- 400 gram over-proofed sourdough dough
- 40 gram bread flour for reshaping
- 10 gram olive oil for greasing
- 5 gram water for smoothing crust
- 2 gram fine sea salt for topping optional
Instructions
- Lightly flour your work surface with a portion of the bread flour.
- Gently tip the over-proofed sourdough dough out of its container onto the floured surface using the dough scraper.
- Dust the top of the dough lightly with more flour to prevent sticking.
- Using the bench scraper, gently fold the dough edges toward the center to tighten it into a rough round or oval shape without aggressively degassing it.
- Let the shaped dough rest on the counter for 15 minutes uncovered to relax the gluten slightly.
- While the dough rests, line a baking sheet or cast-iron skillet with parchment paper and lightly grease the parchment with olive oil.
- After resting, perform a final gentle shaping, tucking the dough edges underneath to build surface tension and form a smooth top.
- Transfer the shaped dough seam-side down onto the prepared parchment-lined pan.
- Lightly brush or dab the dough surface with a little water to help with crust development.
- Loosely cover the dough with a clean kitchen towel and let it rest at room temperature for 45 minutes to 1 hour for a short final proof.
- About 30 minutes before baking, preheat your oven to 450°F (230°C).
- Just before baking, sprinkle the dough surface with fine sea salt if using.
- Score the top of the dough with a sharp knife or lame in one or two swift cuts to control expansion.
- Place the pan with the dough into the preheated oven on the middle rack.
- Bake for 20 minutes, then reduce the oven temperature to 425°F (220°C) and continue baking for another 15–20 minutes until deep golden brown.
- If the crust is browning too quickly, loosely tent the loaf with a piece of foil for the final 10 minutes.
- Remove the bread from the oven and carefully transfer it to a wire cooling rack.
- Let the loaf cool completely for at least 30 minutes before slicing to allow the crumb to set.
Notes

Cynthia Weatherford is a seasoned chef and culinary enthusiast who serves as the Recipe creator of Somonday. With decades of experience in the kitchen and a passion for exploring diverse cuisines, Cynthia brings a blend of creativity and technique to every dish. Known for transforming simple ingredients into show-stopping meals, Cynthia believes that cooking is an art form anyone can master. Dedicated to inspiring home cooks, Cynthia shares approachable recipes, pro tips, and culinary wisdom to make every meal memorable.