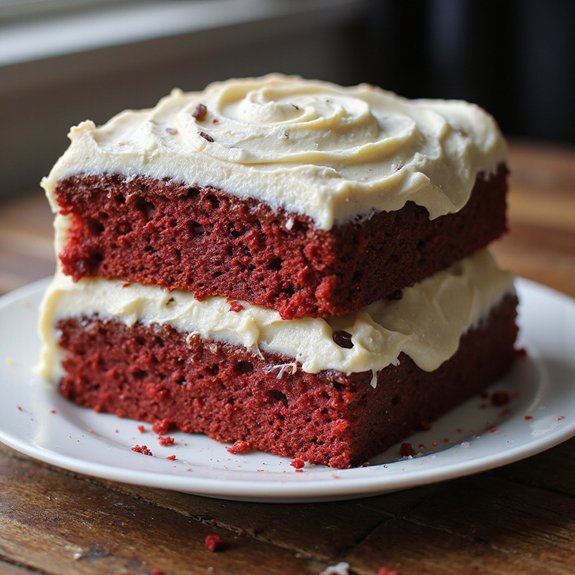
Picture a crimson cake with a cookie-like chew, the edges slightly crisp, the center tender, and ribbons of tangy cream cheese frosting melting into every slice.
Imagine the aroma of cocoa and vanilla warming the kitchen, a comforting whisper that promises both nostalgia and a little celebration.
Red velvet has always been my “bridge” dessert—fancy enough for birthdays, unfussy enough for a Tuesday—because its soft crumb and gentle chocolate notes please everyone at the table.
This Red Velvet Cookie Cake matters to me because it delivers bakery drama without bakery fuss: melted butter for chew, a hint of brown sugar for moisture, and that classic tang that keeps each bite from being too sweet.
It’s perfect for busy weeknights when you still want something special, for Sunday suppers with coffee, or for potlucks where you need a guaranteed crowd-pleaser.
It once saved my sanity when guests arrived early.
Ready? Let’s cook!
Why You’ll Love It
- Delivers bold cocoa-vanilla flavor with classic red velvet tang
- Produces soft, chewy cookie-like crumb in every slice
- Mixes easily with melted butter; minimal whisking required
- Frosts luxuriously with creamy, tangy cream cheese icing
- Slices neatly after a quick chill for clean presentation
Ingredients
- 2 1/4 cups all-purpose flour — spoon and level for accuracy
- 2 tablespoons unsweetened cocoa powder — natural, not Dutch-processed
- 1 teaspoon baking soda — check freshness (fizzes in vinegar)
- 1/2 teaspoon baking powder — aluminum-free preferred
- 1 teaspoon fine salt — fine grain disperses evenly
- 1 1/2 cups granulated sugar — standard white cane or beet
- 3/4 cup light brown sugar, packed — adds moisture and chew
- 1 cup unsalted butter, melted and cooled — cool to room temp before mixing
- 2 large eggs, room temperature — room temp helps emulsify
- 2 teaspoons vanilla extract — pure, not imitation
- 1 cup buttermilk, room temperature — full-fat for best texture
- 2 teaspoons white vinegar — boosts red hue and lift
- 1 tablespoon red liquid food coloring — gel gives stronger color
- 1 cup mini chocolate chips (optional) — choose quality semi-sweet
- 8 ounces cream cheese, softened — block style, not whipped
- 4 tablespoons unsalted butter, softened — for frosting
- 2 cups powdered sugar, sifted — prevents lumps in frosting
- 1 teaspoon vanilla extract — for frosting
- 1/8 teaspoon fine salt — balances frosting sweetness
Step-by-Step Method
Prepare the Pans
Preheat the oven to 350°F (175°C). Line two 8-inch round cake pans with parchment rounds and lightly grease the sides. This prevents sticking and promotes even baking.
Set a wire rack nearby for cooling later. Gather all equipment and ingredients so mixing moves quickly and the batter isn’t left sitting.
Mix the Dry Ingredients
Whisk flour, cocoa powder, baking soda, baking powder, and salt in a bowl until uniform. Break up any cocoa clumps.
Aerate the mixture with a few extra whisk strokes. Set aside. Keeping the dry mix even guarantees the cake rises consistently and prevents pockets of cocoa or leavening.
Beat the Sugars with Butter
In a large bowl, beat melted, cooled butter with granulated and brown sugars until thick and glossy. Use a stand mixer or hand mixer on medium speed.
Aim for a smooth, cohesive mixture. The brown sugar adds moisture and chew. Scrape the bowl to incorporate any sugar stuck on the sides.
Emulsify Eggs and Vanilla
Add eggs and vanilla to the sugar mixture. Beat just until smooth and emulsified.
Avoid overmixing to prevent excess air. Stop and scrape the bowl once to ensure even texture. A proper emulsion supports a tender crumb and helps the batter hold color evenly.
Tint with Buttermilk, Vinegar, and Color
Stir in buttermilk, white vinegar, and red food coloring. Mix until the color is a uniform deep red.
Keep strokes gentle to avoid overworking. The vinegar brightens the hue and reacts with leaveners for lift. Make certain liquids are room temperature for a smooth batter.
Fold in the Dry Ingredients
Add the dry mixture to the wet mixture. Fold gently with a rubber spatula until just combined.
Leave a few faint flour streaks to avoid overdeveloping gluten. Scrape the bottom of the bowl to catch hidden pockets. Stop as soon as the batter looks mostly cohesive.
Add Chocolate Chips (Optional)
Fold in mini chocolate chips if using. Make two to three broad folds and stop.
Overmixing can toughen the crumb. Distribute chips evenly without deflating the batter. This step adds pops of chocolate and boosts the cookie-cake vibe while keeping the texture chewy.
Divide and Smooth the Batter
Portion the batter evenly between the prepared pans. Weigh pans if desired for level layers.
Smooth tops with an offset spatula. Tap pans lightly on the counter to release air bubbles. Keep surfaces even to encourage flat baking and clean stacking for frosting later.
Bake to Moist Crumbs
Bake for 26 to 28 minutes. Check doneness when centers spring back lightly and a toothpick shows a few moist crumbs, not a clean stick.
Rotate pans once if your oven bakes unevenly. Avoid overbaking to preserve chewiness. Remove pans to a wire rack when ready.
Cool the Layers
Let cakes cool in their pans for 10 minutes. Turn out onto a wire rack and peel off parchment.
Cool completely before frosting to prevent melting and sliding. Handle gently to avoid tearing warm layers. Waiting guarantees a clean crumb coat and neat final finish.
Whip the Frosting Base
Beat softened cream cheese and butter until fluffy and smooth. Use medium-high speed for 1 to 2 minutes.
Scrape the bowl halfway through. Aim for a light, aerated base with no lumps. Properly softened dairy blends seamlessly and spreads easily over delicate cake layers.
Finish Frosting to Spreadable
Add powdered sugar, vanilla, and salt. Beat until light and spreadable.
Adjust texture with a spoonful of powdered sugar for thickness or a teaspoon of cream for softness. Mix just to smooth. A slightly tangy finish balances sweetness and complements the red velvet flavor.
Assemble the Layers
Place one cake layer on a serving plate. Spread a generous, even layer of frosting to the edges.
Top with the second layer, aligning sides. Press lightly to set. Make certain the top is level. This foundation helps the crumb coat adhere and creates neat slices.
Crumb Coat and Chill
Apply a thin crumb coat over the top and sides. Smooth to trap loose crumbs.
Chill for 20 minutes to set the surface. Cooling firms the frosting, making the final coat cleaner. This step improves appearance and prevents red crumbs from streaking the finish.
Frost and Slice
Spread a final thick, swoopy layer of frosting over the chilled cake. Use an offset spatula for smooth or textured swirls.
Chill 30 minutes for tidy slices. Wipe the knife between cuts. Serve at room temperature for best texture. Store leftovers covered in the fridge up to 4 days.
Ingredient Swaps
- Buttermilk: 1 cup milk + 1 tbsp white vinegar/lemon juice (rest 5–10 min); dairy-free use unsweetened almond/soy milk + vinegar.
- Butter: Use equal amount neutral oil for extra moisture; dairy-free use vegan butter or 1/2 cup oil + 1/2 cup applesauce for lighter crumb.
- Eggs: Replace each egg with 1/4 cup unsweetened applesauce or 1 tbsp ground flax + 3 tbsp water (rest 5 min).
- Cocoa: Natural cocoa works as written; if using Dutch-process, add an extra 1/4 tsp vinegar to keep tang and color.
- Red food coloring: Use gel for stronger color; natural option is 2–3 tbsp beet powder or reduced beet juice (expect softer hue).
- Cream cheese frosting: Dairy-free cream cheese and vegan butter whip well; budget option is American buttercream (butter + powdered sugar + vanilla + pinch salt).
- Sugar: Light brown sugar can be fully swapped with granulated (cake slightly less chewy); for deeper flavor use dark brown sugar.
- Chocolate chips: Omit or sub chopped chocolate; for nutty crunch use toasted pecans or walnuts.
You Must Know
- Doneness • If the centers dome or crack early, tent loosely with foil and rotate the pans at the 15-minute mark; this moderates top heat so crumbs set evenly and stay chewy, aiming for springs-back feel and a toothpick with moist crumbs at 26–28 minutes.
- Troubleshoot • When the batter looks curdled after adding buttermilk/vinegar, warm it slightly by letting the bowl sit over a warm towel for 2–3 minutes; this re-emulsifies fats for even crumb and color, confirmed when the batter turns glossy and uniformly red.
- Scale • For 9-inch pans, multiply all ingredients by 1.15 and start checking 3–4 minutes earlier; this keeps layer height near 1.25–1.5 inches and preserves chew without drying.
For cupcakes, fill 2/3 full and target 18–20 minutes.
- Flavor Boost • For deeper cocoa notes without losing red, add 1 extra teaspoon Dutch-process cocoa and 1/2 teaspoon espresso powder; balances sweetness and enhances chocolate aroma—look for a slightly brick-red batter before baking.
- Make-Ahead • To keep chew, wrap cooled layers twice and chill up to 48 hours or freeze up to 2 months; thaw wrapped at room temp 60–90 minutes before frosting so surface stays moist and resists crumbs during coating.
Serving Tips
- Serve chilled slices with cold milk or hot coffee to balance sweetness.
- Add fresh raspberries and a dusting of cocoa for color and tart contrast.
- Drizzle warm chocolate ganache over each slice; finish with mini chocolate chips.
- Plate with a scoop of vanilla bean ice cream and a mint sprig.
- Cut into small wedges; offer alongside salted nuts for a sweet-salty pairing.
Storage & Make-Ahead
Refrigerate frosted cake, covered, up to 4 days.
Bring slices to room temp before serving for best texture.
Bake layers a day ahead, wrap well, and assemble/frost the next day.
Layers (unfrosted) freeze up to 2 months.
Thaw wrapped overnight in the fridge.
Cream cheese–frosted cake freezes 1 month.
Reheating
Reheat slices gently.
Microwave 10–15 seconds at 50% power.
Oven at 300°F, tented, 8–10 minutes.
Or stovetop in covered skillet on low 3–5 minutes.
Rest briefly before serving.
Juneteenth Bake-Sale Favorite
Often, I bring this red velvet cookie cake to a Juneteenth bake sale because its bold crimson crumb and tangy cream cheese swoops feel celebratory and unmistakably Southern.
Folks spot that deep red and gather fast. The cake slices clean, the cookie-soft crumb holding together so plates stay tidy at a busy table.
I whisk in buttermilk and a whisper of cocoa for that classic twang, then finish with swoopy cream cheese frosting that’s lush, slightly salty, and cool on a warm June day.
I bake it the morning of, chill briefly, then cut generous squares or tidy wedges. A sprinkle of mini chips adds sparkle and a fudgy bite. It sells out quick—comforting, festive, and easy to carry home for seconds.
Final Thoughts
Ready to bake? Give this red velvet cookie cake a try, then tweak it to your taste—add the chocolate chips, swap in gel coloring for a bolder hue, or play with the frosting thickness to make it your own.
Frequently Asked Questions
Can I Bake This as Cupcakes or a Sheet Cake?
Yes—you can bake cupcakes or a 9×13 sheet cake. I’d fill cups 2/3 full; bake 16–18 minutes. For a sheet, bake 23–28 minutes. I’d frost generously; the tender crumb and tangy swoops taste dreamy.
How Do I Prevent Domed Cake Layers?
I prevent domed layers by baking at 325°F, using baking strips, and evenly dividing batter. I rotate pans halfway, avoid overmixing, and rest batter 10 minutes. I also level gently with a serrated knife after cooling.
Is There a Natural Alternative to Red Food Coloring?
Yes—use beet powder or beet juice. I whisk it into the buttermilk; it tints batter a rosy crimson. I add extra cocoa and a splash of vinegar to keep color vibrant and flavor balanced.
Can I Make This Gluten-Free Without Gummy Texture?
Yes—you can. I swap in a quality 1:1 gluten-free flour with xanthan, add 1 tablespoon cornstarch, and under-mix. I bake slightly under, cool completely, then slice; the crumb stays tender, chewy, never gummy.
What’s the Best Way to Transport the Frosted Cake?
Chill it well, then box it snug in a cake carrier; I wedge parchment under the base, add non‑slip mat, and keep it level. I drive cool, shade the box, and bring a small offset spatula.

Soft Chewy Cookie Red Velvet Cake
Equipment
- 2 Mixing bowl
- 1 stand mixer or hand mixer
- 1 Whisk
- 1 Rubber spatula
- 1 Measuring cups set
- 1 Measuring spoons set
- 2 8-inch round cake pan
- 2 parchment paper round
- 1 Wire rack
- 1 offset spatula
Ingredients
- 2 1/4 cup all-purpose flour
- 2 tablespoon unsweetened cocoa powder
- 1 teaspoon baking soda
- 1/2 teaspoon baking powder
- 1 teaspoon fine salt
- 1 1/2 cup granulated sugar
- 3/4 cup light brown sugar packed
- 1 cup unsalted butter melted and cooled
- 2 large eggs room temperature
- 2 teaspoon vanilla extract
- 1 cup buttermilk room temperature
- 2 teaspoon white vinegar
- 1 tablespoon red liquid food coloring
- 1 cup mini chocolate chips optional
- 8 ounce cream cheese softened
- 4 tablespoon unsalted butter softened
- 2 cup powdered sugar sifted
- 1 teaspoon vanilla extract
- 1/8 teaspoon fine salt
Instructions
- Preheat the oven to 350°F (175°C) and line two 8-inch cake pans with parchment rounds and lightly grease the sides.
- In a bowl whisk together flour, cocoa powder, baking soda, baking powder, and salt until evenly combined.
- In a separate large bowl beat melted butter, granulated sugar, and brown sugar until thick and glossy.
- Add eggs and vanilla to the sugar mixture and beat just until smooth and emulsified.
- Stir in buttermilk, vinegar, and food coloring until the batter turns a uniform deep red.
- Fold the dry ingredients into the wet mixture with a spatula until just combined with a few small streaks remaining.
- Fold in mini chocolate chips if using, stopping as soon as the batter looks cohesive to retain chewiness.
- Divide the batter evenly between the prepared pans and smooth the tops.
- Bake for 26 to 28 minutes until the centers spring back lightly and a toothpick comes out with a few moist crumbs.
- Cool the cakes in their pans for 10 minutes, then turn onto a wire rack to cool completely.
- For the frosting beat cream cheese and softened butter until fluffy and smooth.
- Add powdered sugar, vanilla, and salt and beat until light, spreadable, and slightly tangy.
- Once cakes are fully cool, place one layer on a serving plate, spread a generous layer of frosting, and top with the second layer.
- Apply a thin crumb coat of frosting, chill for 20 minutes, then finish with a thick, swoopy layer of frosting and slice.
Notes

Cynthia Weatherford is a seasoned chef and culinary enthusiast who serves as the Recipe creator of Somonday. With decades of experience in the kitchen and a passion for exploring diverse cuisines, Cynthia brings a blend of creativity and technique to every dish. Known for transforming simple ingredients into show-stopping meals, Cynthia believes that cooking is an art form anyone can master. Dedicated to inspiring home cooks, Cynthia shares approachable recipes, pro tips, and culinary wisdom to make every meal memorable.


