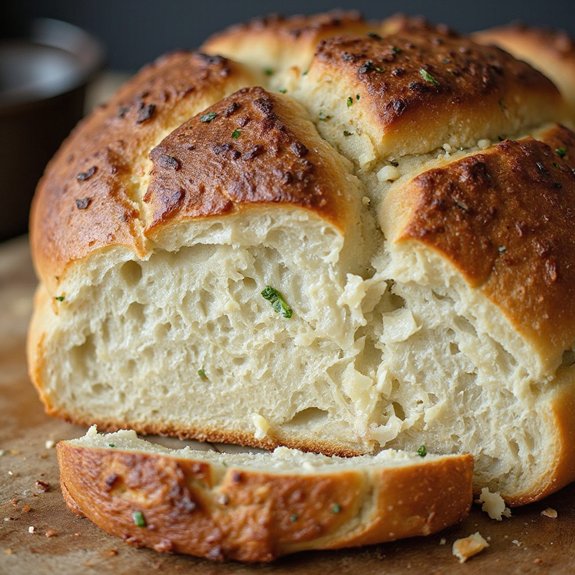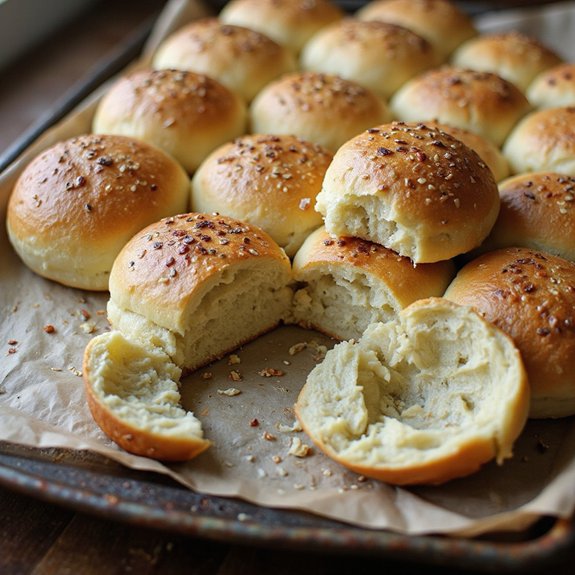
There’s something about pulling a tray of golden sourdough ciabatta rolls from the oven—the crackle of blistered crust, the swirl of flour dust in warm kitchen light, and that deep, tangy aroma wrapping around you like a hug.
These rolls are rustic yet airy, perfect for turning simple meals into something special: dunk them into a hearty stew, pile them high with sandwich fillings, or serve them warm with olive oil and salt.
They’re ideal for weekend bakers, sourdough enthusiasts, and anyone who loves prepping ahead for quick lunches and easy entertaining.
I remember one rainy Sunday when friends dropped by unannounced. I split open a batch of these rolls, steam billowing out, and filled them with roasted vegetables and cheese.
In minutes, the house felt like a cozy café, and nobody minded the weather.
They shine at Sunday suppers, casual gatherings, or anytime you crave bakery-style bread at home.
Ready to bring this dough to life?
Why You’ll Love It
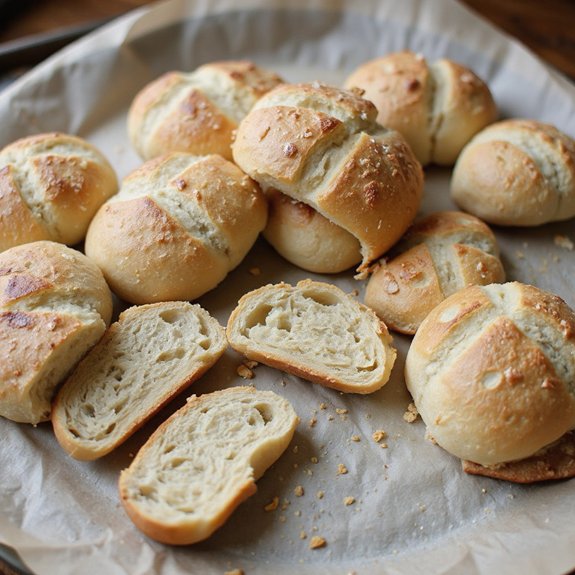
- Delivers complex sourdough tang with chewy, tender Italian-style crumb.
- Creates beautifully open holes thanks to the high-hydration dough.
- Uses simple pantry ingredients and natural wild yeast—no commercial yeast needed.
- Ferments overnight for better flavor and easier next-day shaping.
- Bakes into crisp, crackly crusted rolls perfect for sandwiches or dipping.
Ingredients
- 150 g active sourdough starter, 100% hydration — use at peak, domed and bubbly
- 375 g water, room temperature — cool but not cold for easy mixing
- 450 g bread flour, unbleached — higher protein for better structure
- 50 g whole wheat flour, finely milled — adds flavor and color
- 10 g fine sea salt — dissolves evenly and seasons the crumb
- 15 g olive oil — adds tenderness and subtle richness
- 20 g water — for dissolving the salt and oil mixture
- Extra bread flour — for dusting the work surface lightly
Step-by-Step Method
Mix the Starter and Water
Whisk the active sourdough starter with 375 g room-temperature water in a large bowl. Stir until the starter is mostly dissolved and the mixture looks milky and foamy.
Properly dispersing the starter guarantees even fermentation. Scrape down the sides of the bowl so everything is combined before adding the flours.
Combine Flours into a Shaggy Dough
Add the bread flour and whole wheat flour to the starter mixture. Mix with a wooden spoon or spatula until no dry bits remain.
The dough will look rough and sticky, which is perfect. Avoid adding extra flour at this stage. Scrape the bowl sides to gather all the dough into one cohesive mass.
Rest the Dough for Autolyse
Cover the bowl with plastic wrap or a reusable cover. Let the dough rest at room temperature for 45–60 minutes.
During this autolyse, the flour fully hydrates and gluten begins to form. This improves dough strength and extensibility without extra kneading. Don’t add salt or oil yet.
Dissolve the Salt and Add the Oil
In a small bowl, dissolve the fine sea salt in 20 g water. Stir in the olive oil until combined.
Pour this mixture evenly over the rested dough. Use your hand to squeeze and fold the dough, working the liquid in until fully absorbed. The dough should feel smoother, more elastic, and slightly glossy.
Begin Bulk Fermentation with Folds
Cover the bowl and let the dough bulk ferment at room temperature for 3–4 hours. For the first 2 hours, perform a set of stretch-and-folds every 30 minutes.
Lightly wet your hand, grab one side of the dough, stretch it up, and fold it over. Repeat on all four sides to build strength.
Watch the Dough, Not the Clock
After the last fold, cover the bowl and let the dough rest undisturbed. Allow it to rise until roughly doubled, with visible surface bubbles and a gentle dome at the edges.
The dough should feel airy and jiggly when the bowl is shaken. Extend or shorten the time based on your kitchen temperature.
Transfer and Chill the Dough
Lightly oil a medium mixing bowl. Gently loosen the dough from the sides of the original bowl using a wet hand or scraper.
Transfer the dough into the oiled bowl, trying not to deflate it. Cover tightly and refrigerate for 8–12 hours or overnight. This cold fermentation develops flavor and strengthens the structure.
Prepare the Work Surface for Shaping
When ready to shape, generously flour your work surface. Carefully tip the cold dough out of the bowl, letting gravity help it slide without tearing.
Avoid pressing on the dough so you keep the internal gas. Dust the top lightly with flour to prevent sticking during shaping and cutting.
Shape the Dough into a Rectangle
Gently coax the dough into a loose rectangle about 2–3 cm thick. Use your hands to lightly stretch the edges rather than pressing down.
Keep the movements soft and minimal to protect the bubbles. The dough should feel airy yet elastic. Add a little extra flour underneath if it sticks.
Cut the Dough into Individual Rolls
Use a well-floured dough scraper to divide the rectangle into 8 even pieces. Cut straight down rather than dragging the blade, which can deflate the dough.
Aim for roughly similar-sized rectangles so they bake evenly. Work efficiently to avoid warming the dough too much at this stage.
Transfer the Pieces to Baking Sheets
Line two rimmed baking sheets with parchment paper. Slide your hands or the scraper under each dough piece and gently lift it onto the parchment.
Space the pieces well apart to allow room for expansion. If needed, lightly tug each into a neater rectangle, handling them as little as possible.
Proof the Rolls Until Puffy
Cover the rolls loosely with a floured kitchen towel to prevent sticking. Let them proof at room temperature for 45–75 minutes.
They should look slightly puffier and feel jiggly when the tray is gently shaken. Adjust proofing time based on your room temperature to avoid under- or over-proofing.
Preheat the Oven and Prepare Steam
About 30 minutes before baking, preheat your oven to 230°C (450°F). Place an empty tray on the bottom rack to create steam later.
Make sure the oven is fully heated before baking. Proper preheating and steam help maximize oven spring and create a thin, crisp ciabatta crust.
Mist and Bake the Rolls with Steam
Just before baking, lightly mist or sprinkle the rolls with water. Place the baking sheets on the middle rack.
Carefully pour a small cup of hot water into the empty lower tray and quickly close the door. Bake for 18–22 minutes, rotating the pans halfway through, until golden brown and crisp.
Cool the Rolls Before Slicing
Remove the rolls from the oven and transfer them to a wire rack immediately. Let them cool for at least 30 minutes before slicing.
This resting time allows the crumb to finish setting and keeps it from becoming gummy. Serve once cooled, or store at room temperature for short-term use.
Ingredient Swaps
- Use up to 50% all-purpose flour in place of bread flour if needed; the rolls will be slightly less chewy but still delicious.
- Swap the whole wheat flour with spelt, rye (up to 25 g), or more bread flour if you don’t have it.
- Replace olive oil with any neutral vegetable oil or melted butter for a richer flavor.
- For a vegan version, the base recipe is already dairy- and egg-free—just be sure your starter is fed with water, not milk.
- If you’re low on starter, you can build up a levain the night before using a small amount (e.g., 25 g starter + 75 g water + 75 g flour) and use 150 g of that in the dough.
You Must Know
– Doneness • If your rolls look done outside but feel heavy: Leave them in for an extra 3–5 minutes until they sound distinctly hollow when tapped on the bottom and the crust is a deep golden brown, not pale.
This makes certain the interior hits roughly 96–99°C and sets fully, preventing gummy crumb.
– Troubleshoot • If your crumb is tight instead of holey: Next time, extend bulk fermentation by 30–60 minutes until the dough shows visible surface bubbles and a 60–80% rise, and be extra gentle when dividing (straight down cuts, no pressing).
Proper gas development plus minimal handling is what creates large, irregular holes.
– Avoid • If the dough is spreading into flat pancakes on the tray: Shorten the final proof by 10–20 minutes and chill the shaped pieces in the fridge for 10 minutes before baking.
Over-proofed or overly warm dough loses strength; cooler dough and slightly under-proofed pieces spring higher in the oven.
– Scale • To make a half or double batch: Multiply every ingredient by 0.5 or 2 using a scale (e.g., 75 g starter and 225 g water for half; 300 g starter and 750 g water for double).
Gluten and fermentation balance depend on ratios, so keeping baker’s percentages exact preserves structure and timing.
– Flavor Boost • For a deeper tang and nuttier flavor: Extend the cold retard to the upper end, 12–18 hours, and keep at least 10% of the flour as whole wheat (about 50–60 g per 500 g total flour).
Longer, colder fermentation plus bran pigments darken the crust and add complex, mildly sour notes.
Serving Tips
- Serve warm, split and stuffed with grilled vegetables, fresh mozzarella, and pesto.
- Slice horizontally for mini sandwiches with cured meats, sharp cheese, and arugula.
- Toast and top with smashed avocado, cherry tomatoes, and flaky sea salt.
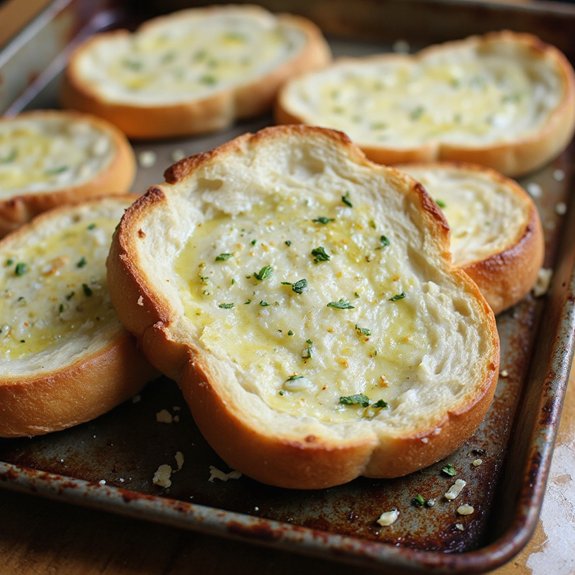
- Cut into strips, brush with garlic butter, and broil for easy garlic bread.
- Cube into rustic croutons for salads or hearty soups.
Storage & Make-Ahead
Sourdough ciabatta rolls keep in the fridge for up to 3–4 days in an airtight container or zip-top bag.
For best texture, rewarm in a 180°C (350°F) oven for 5–8 minutes.
They freeze very well for 2–3 months; thaw at room temperature, then crisp in the oven before serving.
Reheating
Reheat rolls gently to preserve texture.
Briefly microwave wrapped in a damp towel, warm in a 160°C (325°F) oven until crisp, or refresh cut sides on a covered skillet over low heat.
Italian Bakery Traditions
Dawn in an Italian town always seems to start at the bakery door, where trays of ciabatta and filoni emerge in a rush of steam and flour.
When I think about sourdough ciabatta rolls, I picture that doorway—open to the street, light just breaking, the air thick with yeast and roasted grain.
In many bakeries, dough rests through the night, shaped by hand with quick, practiced motions.
Bakers don’t fuss; they trust fermentation, touch, and time. Ciabatta’s high hydration and gentle handling are part of this tradition—bread that’s rustic, open-crumbed, and meant to be shared.
As you work your own dough, you’re echoing those quiet morning routines: minimal shaping, generous patience, and respect for simple ingredients.
Final Thoughts
Give these sourdough ciabatta rolls a try and see how much flavor and texture you can coax from just a few simple ingredients.
Once you’ve made them once, don’t hesitate to tweak the fermentation time, flours, or shape to create your own perfect version.
Frequently Asked Questions
Can I Make These Rolls Completely Without Commercial or Natural Sourdough Yeast?
You can, but the dough won’t rise properly; it’ll bake up dense and flat. If you’d like a wild-yeast version, I’d guide you to first grow a starter, then use that instead.
How Do Altitude or Very Dry Climates Affect Fermentation and Hydration for This Recipe?
Altitude speeds fermentation and dry air pulls moisture fast. I’d shorten bulk times, watch the dough’s rise, and bump hydration 5–10%, keeping the dough silky-wet so you still get that open, glistening crumb.
What Are Common Troubleshooting Signs if My Dough Never Doubles During Bulk Fermentation?
If your dough never doubles, I’d watch for dense, rubbery texture, few bubbles, flat surface, sour but not yeasty smell, and sluggish spread. I’d suspect weak starter, cold dough, or over‑tight gluten from rough handling.
Can I Adapt This Recipe for a Bread Machine or Stand Mixer Kneading?
You can, but I’d keep mixing gentle. In a stand mixer, use low speed just to combine, then finish with folds by hand; in a bread machine, use “dough” cycle, stopping before aggressive kneading tightens everything.
How Do I Convert This Formula for Gluten-Free Sourdough Ciabatta Rolls?
You’ll need a dedicated gluten‑free blend, 1–2% xanthan or psyllium, extra hydration, and shorter ferments. I’d skip intense folding, shape gently when cold, then bake hot and steamy for that crackling, honeycombed interior.

Sourdough Ciabatta Rolls
Equipment
- 1 large mixing bowl
- 1 medium mixing bowl
- 1 digital kitchen scale
- 1 Dough scraper
- 1 wooden spoon or silicone spatula
- 2 rimmed baking sheets
- 2 sheets parchment paper
- 1 clean kitchen towel
- 1 plastic wrap or reusable cover
- 1 Oven
Ingredients
- 150 gram active sourdough starter 100% hydration
- 375 gram water room temperature
- 450 gram bread flour unbleached
- 50 gram whole wheat flour finely milled
- 10 gram fine sea salt
- 15 gram olive oil plus extra for greasing
- 20 gram water for dissolving salt
- 1 Extra bread flour for dusting work surface
Instructions
- In a large mixing bowl, whisk together the active sourdough starter and 375 g room-temperature water until mostly dissolved.
- Add the bread flour and whole wheat flour to the bowl and mix with a spoon or spatula until no dry flour remains and a shaggy dough forms.
- Cover the bowl with plastic wrap or a reusable cover and let the dough rest (autolyse) for 45–60 minutes at room temperature.
- In a small bowl, dissolve the fine sea salt in 20 g water and stir in the olive oil.
- Pour the salt and oil mixture over the dough and squeeze and fold with your hand until it is fully incorporated and the dough feels more cohesive.
- Cover the bowl and let the dough bulk ferment at room temperature for 3–4 hours, performing stretch-and-folds every 30 minutes for the first 2 hours.
- To stretch and fold, lightly wet your hand, grab one side of the dough, stretch it up, and fold it over the center, repeating on all four sides.
- After the final fold, cover the dough and let it rest undisturbed until roughly doubled, bubbly on top, and domed at the edges.
- Lightly oil a medium mixing bowl, gently transfer the dough into it, cover, and refrigerate for 8–12 hours or overnight for better flavor and structure.
- When ready to shape, generously flour your work surface and carefully tip the cold dough out without deflating it.
- Dust the top of the dough with flour and gently stretch it into a loose rectangle about 2–3 cm thick, avoiding pressing out the air.
- Using a floured dough scraper, divide the rectangle into 8 even pieces, cutting straight down to preserve the internal bubbles.
- Slide your hands or the scraper under each portion and gently transfer the pieces to two parchment-lined baking sheets, spacing them well apart.
- If desired, lightly tug each piece into a more uniform rectangle, handling as little as possible to keep them airy.
- Cover the rolls loosely with a floured kitchen towel and let them proof at room temperature for 45–75 minutes, until slightly puffy and jiggly.
- About 30 minutes before baking, preheat the oven to 230°C (450°F) and place an empty tray on the bottom rack for steam if desired.
- Just before baking, lightly mist or sprinkle the rolls with water to encourage a thin, crisp crust.
- Place the baking sheets in the oven, carefully pour a small cup of hot water into the empty tray for steam, and close the door quickly.
- Bake the rolls for 18–22 minutes, rotating the pans halfway through, until golden brown with a crisp crust and a hollow sound when tapped on the bottom.
- Transfer the baked rolls to a wire rack and let them cool for at least 30 minutes before slicing to allow the crumb to set.
Notes

Cynthia Weatherford is a seasoned chef and culinary enthusiast who serves as the Recipe creator of Somonday. With decades of experience in the kitchen and a passion for exploring diverse cuisines, Cynthia brings a blend of creativity and technique to every dish. Known for transforming simple ingredients into show-stopping meals, Cynthia believes that cooking is an art form anyone can master. Dedicated to inspiring home cooks, Cynthia shares approachable recipes, pro tips, and culinary wisdom to make every meal memorable.