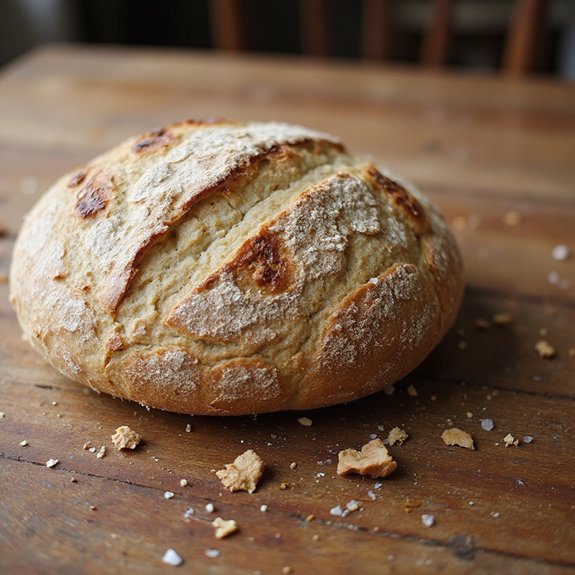
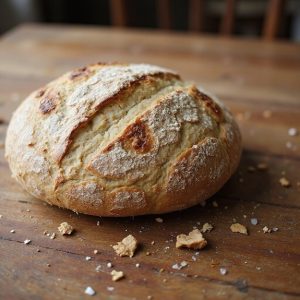
There’s something about a crackling, golden loaf of spelt sourdough cooling on the counter that makes the whole kitchen feel like home.
The crust is deep amber and blistered, the inside tender and slightly nutty, with a gentle tang that greets you the moment you slice in.
This is slow bread—an overnight, no-rush kind of recipe—but the hands-on time is surprisingly short, making it perfect for beginners, busy home bakers, and anyone craving more wholesome, digestible bread.
I still remember a hectic week when everything felt rushed—meetings, errands, quick dinners.
Pulling a warm spelt sourdough from the oven on Sunday gave me breakfasts and lunches sorted for days: toast with butter, hearty sandwiches, simple toast-and-soup suppers.
It’s ideal for slow Sunday baking, casual gatherings, or comforting weeknight meals. Ready to bring this beautiful, nourishing loaf to life in your own kitchen?
Why You’ll Love It
- Delivers a nutty, slightly sweet flavor you can’t get with wheat
- Feels gentler on digestion thanks to spelt’s more delicate gluten
- Builds a chewy, moist crumb with a beautifully crackly crust
- Fits easily into busy days with overnight cold-proof flexibility
- Uses simple, wholesome ingredients—just flour, water, salt, and starter
Ingredients
- 100 g active sourdough starter — 100% hydration and bubbly
- 350 g water — at room temperature to keep fermentation predictable
- 450 g whole spelt flour — freshly milled if possible for better flavor
- 50 g bread flour — adds strength to spelt’s weaker gluten
- 9 g fine sea salt — weigh for accuracy and even seasoning
Step-by-Step Method
Mix Starter & Water
Whisk the active sourdough starter with room-temperature water in a large bowl. Break up any thick bits so the mixture looks milky and mostly smooth.
This guarantees the starter is evenly dispersed. Proper mixing at this stage leads to more consistent fermentation and an even crumb later.
Combine Flours Into a Shaggy Dough
Add the whole spelt flour and bread flour to the bowl. Mix with your hand or a dough scraper until no dry patches remain.
Scrape down the sides and bottom so all flour is hydrated. Aim for a shaggy, rough dough. Don’t knead here; just bring everything together into one cohesive mass.
Autolyse the Dough
Cover the bowl with a clean towel or plastic wrap. Let the dough rest for about 30 minutes at room temperature.
During this autolyse, the flour hydrates and gluten begins forming on its own. This rest makes the dough smoother and easier to handle later, especially important with delicate spelt flour.
Add Salt & Tighten the Dough
Sprinkle the fine sea salt evenly over the dough’s surface. Use a pinch-and-fold motion to work the salt in.
Grab sections of dough, pinch, then fold over itself. Continue until the salt disappears and the dough slightly tightens. This step strengthens gluten and balances flavor, so don’t skip it.
Perform Stretch-and-Folds
Over the next 2 hours, perform 3–4 sets of stretch-and-folds every 30 minutes. With wet hands, grab one side of the dough, stretch it up gently, then fold over to the opposite side.
Rotate the bowl and repeat several times. These folds build structure without heavy kneading, ideal for spelt’s fragile gluten.
Bulk Ferment Until Puffy
After the final folds, cover the bowl and let the dough bulk ferment at room temperature. Wait 3–5 hours, watching the dough more than the clock.
Look for a rise of about 50%, gentle doming on top, and a light, airy feel. Avoid over-proofing; spelt ferments faster than regular wheat dough.
Pre-Shape & Rest the Dough
Lightly flour your work surface, then gently turn the dough out of the bowl. Use a scraper if needed to avoid tearing.
Shape it loosely into a round by tucking edges under. Let the dough rest uncovered for 10–15 minutes. This bench rest relaxes gluten, making the final shaping easier and more controlled.
Shape Into a Tight Loaf
Shape the dough into a tight boule or batard. Gently stretch and fold edges toward the center, then flip seam-side down.
Drag the dough against the counter to tighten the surface, creating tension without tearing. Keep movements gentle, as spelt gluten is delicate. Aim for a smooth, taut exterior.
Prepare Basket & Proof the Dough
Generously flour your proofing basket or a towel-lined bowl. Place the shaped dough inside seam-side up.
Cover with a towel or plastic wrap. Proof at room temperature for 1–2 hours, or refrigerate for 8–12 hours for a cold retard. Look for slight doming and a soft wobble when gently shaken.
Preheat the Oven & Dutch Oven
About 45 minutes before baking, put the Dutch oven and its lid into your oven. Preheat to 475°F (245°C).
Heating the Dutch oven thoroughly ensures strong oven spring and good crust. If you lack a Dutch oven, preheat a baking stone and an oven-safe tray below to create steam during baking.
Invert & Score the Loaf
When ready to bake, carefully remove the hot Dutch oven. Gently invert the proofed dough onto a piece of parchment paper so it ends up seam-side down.
Use a razor blade or very sharp knife to score the top with a confident slash. Scoring controls expansion and helps the loaf open attractively in the oven.
Bake Covered for Steam
Lift the parchment with the dough and place it into the hot Dutch oven. Cover with the lid to trap steam.
Bake at 475°F (245°C) for 20 minutes. The steam allows the loaf to expand fully and develop a glossy, blistered crust. Avoid opening the lid during this initial phase.
Finish Baking Uncovered
Remove the lid and reduce the oven temperature to 450°F (230°C). Continue baking uncovered for 18–22 minutes.
Watch for a deep golden-brown crust. The loaf should sound hollow when tapped on the bottom. For a thinner yet crispier crust, crack the oven door slightly during the last 5 minutes.
Cool Completely Before Slicing
Transfer the baked bread to a wire rack immediately so steam can escape. Let it cool for at least 1–2 hours before slicing.
This rest allows the crumb to set and moisture to redistribute. Cutting too early can make the interior gummy. Once cool, slice with a sharp serrated knife and serve.
Ingredient Swaps
- Use all-purpose flour instead of bread flour if needed; the loaf may be slightly less tall but still good.
- For gluten-sensitive (not celiac) diets, you can replace some spelt with light rye or einkorn; keep at least 50% spelt for structure.
- If you don’t have a sourdough starter, swap the 100 g starter for 5 g instant yeast and add 50 g extra water + 50 g extra flour, then reduce bulk and proof times (watch the dough closely).
You Must Know
- Doneness • If your loaf looks done but you’re unsure inside: Use an instant-read thermometer and remove it when the center hits 205–210°F (96–99°C); the crust should be deep golden and firm, and the loaf should sound hollow when tapped. This prevents a gummy crumb that can happen easily with moist spelt doughs.
- Avoid • To prevent over-proofing with fast-spelt dough: Stop room-temp proof when the dough rises about 40–60%, shows gentle doming, and gives a slow, soft spring back when poked (the dimple should partially fill in within 3–5 seconds).
Overly jiggly, collapsing dough bakes up flat and dense.
- Troubleshoot • If your loaf spreads sideways instead of rising: Next time shorten bulk fermentation by 30–60 minutes or chill the shaped dough at least 4 hours; a slightly under-proofed spelt dough plus cold dough going into the hot Dutch oven gives better vertical oven spring and keeps the crumb from turning tight and squat.
- Scale • For a smaller loaf (about 75% size): Use 75 g starter, 260 g water, 340 g whole spelt, 38 g bread flour, 7 g salt and check bulk and proof 15–25 minutes earlier than usual.
Smaller masses ferment faster and over-proof more easily.
– Flavor Boost • For a deeper, nuttier taste without extra sourness: Toast 10–15% of the spelt flour (45–70 g) in a dry pan until lightly tan and fragrant, cool fully, then include it in the dough, and favor a 10–12 hour cold proof; this builds complexity and aroma while keeping acidity balanced.
Serving Tips
- Serve warm slices with cultured butter, flaky salt, and a drizzle of honey.
- Pair with soft cheeses, olives, and cured meats for a rustic appetizer board.
- Toast and top with smashed avocado, lemon, and chili flakes.
- Use for open-faced sandwiches with smoked salmon, cream cheese, and fresh dill.
- Accompany hearty soups or stews, grilling slices lightly for extra crunch.
Storage & Make-Ahead
Spelt sourdough keeps in the fridge, well wrapped, for 5–7 days; slice only as needed to prevent drying.
For make-ahead, let the baked loaf cool completely, slice, and freeze up to 2 months in an airtight bag.
Toast slices straight from frozen for best texture and flavor.
Reheating
For best texture, reheat slices briefly in a 300°F (150°C) oven or covered on a stovetop skillet.
Use the microwave sparingly, wrapped in a damp towel, to prevent drying.
Spelt Bread in Europe
Across much of Europe, I find spelt bread feels like both a memory and a quiet revival, showing up as rustic, nutty loaves on village tables and in modern artisan bakeries alike.
When I travel, I watch how each region treats it: in Germany, dark, crackling Krustenbrot; in Italy, lighter pane di farro with olive oil’s perfume; in France, tender pain d’épeautre with a caramelized crust.
I notice three threads weaving through these breads:
- Heritage: Spelt links back to older farming traditions and pre-industrial grains.
- Flavor: A deep, toasty sweetness that lingers longer than standard wheat.
- Texture: Moist, slightly fragile crumbs that invite slow chewing and generous butter.
Final Thoughts
Ready to give this spelt sourdough a try? Start with the recipe as written, then tweak the timing, scoring, or flour blend to make a loaf that’s perfectly your own.
Frequently Asked Questions
Can I Make This Spelt Sourdough Completely Without a Dutch Oven?
Yes, you can. I’d preheat a baking stone or heavy tray, slide your loaf on, and add a steaming pan of water. Watch the crust deepen, listen for that hollow tap, then inhale the caramelized aroma.
How Do High Altitudes Affect Proofing and Baking This Spelt Sourdough?
High altitude makes your dough rise faster and bake quicker, so I’d tell you: shorten proofs, cool your water, and lower oven heat slightly. Watch the dough’s domed, jiggly surface like shifting mountain light.
How Can I Troubleshoot a Dense or Gummy Spelt Sourdough Crumb?
You’ll fix dense or gummy crumb by shortening proofing, baking longer, and letting the loaf cool completely. I’d watch for lighter dough, stronger rise, a hollow thump, and a softly springing, not squishy, interior.
What Are Common Mistakes Beginners Make With Spelt Sourdough Fermentation?
You often overproof this quick, fragile dough, let a weak starter limp along, or ferment too warm. I watch for a softly domed, jiggly surface, earthy aroma, and airy feel beneath my fingertips, not the clock.
Spelt Sourdough Bread
Equipment
- 1 large mixing bowl
- 1 Dough scraper
- 1 Kitchen scale
- 1 measuring jug
- 1 proofing basket or 1 medium bowl lined with a floured towel
- 1 Dutch oven with lid (or 1 baking stone plus 1 oven-safe tray for steam)
- 1 razor blade or sharp knife for scoring
- 1 clean kitchen towel or plastic wrap
Ingredients
- 100 gram active sourdough starter 100% hydration
- 350 gram water room temperature
- 450 gram whole spelt flour
- 50 gram bread flour
- 9 gram fine sea salt
Instructions
- In the large mixing bowl, whisk together the active sourdough starter and water until mostly dissolved.
- Add the whole spelt flour and bread flour to the bowl and mix with your hand or a dough scraper until no dry flour remains and a shaggy dough forms.
- Cover the bowl with a towel or plastic wrap and let the dough rest (autolyse) for 30 minutes.
- Sprinkle the salt over the dough, pinch and fold it in until evenly incorporated and the dough tightens slightly.
- Over the next 2 hours, perform 3–4 sets of stretch-and-folds every 30 minutes, pulling the dough up from one side and folding it over to the other side, turning the bowl and repeating.
- After the final set of folds, cover the bowl and let the dough bulk ferment at room temperature for 3–5 hours, or until it has risen by about 50% and feels airy and puffy.
- Lightly flour your work surface, gently turn the dough out, and let it rest for 10–15 minutes uncovered to relax.
- Shape the dough into a tight boule or batard by gently stretching and folding the edges toward the center, then tightening the surface by dragging it against the counter.
- Generously flour your proofing basket or towel-lined bowl and place the shaped dough seam-side up into it.
- Cover the dough and proof it at room temperature for 1–2 hours, or place it in the refrigerator for 8–12 hours for a cold retard.
- About 45 minutes before baking, place the Dutch oven with its lid into the oven and preheat to 475°F (245°C).
- When ready to bake, carefully remove the hot Dutch oven, gently invert the dough onto a piece of parchment paper so it is seam-side down, and score the top with a sharp blade.
- Transfer the dough on the parchment into the Dutch oven, cover with the lid, and bake for 20 minutes.
- Remove the lid, reduce the temperature to 450°F (230°C), and continue baking for 18–22 minutes until the crust is deep golden-brown and the loaf sounds hollow when tapped on the bottom.
- Transfer the bread to a wire rack and let it cool completely for at least 1–2 hours before slicing.
Notes

Cynthia Weatherford is a seasoned chef and culinary enthusiast who serves as the Recipe creator of Somonday. With decades of experience in the kitchen and a passion for exploring diverse cuisines, Cynthia brings a blend of creativity and technique to every dish. Known for transforming simple ingredients into show-stopping meals, Cynthia believes that cooking is an art form anyone can master. Dedicated to inspiring home cooks, Cynthia shares approachable recipes, pro tips, and culinary wisdom to make every meal memorable.